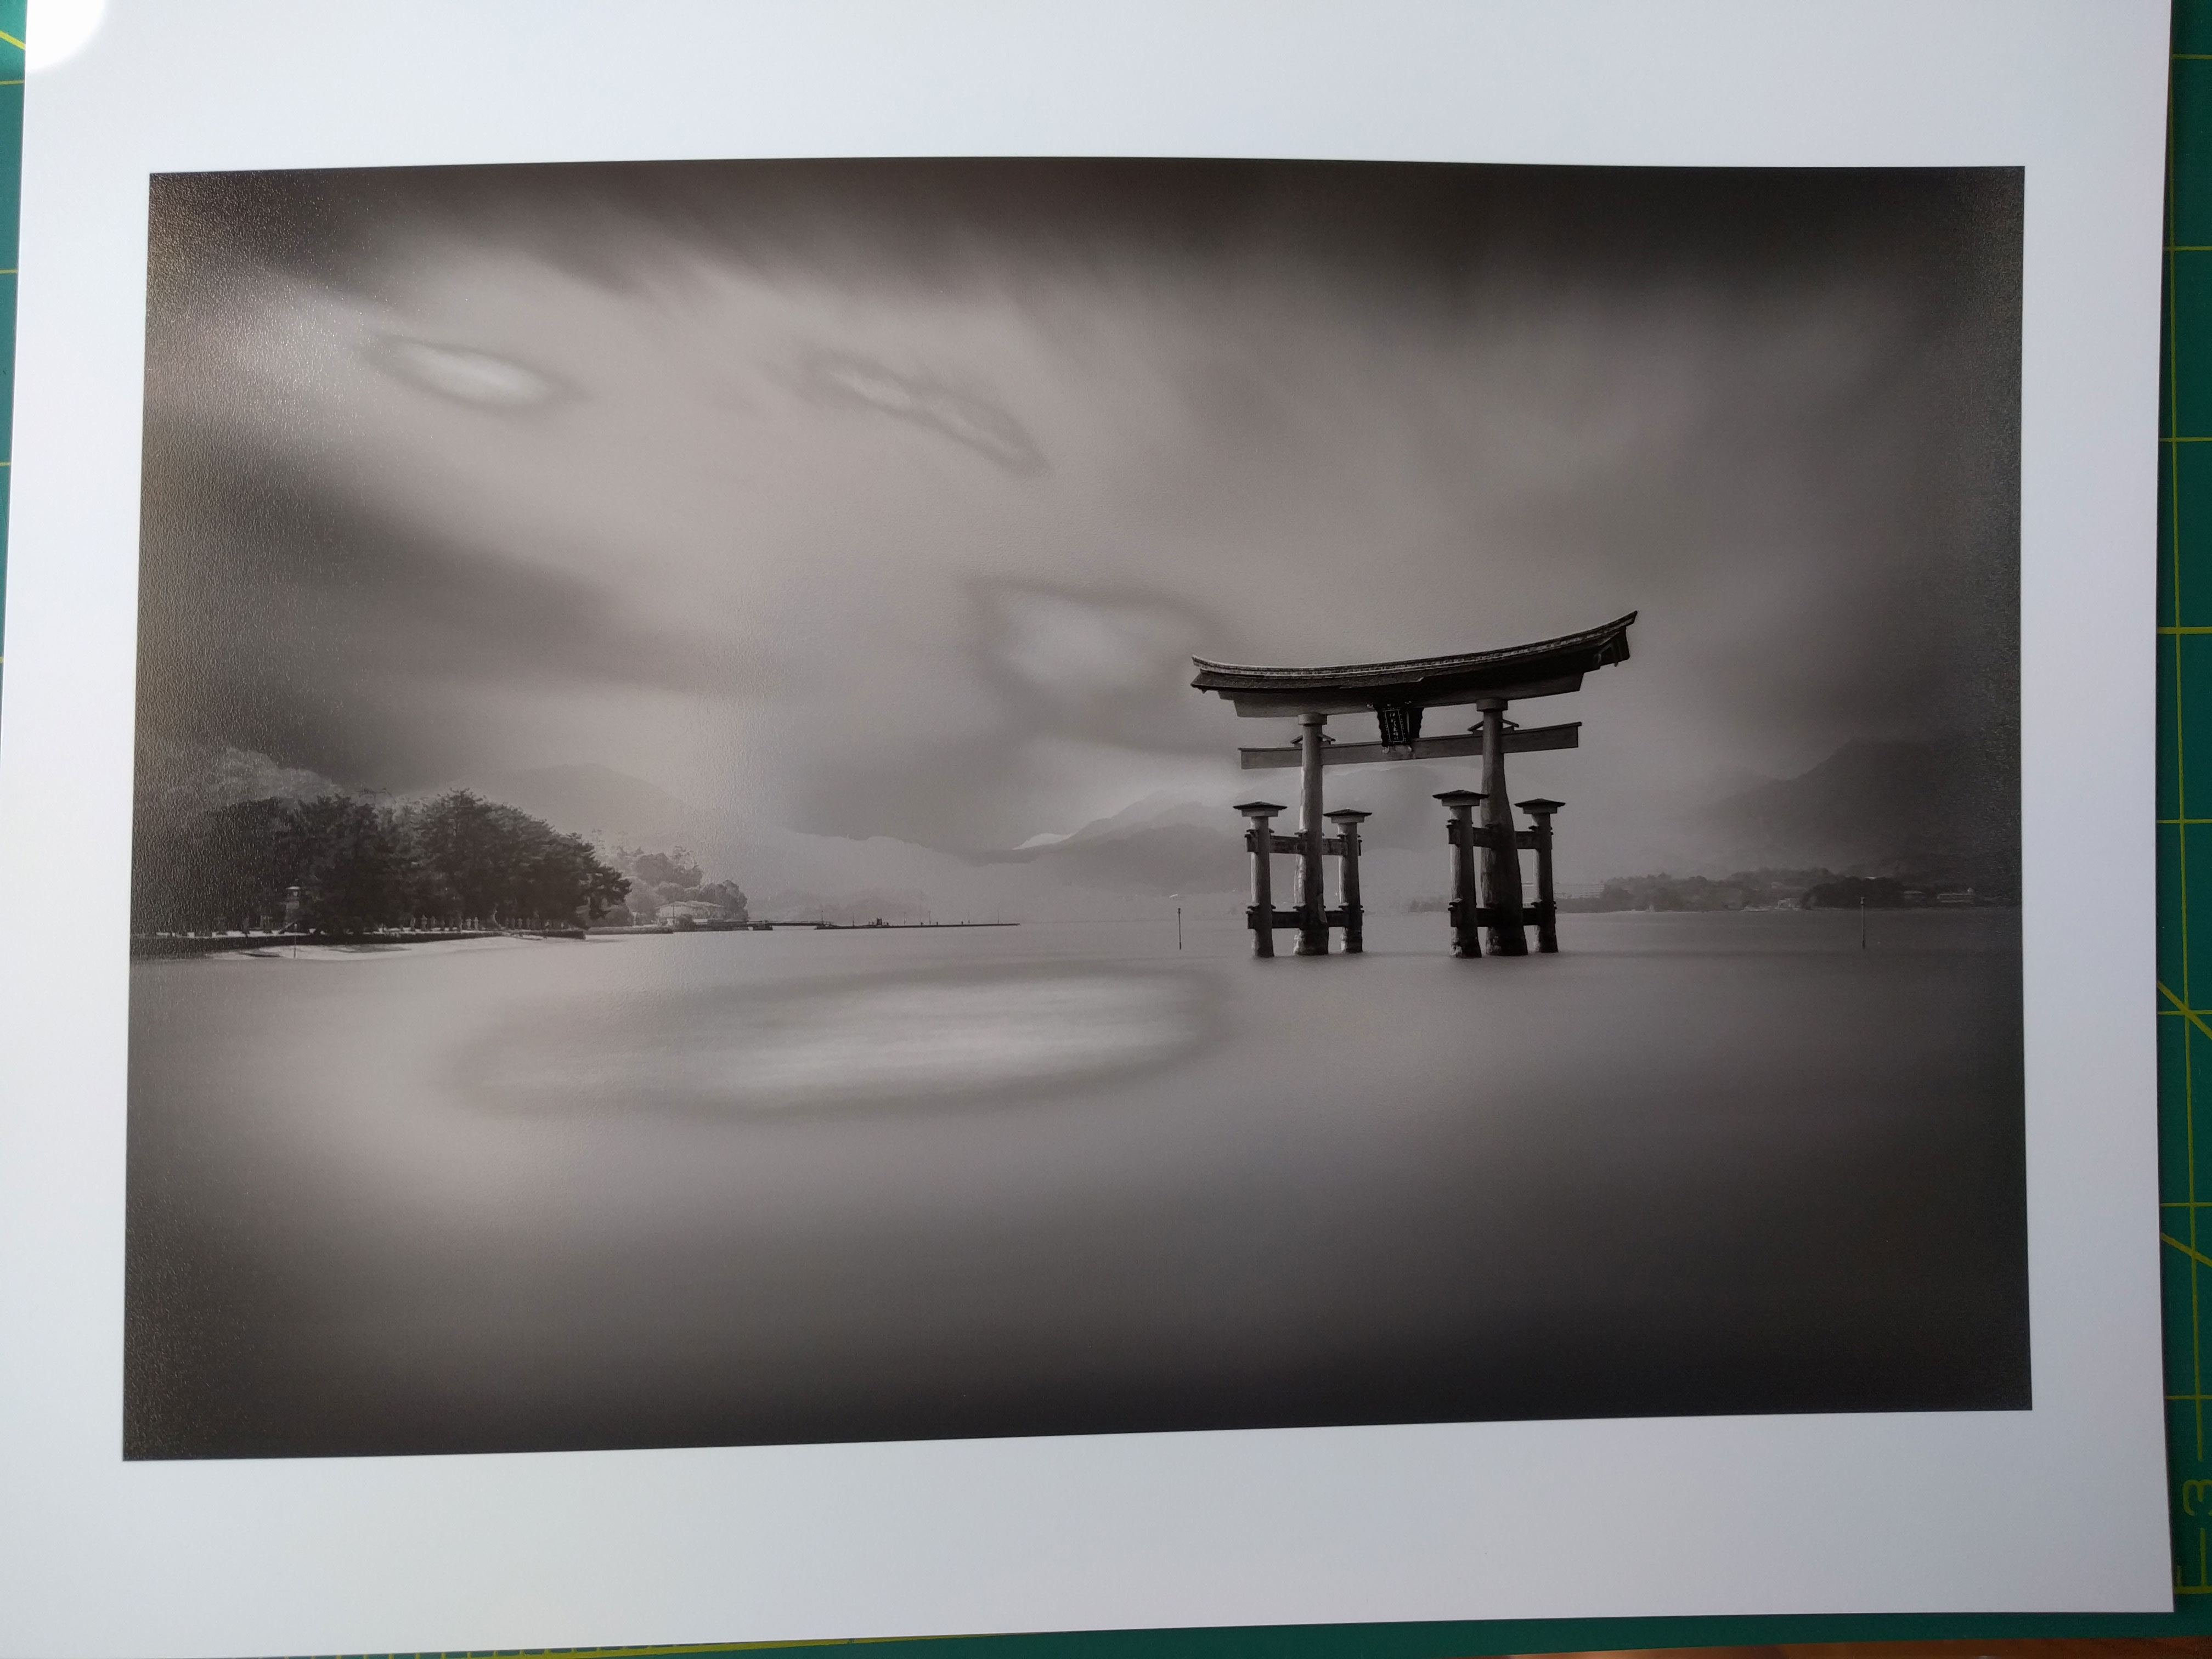
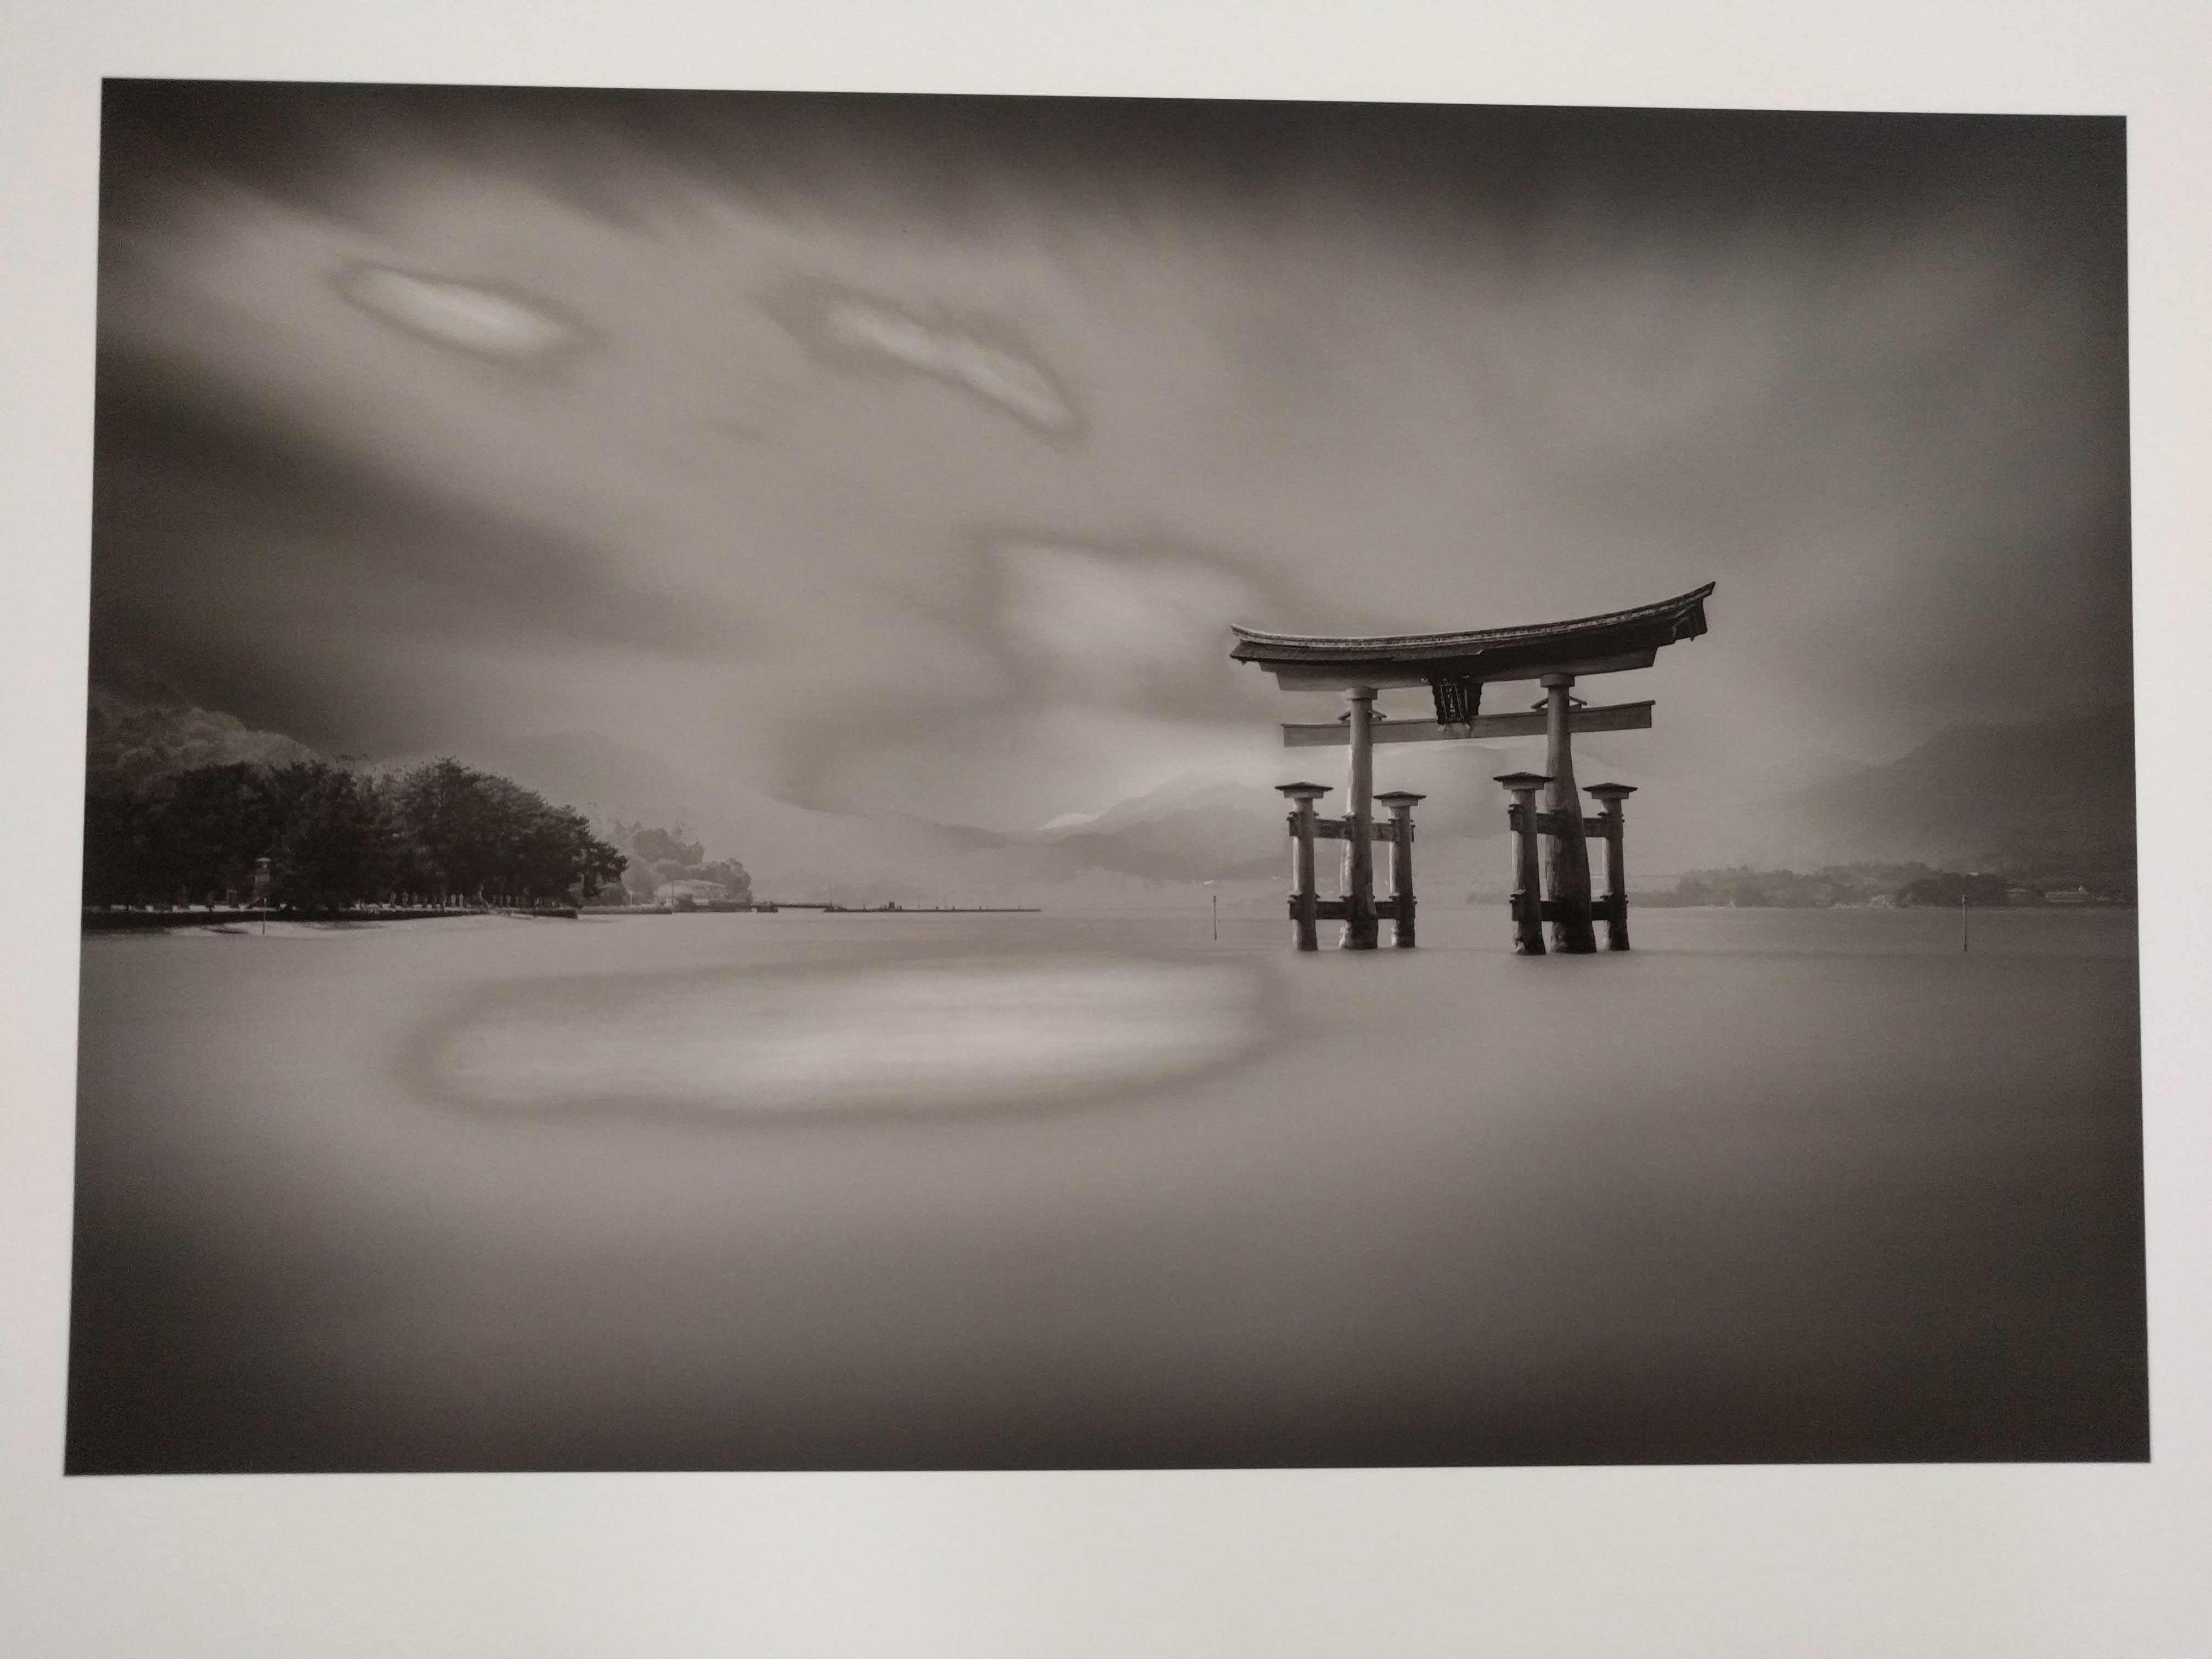
Hello. Not sure if this is the right place to post. I have uploaded 2 images: nozzle check and photo of the print, both printed on Epson Luster.Printed on 7880 with Selenium inkset. I consider the nozzle check not representing the problem, that my print is showing.Am I wrong here? Please help me to understand what the problem can be and how to solve it.
In the beginning the nozzle check was not perfect, so I did so far:
cleaning capping station, wiper blade, flushing box,under the printhead with piezoflush
2.changing the maintenance cartridge
3.Run several clean cycles and at the end power clean
4.Run aligning the print head
I am bummed .I have on my hand 50 pcs project for upcoming exhibition…SOS
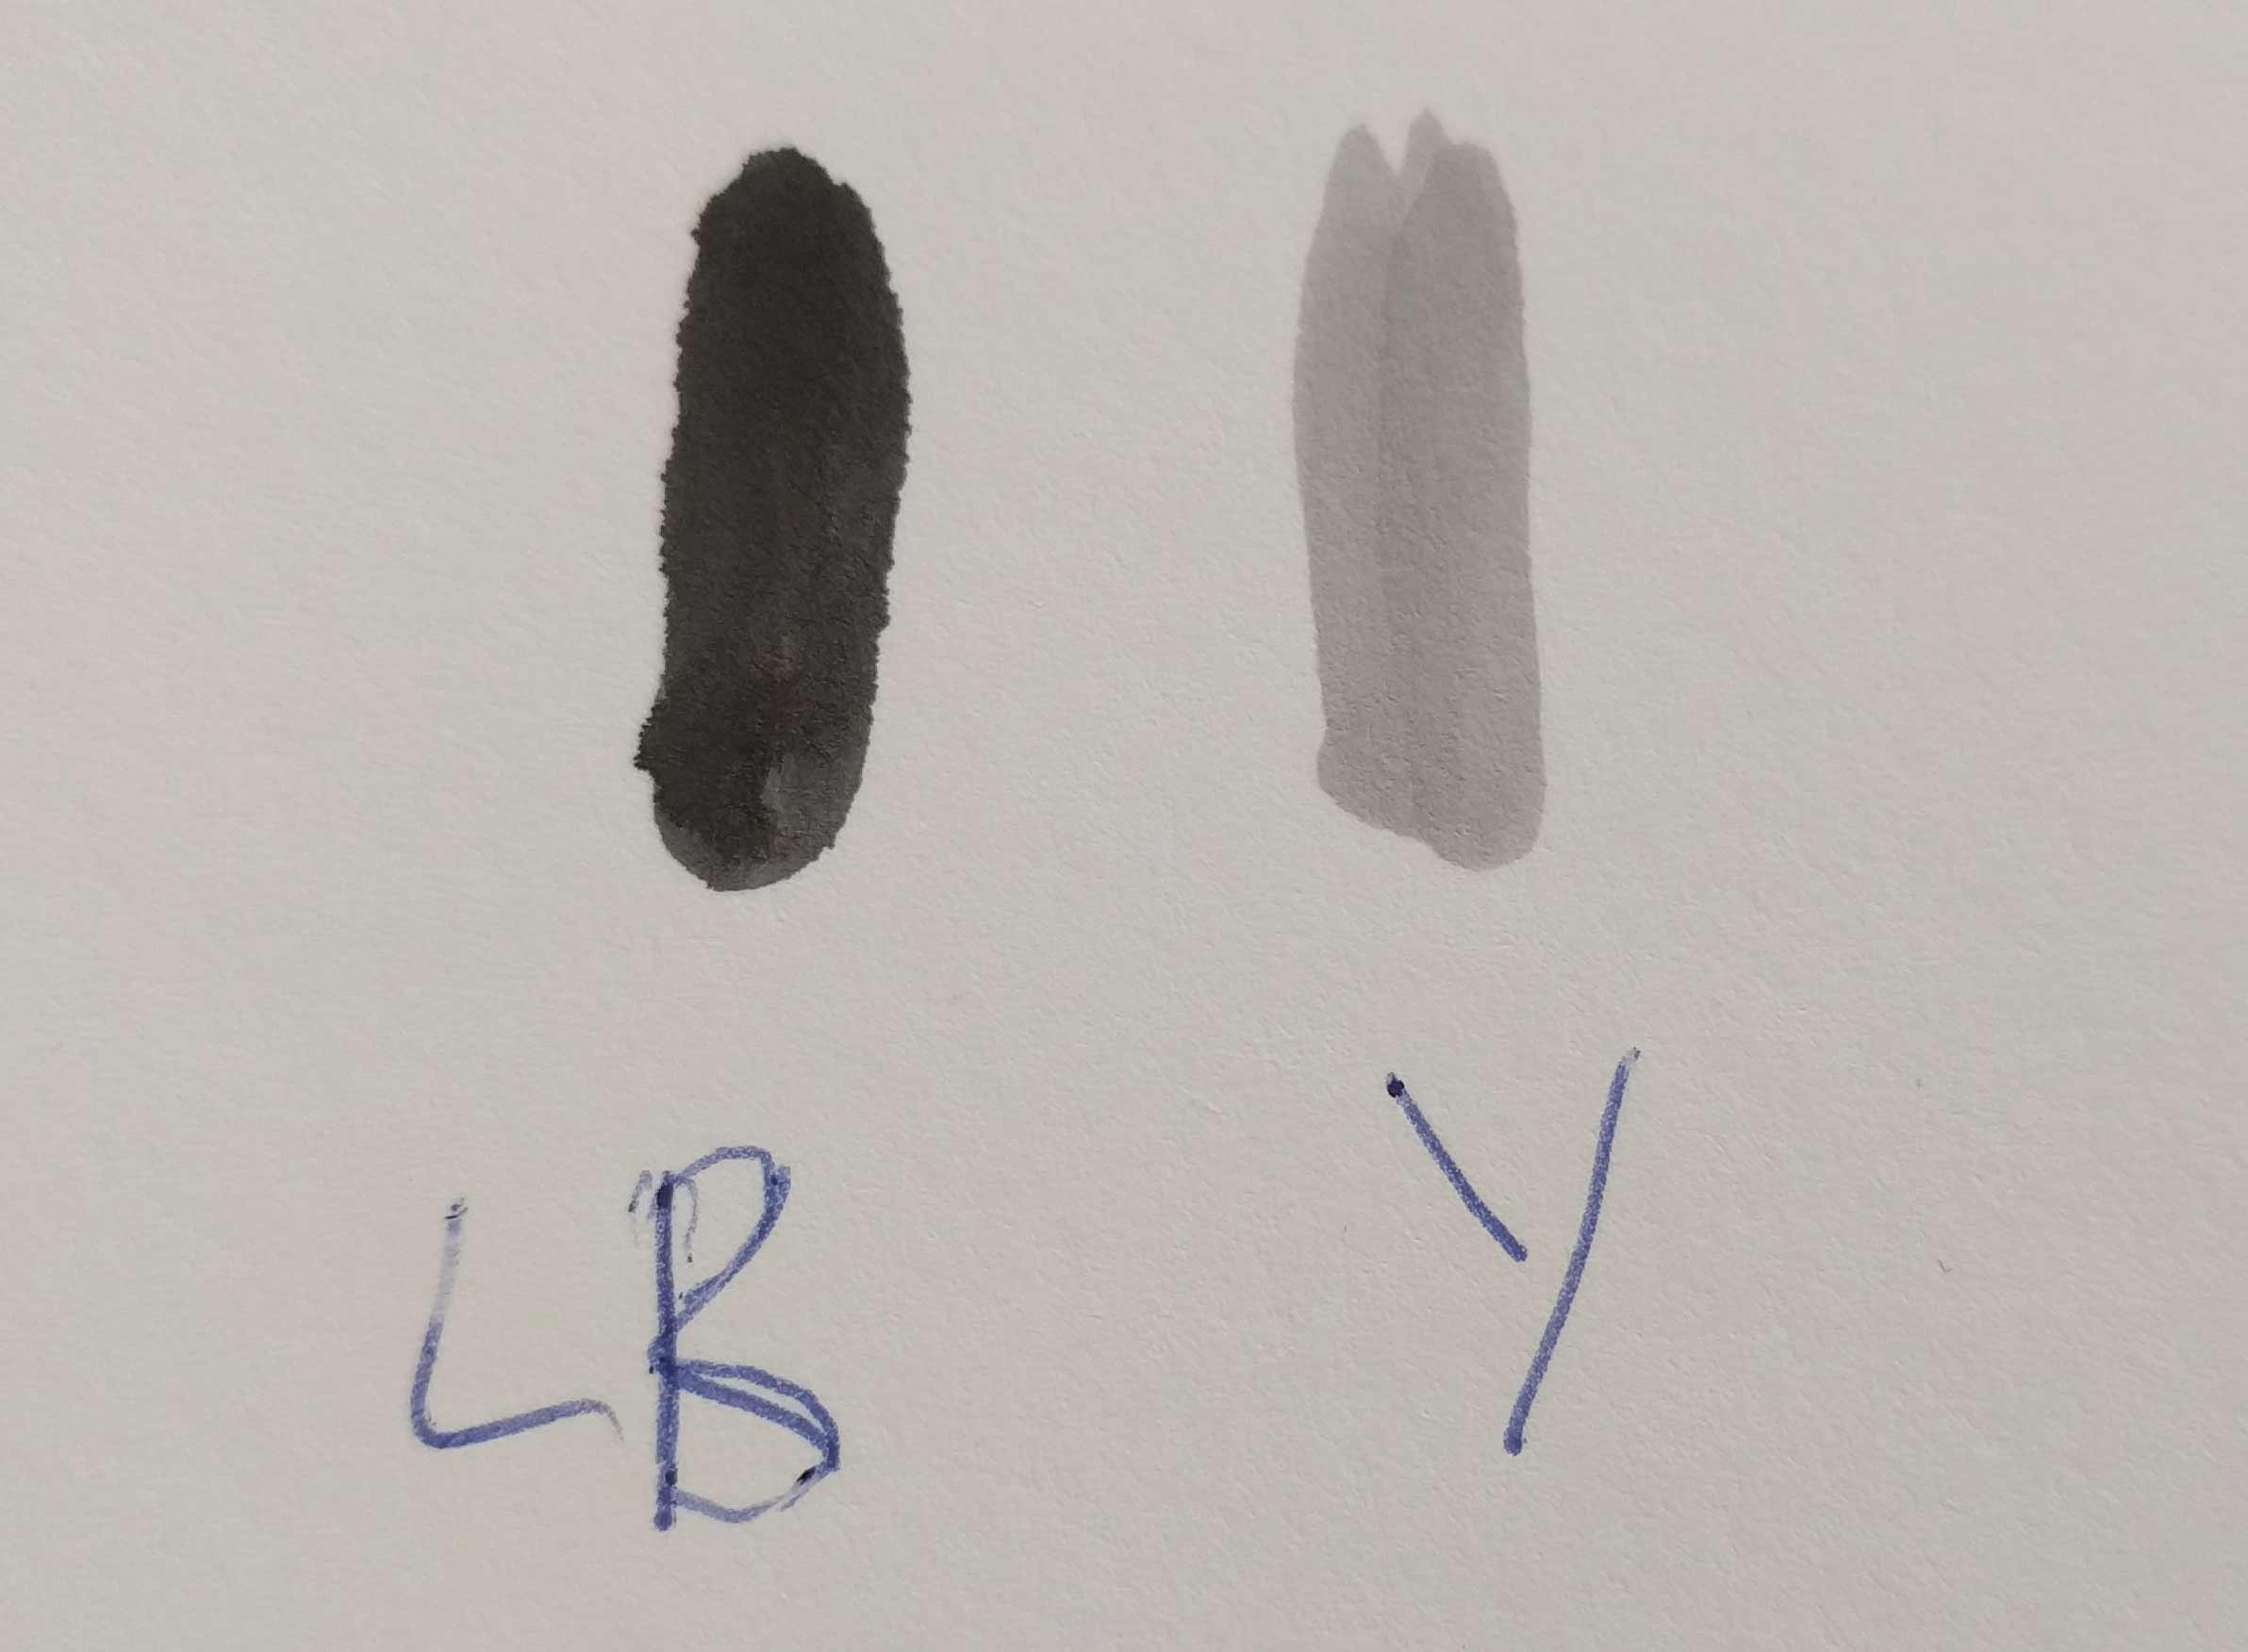
It gives you a list of the shades per channel from left to right on your printer. If you are not sure what ink you put in there, you can also use a brush and dip it into each cartridge and brush on some matte paper. This is an easy way to determine the order of lightness.
Also, in your response, please let me know exactly what inkset you are using (Piezography K7 or P2) and what curve you are using to print with.
If you have two inks in the wrong position, it should be relatively easy to re-map the curve for you to get you printing without too much effort and time.
Walker, thank you for coming back so fast/
I wish that was the problem. To determine if I did/did not refill incorrectly, i brushed, as you advised ( great tip for future:) My inks are on the right place. Photo is attached
I am using Piezography K7. The curve I used for epson luster is the one i have created myself a year back. It was not perfect, but I did not care about that, since luster I use only for test shots-composition, general tones etc…Worked fined till about a week back…
The paper i use for the final print is Epson Exhibition Fiber.So I printed on Exhibition fiber to see if the problem is the curve, but it is even worse. Photo with print on Exhibition Fiber is attached
Nune
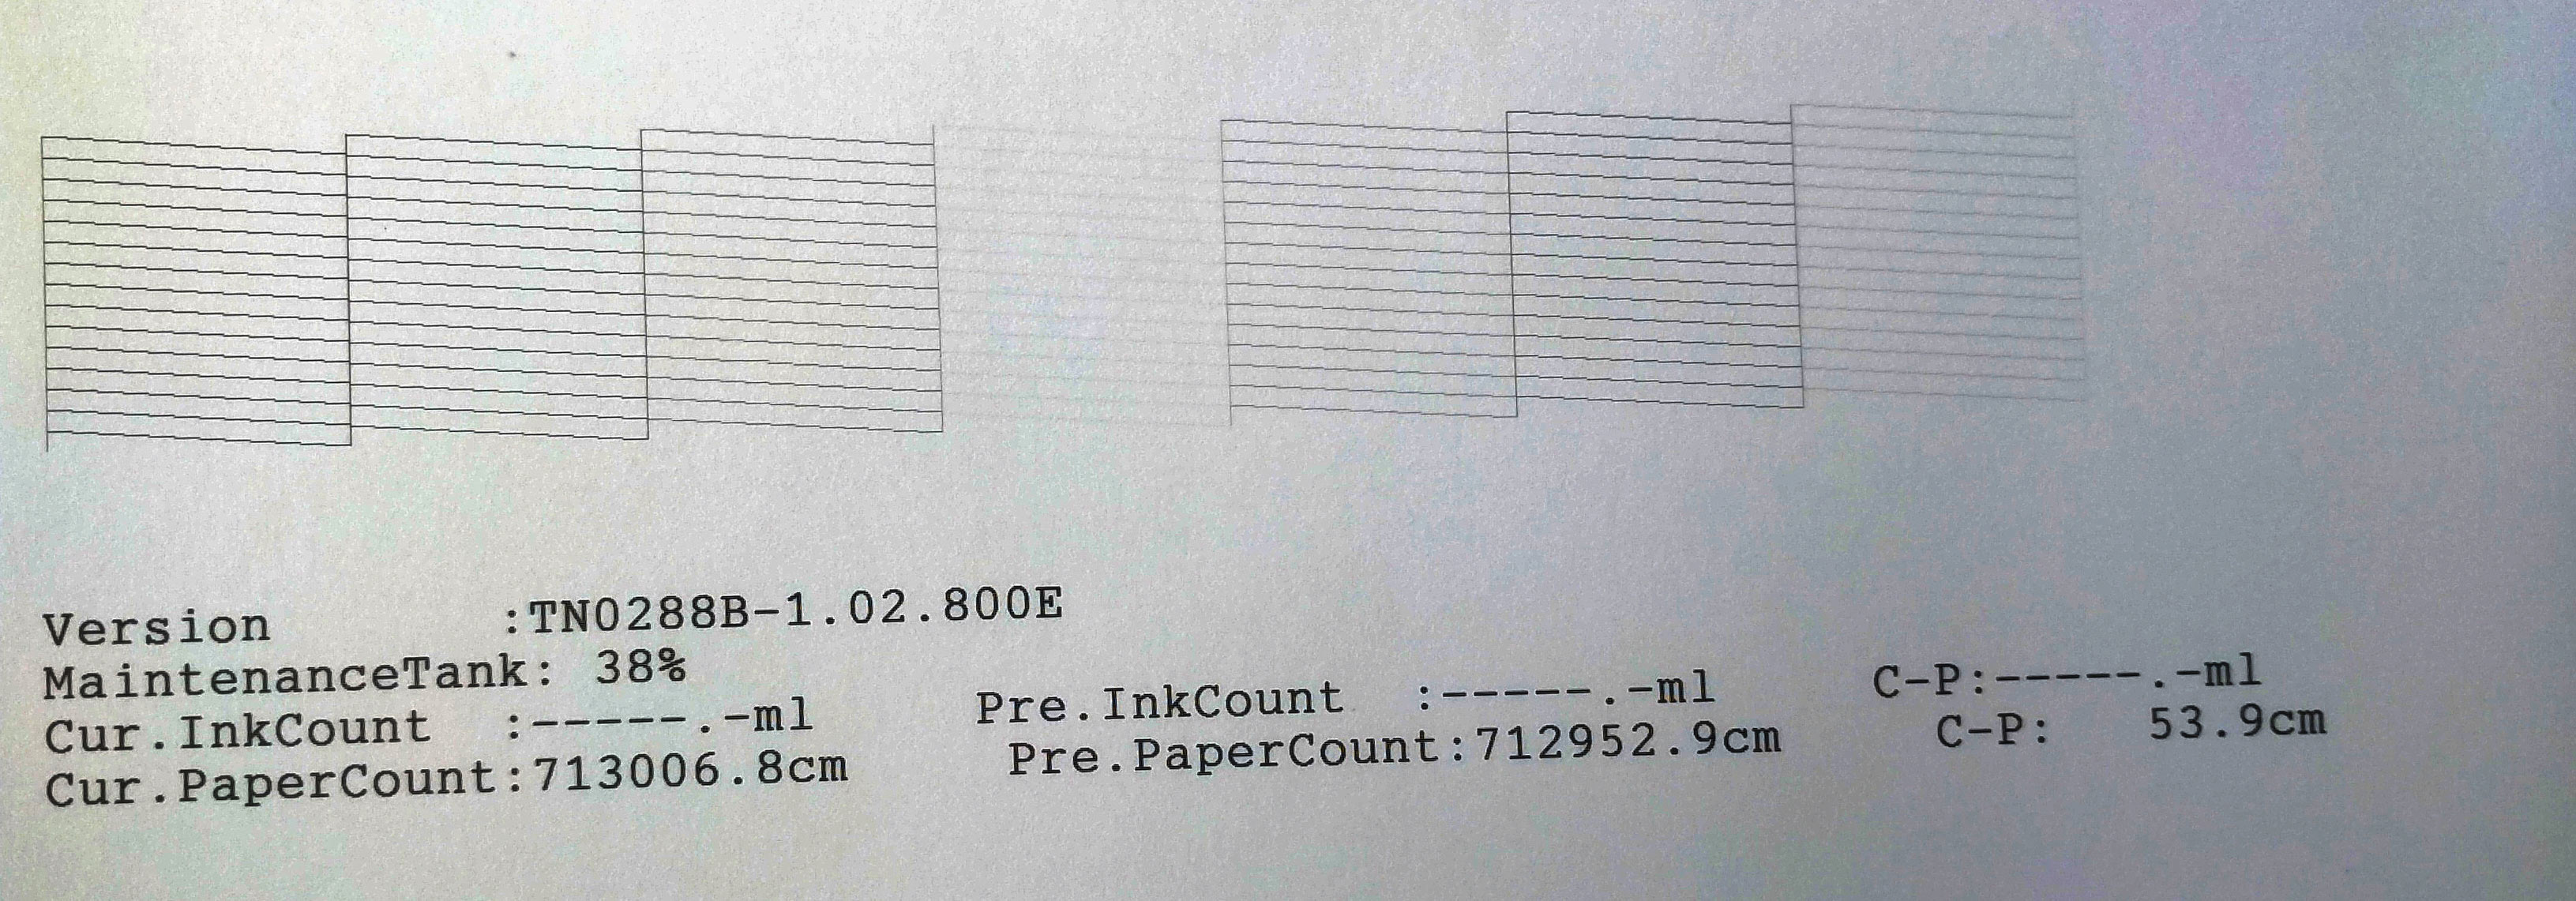
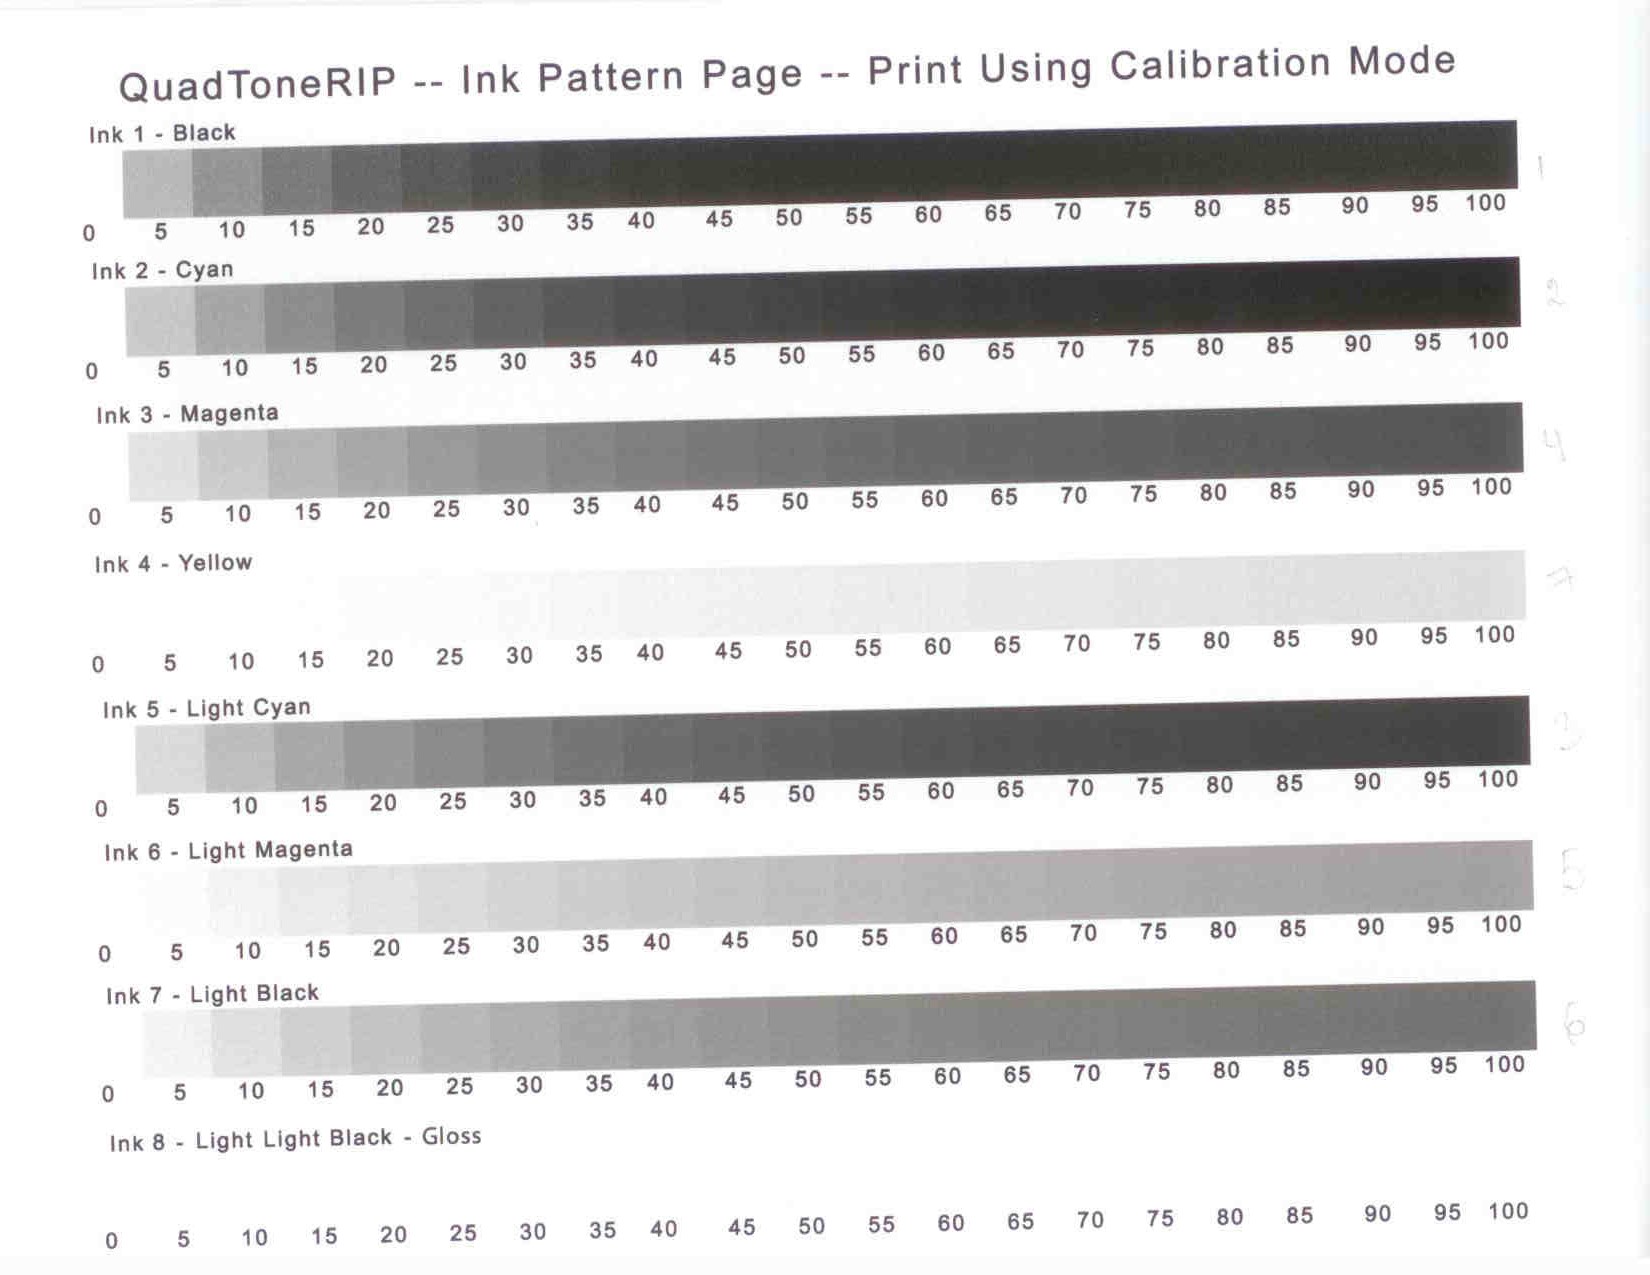
Print Inkseparation Image Using QTR Calibration Mode:
Printing the inkseparation image thru QTR’s Calibration Mode will print strips of pure ink from each channel. This is an easy way to check ink shade/color placement and density.
The inkseparation files can be found in the following locations:
3880-WN-SEL-NU-EPexFiber-lin-lin.zip (2.9 KB)
looks like we caught it…
attaching my ink separation scan and since you asked, the zipped curve of Eps exh fiber
The cartridges were getting low, so i have added by mistake into the #6 something else… probably some 4:( ugh… #5 looks fine, i brushed some from the bottle onto the matte paper and compared to the one from the cartridge. It is identical #6 is completely off…
What should I do to clean up my own mess?
If this were shade 7 I would just give you a P2 curve and be done with it, but because this is 6, it’s a required shade.
You have two ways to go about doing it. One way is hard and one is easy.
Easy way:
You will need a bottle of shade 6. You will need to dump the current ink you have, then put some distilled water into the cartridge, then dump that out (as much as possible).
Then put shade 6 in, and print a purge sheet (use the LK Purge file from your QTR Purge folder) on some scrap paper (24"x90" in size). I generally use a roll of Canon Bond paper.
Print at 1440dpi bi-directional.
If you don’t have an ink bottle, order a shade 6 bottle online and it will go out in the morning tomorrow. We are past the cut-off for overnight same-day today. If you call us tomorrow before 10am, Wells is in and he can get you out a bottle rush.
Hard Way:
If you have a bottle of shade 7 and a bottle of shade 5, mix them 1-1 to make a “not perfect but passable” shade 6.
Put this new DIY shade six into your cartridge and flush like I described in the “easy way”.
Walker, I greatly appreciate your help!
I tried the switched curve, but it did not work.Comes out too blotchy.
I am going to try the easy way, since for the hard way I don’t have enough of shade 5, but for the easy way I still have 350ml of shade 6. Will it be enough to do the purge and have some for printing?
The paper does not need to be 24" long, does it? I have some heavy matte paper which I am not using, 8.5x11, came as a gift
It has to be 24x90inches or any equivalent square footage of sheets. If you print sheets you will be printing for a long time. You are purging 45mL of ink approximately.
Walker, hello.I am back with a different problem
Printer prints fine, but…
After the print is finished printer runs strange machine-gun-like noise. About 6 seconds on, 6 seconds off. Continuously.
I lift a lever and lower it ( does not matter which side) and the noise is gone.
I was hoping, that it might resolve by itself, but it is happening about 10 days. After almost every print.
Is there a solution for this? I tried looking up into the forum, but could not find an answer.
The sound was coming from the left side of the printer. Right now for some reason it stopped by itself, I hear mellow humming only during the print process.
I will come back if the problem comes back. Keeping my fingers crossed!
Walker, the situation got out of hand…
the sound repeated again, I released the right lever …and it came off from it’s place.
I downloaded the manual from scribds website.
My husband and I disassembled the right side of the cover, tried to put back the lever, but it looks like there should be 2 inner tabs, which are missing ( probably broke off, and that is why it came off it’s place). So since the lever is spring loaded mechanism, it is not holding on it’s place and looks like we need a new one.
I can’t find spare parts anywhere else than China. I thought might be faster to ask you, may be you have something in sale or laying around useless… Or anyone in the forum… Would appreciate the help…
While the cover was off, I noticed that there is a lot of air in the ink lines. Might that be a reason for that humming noise?
Nune
You need to run some cleanings to purge the air from the lines.
The print-release levers does not need a handle. It’s possible to get away just moving the little white tab up and down with your fingers if you are ok with that.
I had a printer in this state working perfectly for several years at my own studio long ago.
Hello Walker.
I thought that since this post is considered solved, it does not receive attention anymore, so I created the new one.
The lever which I mentioned, was the cartridge lever, not the print-release paper. But that issue is solved. We ordered the lever and changed it ( the tabs were broken). The humming is still there.