Hi! I visited Cone Editions for a private piezography workshop on printing digital negatives a few months ago. You showed me how to clean and care for the Epson 9800 and advised me to replace the capping station and dampers. I replaced the capping station, and that was fine. I then ran piezoflush through the printer and that was also fine, nozzle checks were printing much better after almost blank before. Then, I changed the dampers and since that step I have run into problems.
I have had almost blank nozzle checks (mostly) and piezoflush is leaking from the print head. When I replaced the dampers I realized that they might not be inserted correctly so I took them out and re-installed them. I think they are all in the correct position now, but perhaps they are not. Is there another possible problem? Perhaps the film on one of the dampers is damaged? At first there were drips here and there on the paper when I ran nozzle checks, but those have gone away since I re-inserted the dampers. But when I move the head to the center of the printer and let it sit there a few minutes, and then move it again, I can see that piezoflush has dripped out. And the nozzle checks are still mostly blank. I did run an ink charge after replacing the dampers.
Any thoughts you have on this would be much appreciated! I don’t want to cause more problems. I have a set of peizography meth 1 inks ready to install in the printer, but of course I don’t want to do this until the problem is solved.
Also, I tried to start a new thread about this problem, but it said I was not allowed…
I’m glad your capping station replacement went well, and nozzle checks improved after replacing that part.
One small but very important thing when replacing dampers is correct tightness of the plastic nuts that connect the ink lines to the dampers- if too tight, ink flow will be poor or totally restricted, and if too loose, fluid will drip from the connection. The nuts should be finger tight (don’t tighten them with a tool, or they will be too tight), and obviously make sure they’re threaded on straight.
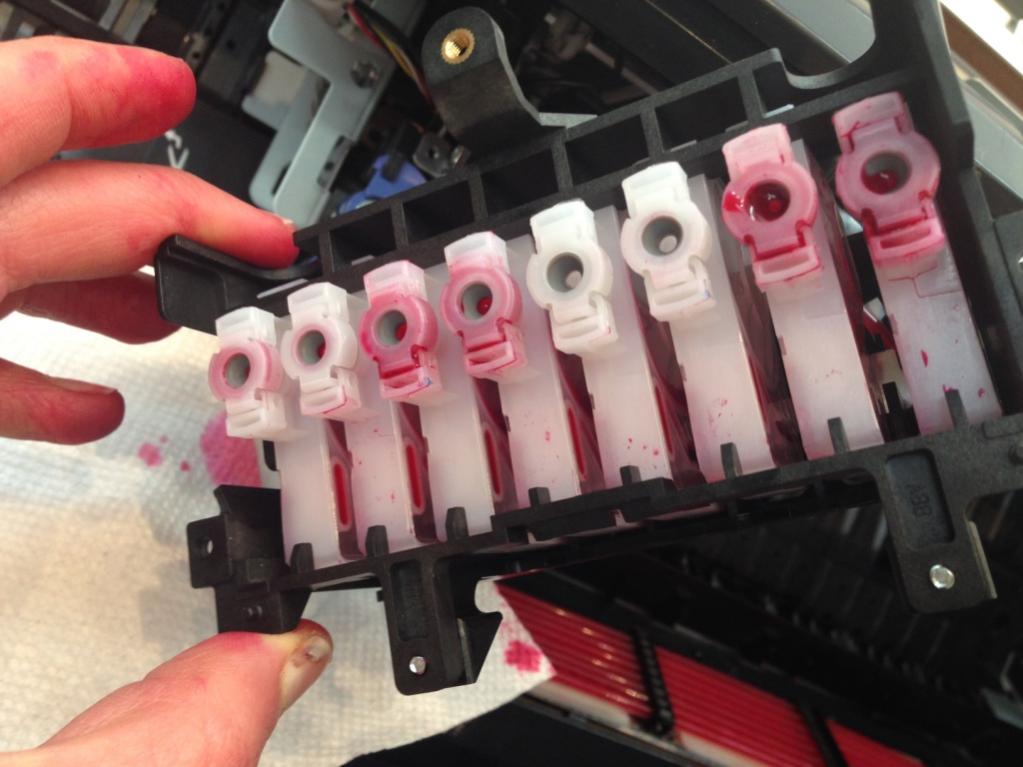
If you continue having trouble with either missing channels and/or dripping fluid from the head, then I suggest removing the damper assembly again and carefully inspecting the dampers- they should have equal springyness to the diaphragm side, and fluid in the rectangular channel on the opposite/flat side. If you find one that doesn’t re-open after gently pushing the springy side, and/or doesn’t have much or any fluid in the rectangular chamber, then that might be a bad damper (which happens occasionally).
Thanks Dana,
I’ll give that a try first, and then check the position of the dampers themselves if that doesn’t work. I’ll let you know…
Thanks again, I hope it’s not too snowy out there!
Abby
I tried adjusting the tightness of the plastic nuts on the dampers, and there wasn’t any improvement. I will next check the dampers again to make sure they are properly situated. However, I noticed that the lt black ink cartridge has lost a lot of piezoflush in the last few days, compared to the other cartridges. So I think either that damper is out of place or damaged. I should probably have a few backup dampers either way, so I’ll go ahead and order some more. Please let me know if you have any other thoughts about this!
I have taken out the damper assembly and re-inserted it a few times, and I think the leak problem was from the dampers not sitting properly. I hope, anyway! But I am still getting blank nozzle checks. I did an initial fill after installing the dampers, and it looks like piezoflush is full in the lines all the way, and in the dampers. However, I was reading over other the conversation between you and Tyler in July 2015 regarding his K damper, and he mentions priming the dampers. That is something I have not done yet, should I try that next? I am hesitant to do too many more initial fills because I going through so much piezoflush. Please let me know,
Thanks for the update. I always prime dampers so they are filled with fluid before reconnecting to the print head, but I don’t think not doing this would give you a blank nozzle check, esp after you’ve done an ink charge cycle.
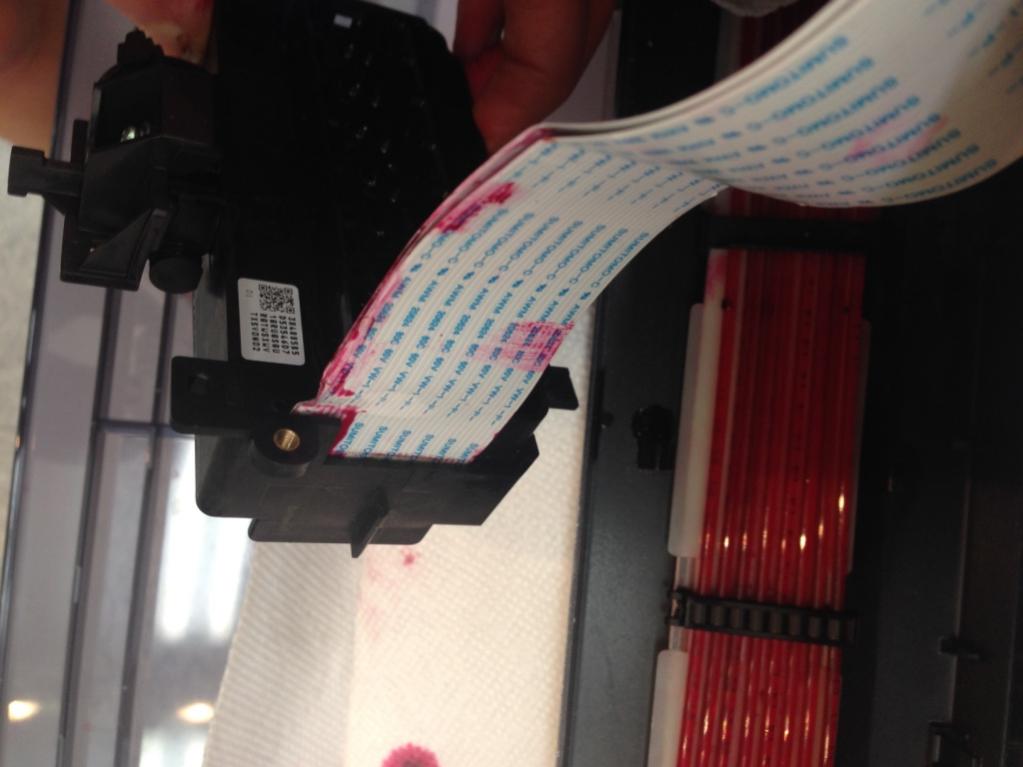
Did PiezoFlush go into the waste ink tank when you did the ink charge cycle (I assume so, since you said your going thru a lot of it)? Are your nozzle checks printing totally blank across all positions, or are some positions printing, but some are blank? If ALL channels are blank, but fluid is in your waste tank, then you have flow thru the lines/dampers/head, and I suspect electrical rather than all mechanical. The important thing I would check is the ribbon cable that goes down the right side of the dampers and connects to the print head. This cable shouldn’t be bent/broken, and there shouldn’t be any liquid where it connects to the head (you will have to remove the head to see the connection spot).
Thanks for your response! I will check the cable. I don’t think it is bent or broken, but it is quite possible some fluid got down there while I was changing the dampers. It was a bit messy when I first started, but then I was able to capture most of the piezoflush that was released. I was getting some traces on the nozzle checks at first, as well as drips that I attributed to the dampers not being in quite right (I removed the damper unit and reinserted it to be sure) but then nothing. I am losing piezoflush, but only from the light black cartridge, it is much lower than the others.
If for some reason the cable is damaged, is it likely I will be able to replace it without having to replace the whole print head? they are so expensive… I will let you know what happens…
Abby
If the issue is moisture at the cable connection, then I expect you will be able to either dry it out and get it working again, or replace the cable if it’s damaged, but I don’t think you’re going to need a new head.
To stop/reduce dripping when dampers are disconnected from the head, or when dampers are disconnected from the ink lines- raise both of the cartridge locking levers to stop ink flow. Only lower/lock ink levers once you have everything back together again.
It’s a relief that you think I can get the printer working without replacing the head! I hope that’s the case. I took out the damper and head last night to examine it. What is your advice for drying it out? Should I just leave it sit for a while or take out the head and disconnect the cable temporarily to let it dry out? I took some photos last night to send you, in case you can see any other problems I am not aware of.
Now I know to always raise the ink levers, but I didn’t realize this the first time I took out the dampers. A very novice mistake! Even though I had paper cups handy to catch the ink, you can imagine it was still on the messy side. Even though the process of getting this printer going is slow and frustrating, it is really great and I am understanding the machine more and more, many thanks to you!!!
Please let me know the best method for drying out the cable, and if you see anything in the photos. (I think I attached them, but the uploader only shows me code… let me know if I need to send them some other way)
Thanks again! Abby
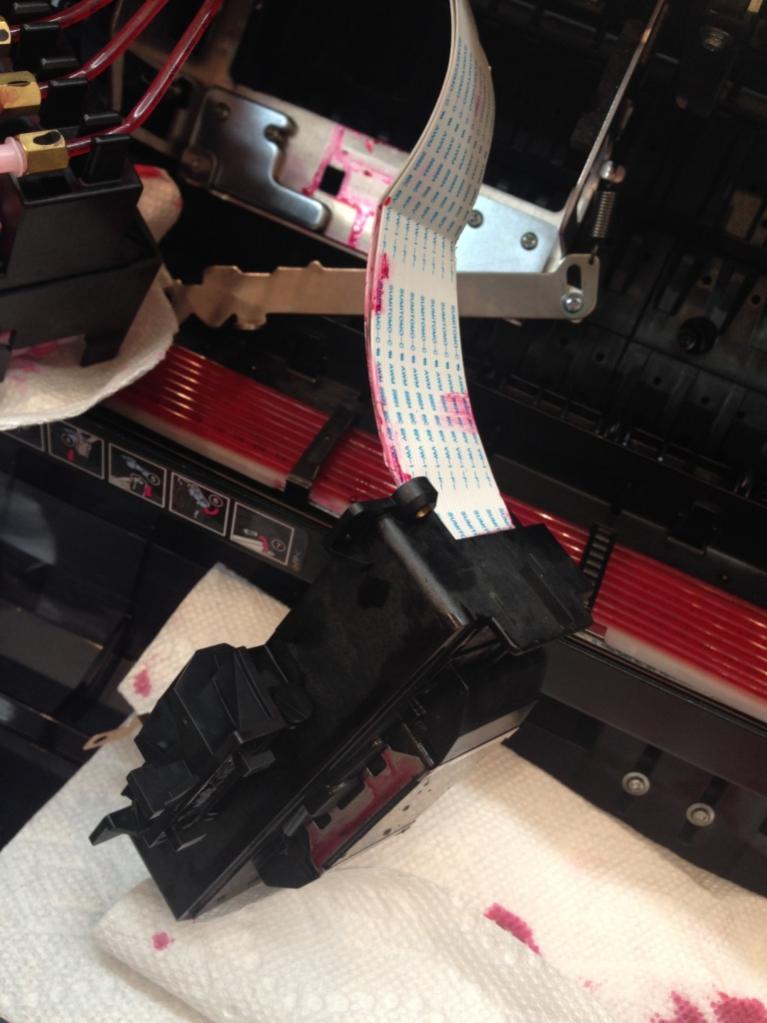
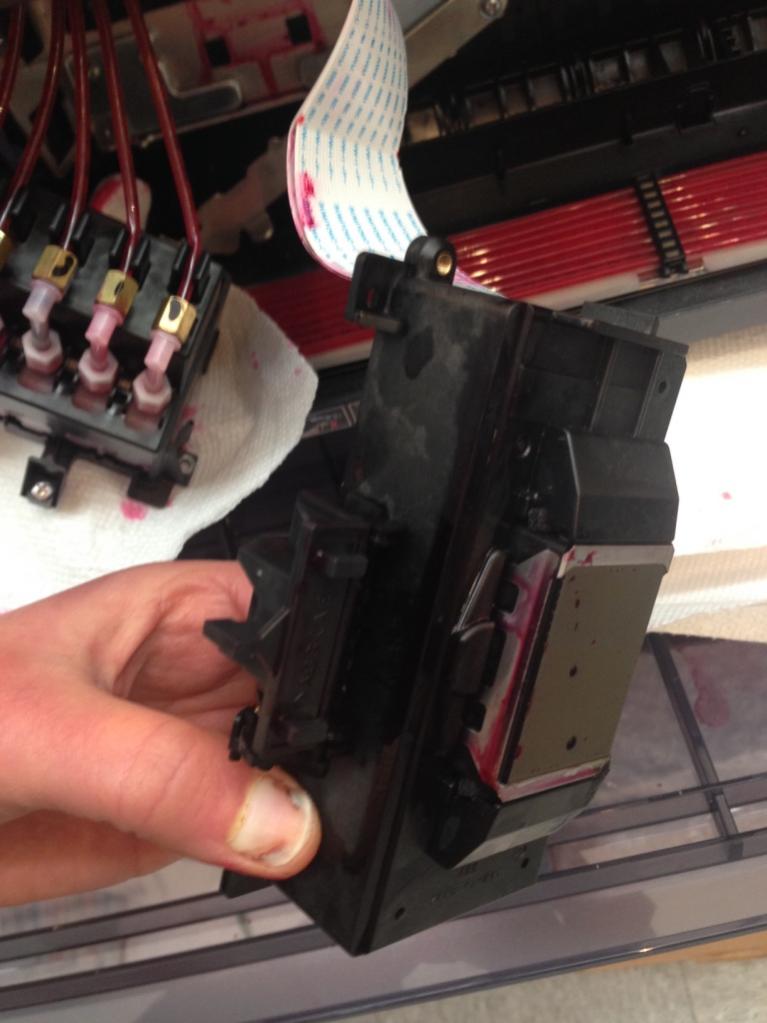
Thanks for the pics, they’re very helpful to see what’s going on. Is the top side of the print head (nipple area where dampers connect) flooded with PiezoFlush as well?
Keep in mind: I’m not a formerly trained “certified Epson tech”, though have been working on Epson printers for many years, and have replaced/fixed many parts over the years, so can give you some advice based on my personal experience, but we do not provide formal support for self repair to your printer, so say “proceed at your own risk” and direct people to follow the repair manuals. My advice may or may not help, and I can not guarantee I will help you get your printer fixed, so follow my advice if you wish.
I can see the whole area is pretty wet with PiezoFlush, and the cable connection is definitely wet- this is likely what’s causing your problem.
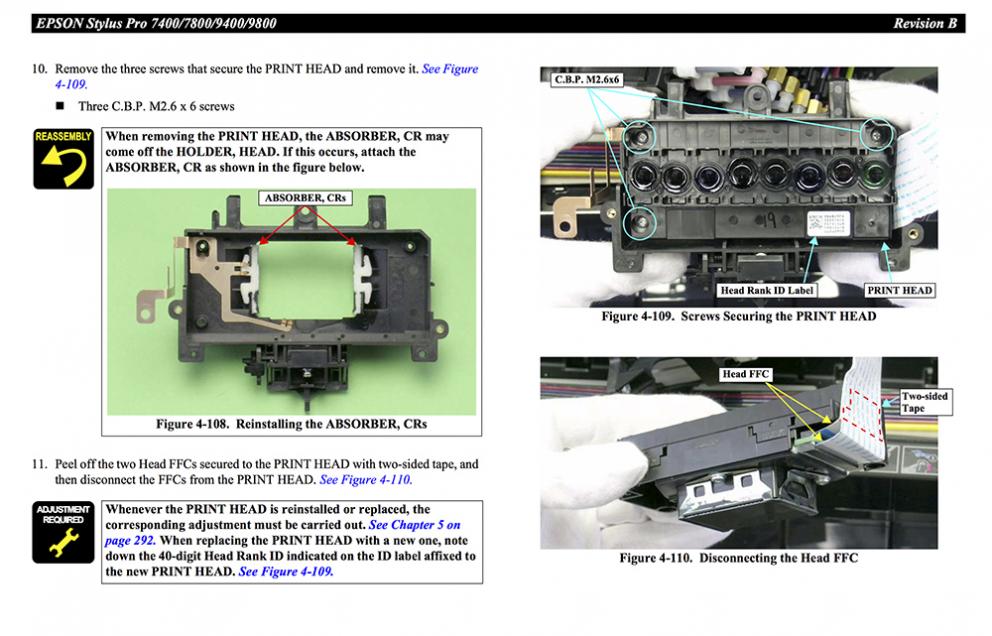
To access the end of the cable- carefully unscrew the print head from the black plastic carrier, which is starting at step 10 on page 270 of the 7800/9800/7880/9880 repair manual (screen shot included below). Figure 4-110 shows the two ribbon cables that connect to the right side of the print head.
Gently pull the two ribbon cables straight out of the print head connection, and carefully wipe/dry the entire area: cables (esp the ends), connection and surrounding area of the print head (TIP: be VERY careful with the print head and gentle when wiping the metal surface/bottom of the head- and do NOT touch the bottom of the print head with anything scratchy or your bare hands, as oils can damage it), print head holder and around the print head, and bottom of the dampers. You may want to use some canned air to blow out any hidden liquid from inside/around the connection and electrical area of the print head, then let it sit for a few minutes to help it dry out a bit more before carefully reconnecting- making sure everything fits easily and snugly. Do a few regular cleaning cycles after everything is back together, then print a nozzle check to see how things look.
Thanks. I know that I am working on this printer at my own risk, but I really appreciate your comments, since you have been doing this for a while!
I removed the cable and dried everything out, and used the air can to make sure the connection was clean and dry. so far, still blank nozzle checks, so I will next try replacing the cable.
I replaced the cable to the print head, making sure everything was clean and dry in the connection area. When I turned the printer back on I got the message Service Error 0001001B. So I took everything apart again to make sure all the connections were snug and put it back together, and again got this message when I turned the printer back on. I didn’t get this message before despite the other problems. Googling the error, everyone says to replace the print head, but since I just replaced the cable it seems it must be associated with the connection. Do you have any ideas about this problem?
At risk of entering a realm I’m not too familiar with, I do know that those ribbon cables are extremely fragile. I’d check the condition of the exposed metal on the ends of the ribbon cables.
Extremely fragile! If they do not look perfect, they should be replaced. Generally, technicians usually do not replace ribbon cables with pre-existing cables but only with new cables for fear of shorting. These are not too expensive. I have shorted out our Roland by replacing a cable I removed that looked perfect. On closer inspection there was a very tiny fray in the contact edge - just a slight bend that then shorted out a $1,200 main board. The cable was less than $30.
Thanks for your input. The cable I put in was new, and looked perfect, but I will examine it again. I would like your advice on whether I should buy another cable to put in, or is it likely I have damaged the print head and need to look for a new one? I don’t want to buy a new print head, of course, but I’m this far into it now…
The end of the cable I replaced, which was attached to the print head, definitely showed damage, but I did not receive the error message until I replaced it. I replaced it with the new cable.
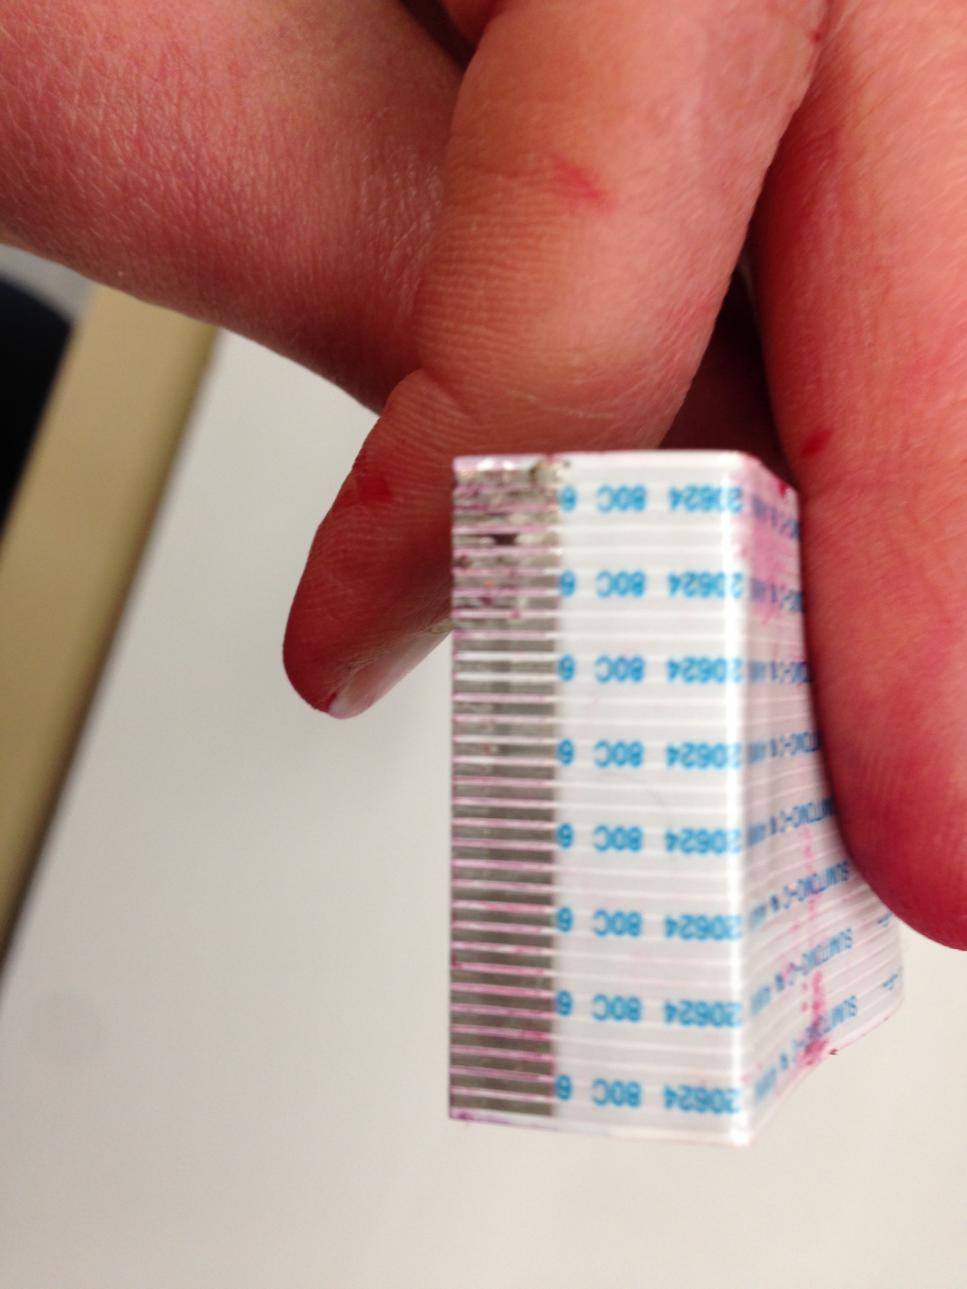
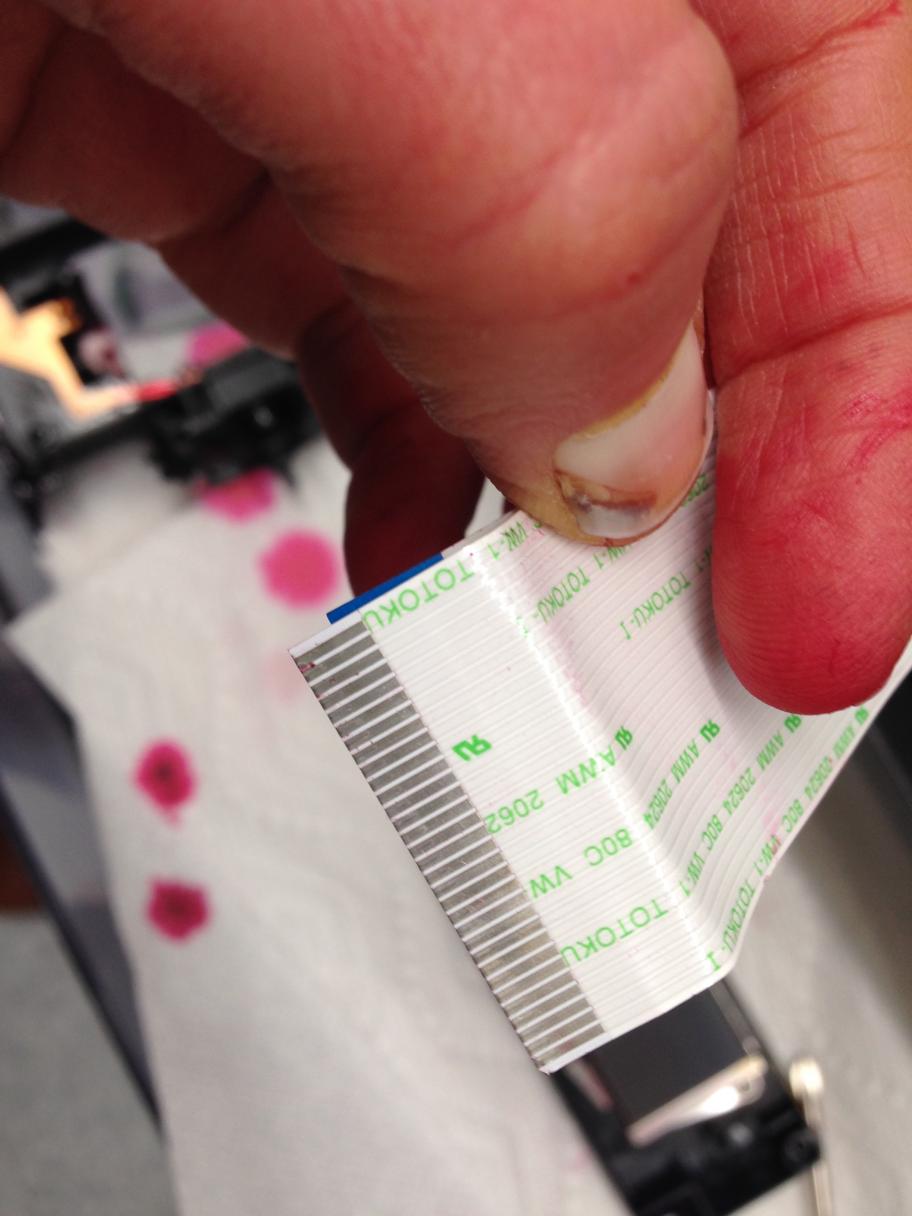
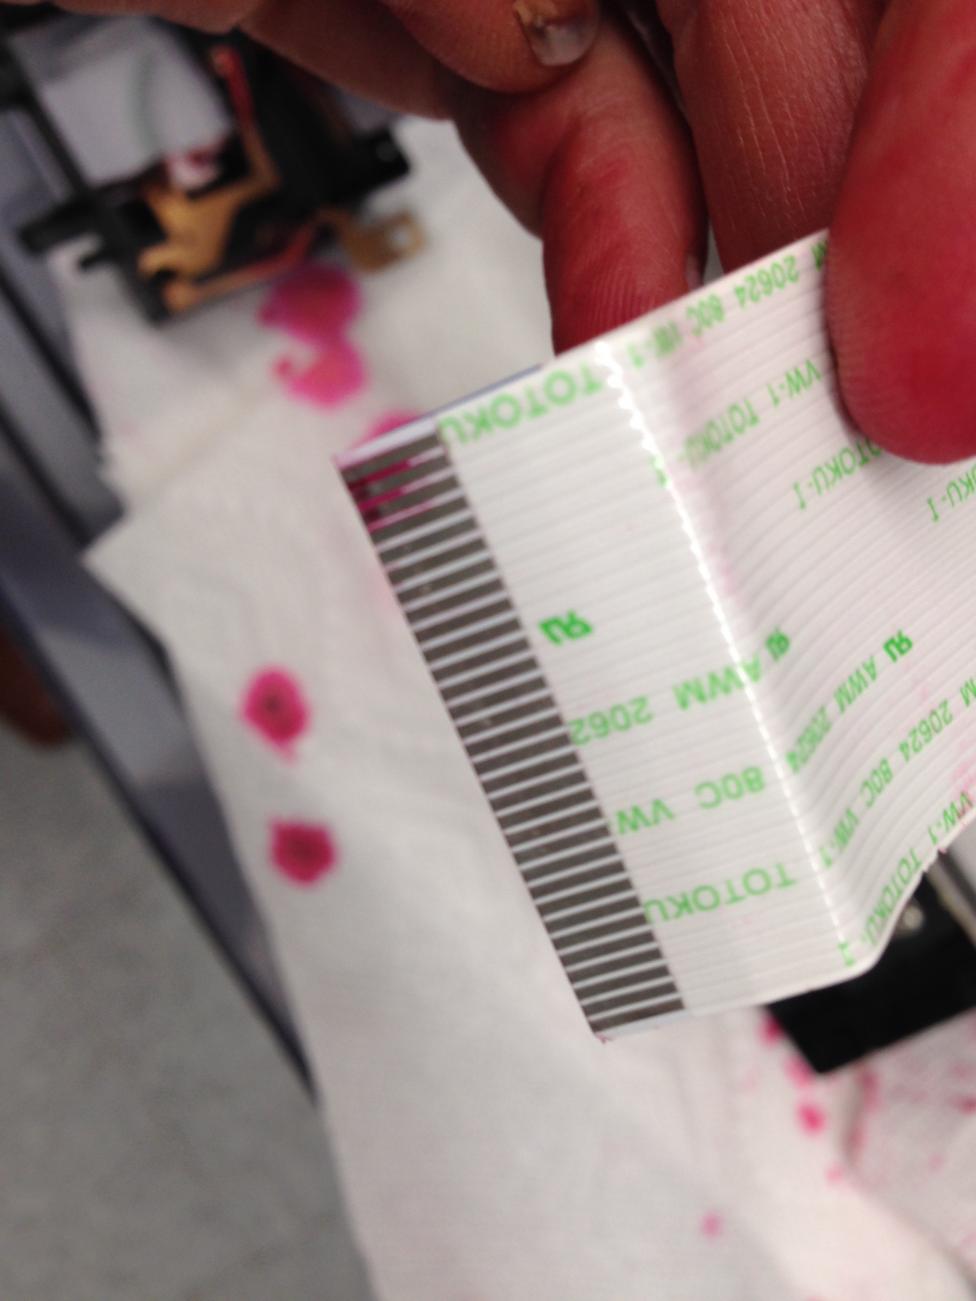
Hi it’s me again. Last night I removed the print head again to examine the cable connection. It is starting to exhibit a small amount of damage in the same area that was damaged on the cable i removed. I’ve attached two photos below, first the old cable and then the new. The third photo shows that when the new cable is inserted and removed there is again piezoflush in the connection, in the area of damage. Originally I had thought there was a leaky damper, but I thought that the leak was caused by the dampers being out of line, and that I had solved the problem by resetting them. Apparently there still is a leak, andI believe it is from the lt black damper. So I plan to replace that damper, and also get a new cable (again) since this one is already damaged. Hopefully that will repair the connection between print head and printer and I will be able to move forward. If not, I guess I will have to get a new print head also. Any advice is appreciated!
Best,
Abby
from my experience any moisture in a cable connection can or will fry the component up line from it. Two or more connectors short, and a small fuse will break. These fuses are soldered onto the boards to protect more expensive components. Print heads do not have protection with fuses. The head board may but it is generating the signal and the damage tends to be upstream.
The ideal situation of course is that there would not have been a leak. But there was and moisture made its way to a live circuit. So that factor may trump the leak (in that the head may be damaged.)
You are learning how to work on printers so you are an excellent candidate to get another X880 printer off someone else who has neither the time nor inclination to work on it. You are doing dig neg and do not need 8 working channels. can you find a give away printer with a permanently clogged ink channel? You might harvest that head for your printer and we can show you how to re-write the Piezography Curves to map out the bad channels. Technically you need only 5 working channels for what you are doing, right? Dig neg does not use shade 1 black - it only uses 2, 2.5, 3, 4.5, & 5. So a head with only 5 working channels while useless to anyone else would be valuable to you. I might harvest the boards and cables as well. Rebuild your printer - or better yet. Work off the new printer and keep yours for parts… ? All trying to get you to avoid buying a refurbished X880. But if you do buy one - buy from Ron Arditos. He’s builds them well.
Sort of saying that you may have gone past what you can do for this printer right now.
However with one last gallant effort on your part. STOP THE LEAKS. that is primary. Clean and then dry the cables perfectly clean with alcohol. Flush out the receivers for the connectors with distilled followed by alcohol to clean the moisture and piezo chemistry from these points. Then perfectly dry them. When everything is perfectly dry. Reconnect everything - initialize with ink or flush. Check and see if the print head operates. The error may be due to active shorting from the moisture rather than a damaging short that has made something in the head permanently fried. Am I making sense? I realize this is a bit rambling.


 The cable was less than $30.