The QuadTone RIP is used for printing B&W images, and is how most users print with Piezography ink. QTR is a $50 shareware program, available for download from www.quadtonerip.com. The Ink Separation image included in the QTR download can be printed thru QTR’s Calibration Mode to easily check ink shade/color placement, to verify or check if all positions are printing, or to flush an individual channel. This is very helpful to quickly verify inks are installed in the correct positions and printing well. It is also a great way to flush an individual channel without wasting ink in all the other positions as well.
The QTR Print Tool is necessary when printing from Mac 10.6.8 or higher, for accurate output (other printing applications have screwed up color management that will produce poor Piezography output).
Print Inkseparation Image Using QTR Calibration Mode:
Printing the inkseparation image thru QTR’s Calibration Mode will print strips of pure ink from each channel. This is an easy way to check ink shade/color placement and density.
The inkseparation files can be found in the followimng locations:
MAC: Applications> QuadToneRIP> CurveDesign> Images folder. The location for Windows is Program Files> QuadTone RIP>
Windows: C:/ Program Files/ QuadTone RIP/ bin
NOTE: There are different inkeparation images depending on the printer model you’re using. “6” for 6-color printers, “inkseparation” for 7-color printers, “8” for 8-color printers, and “10” for 10-color printers. Be sure to select the correct image for the printer model you’re using.
WINDOWS:
- Open the QuadTone RIP program, select your printer and paper size
- Select Tools> Options> Calibration Mode, which will open the inkseparation image file.
- Ink Limit: 100% and Resolution either 1440 or 2880dpi then print
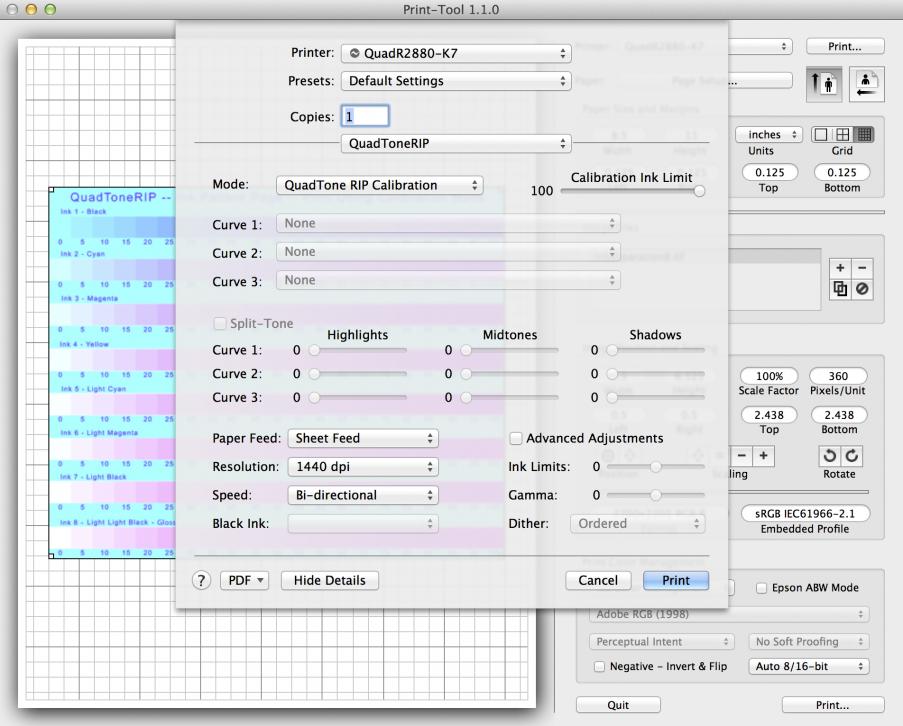
MAC:
- Open the “inkseparation” file in QTR Print Tool
- Select “NO Color Management” in the Print Tool window
- Select your K7 printer model, and paper size, then push print
- In the QuadTone RIP window- select Calibration Mode, Ink Limit: 100% and Resolution either 1440 or 2880dpi

The Piezography K7 Ink Separation-8 printout from an 8-color K3 model printer should look like this, note the obvious density differences between each ink shade:

©Copyright Vermont PhotoInkjet, LLC All Rights Reserved. No parts of this can be reproduced without written permission.
