I had filled my 7880 with Cone inks, and printed an exhibit. Now, doing my regularly scheduled head-health prints, I ran out of LLK.
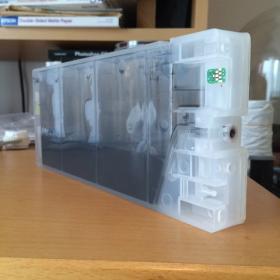
Prior to this I have sometimes experienced strange readings from my LLK cart since switching away from Epson carts. This cart had never fit in as easily as the others did, appearing swollen, and required some gentle re-angling to get a reading as per advice from IJM.
I withdrew this LLK IJM cart to refill it. The chip was still attached correctly. Looking deep into the ink cart bay slot, I can see (with startling concern) that one of the gold contact wires in the cart sensor has come loose and has fallen to the absorbent mat below the bay.
I am crestfallen to say the least after putting $$$ into rebuilding and re-inking this fine otherwise printer.
I am SOL for the time being with a new show to print. If I hadn’t sunk so much into the 7800, I’d be shopping for a new printer. Or farm it out.
Is there a way to replace that sensor without having to buy a new complete Left bay?***
IF so, can you lead me to the source?
If not, what is your advice?
Many thanks, Dave
By first Googling this, I read on DPReview of a successful hack for removing the old sensor using a cart with no chip, and replacing just that sensor alone using chopsticks and tape, but that sounds risky or worse.
I’m sorry to hear you experienced a broken chip sensor. I see you bought the LLK refill cart in Aug 2014. Can you please send some photos of your LLK cart, especially the chip area, so I can see how it caused your sensor pin to get damaged?
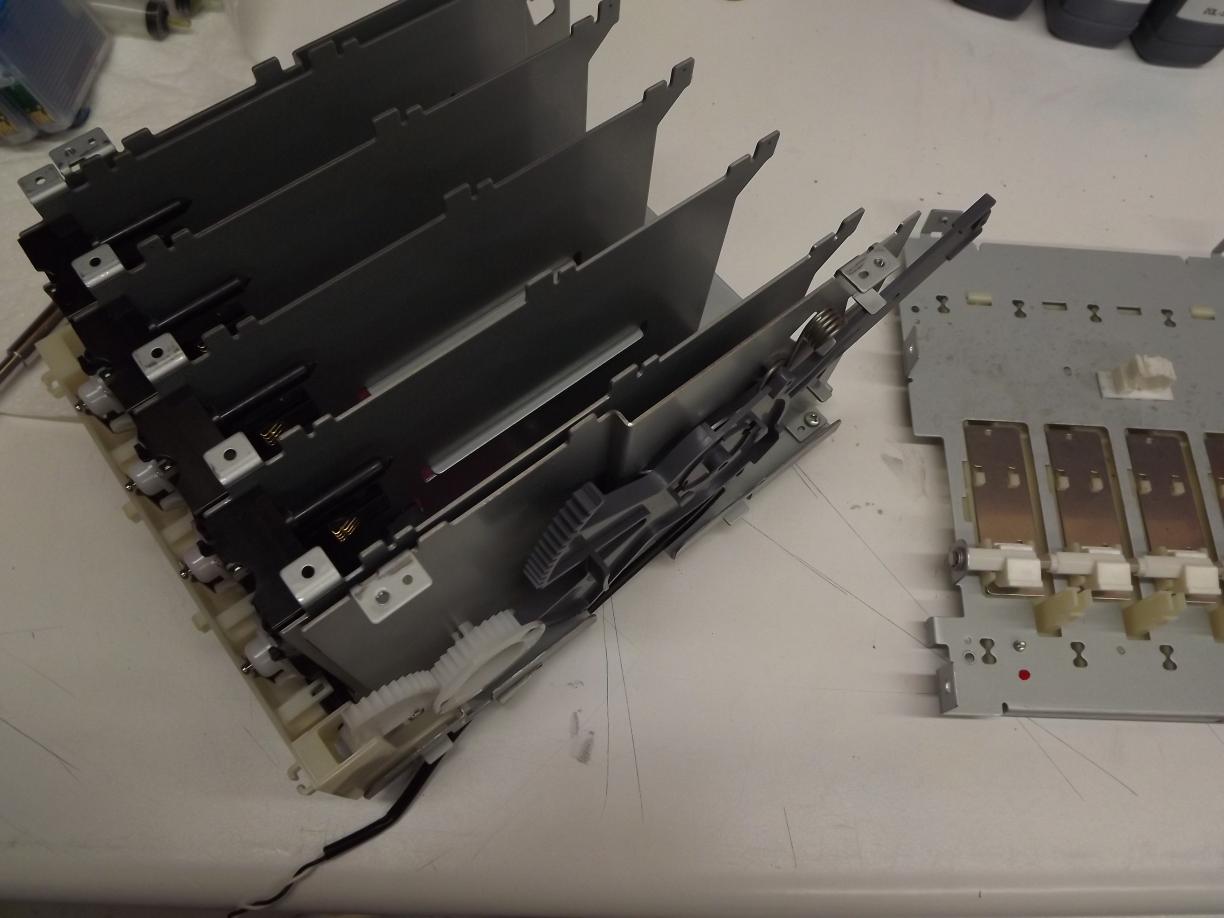
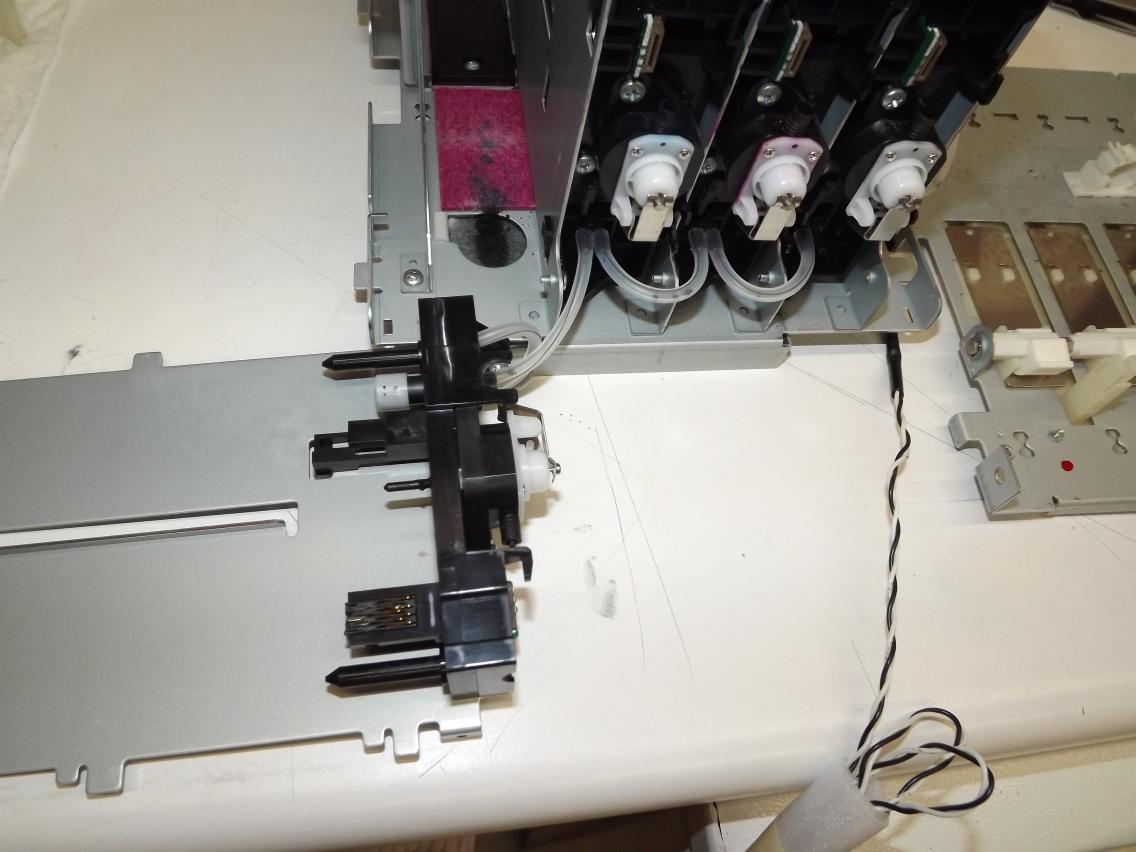
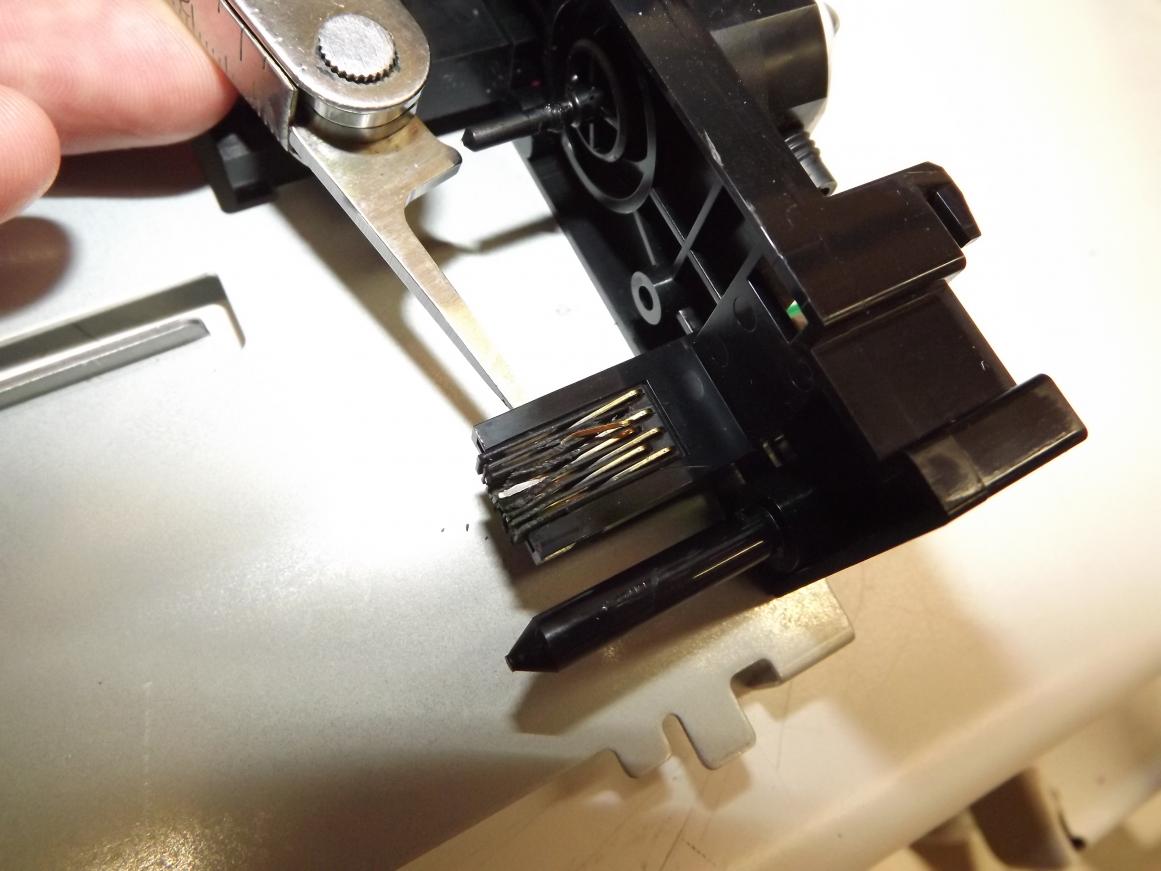
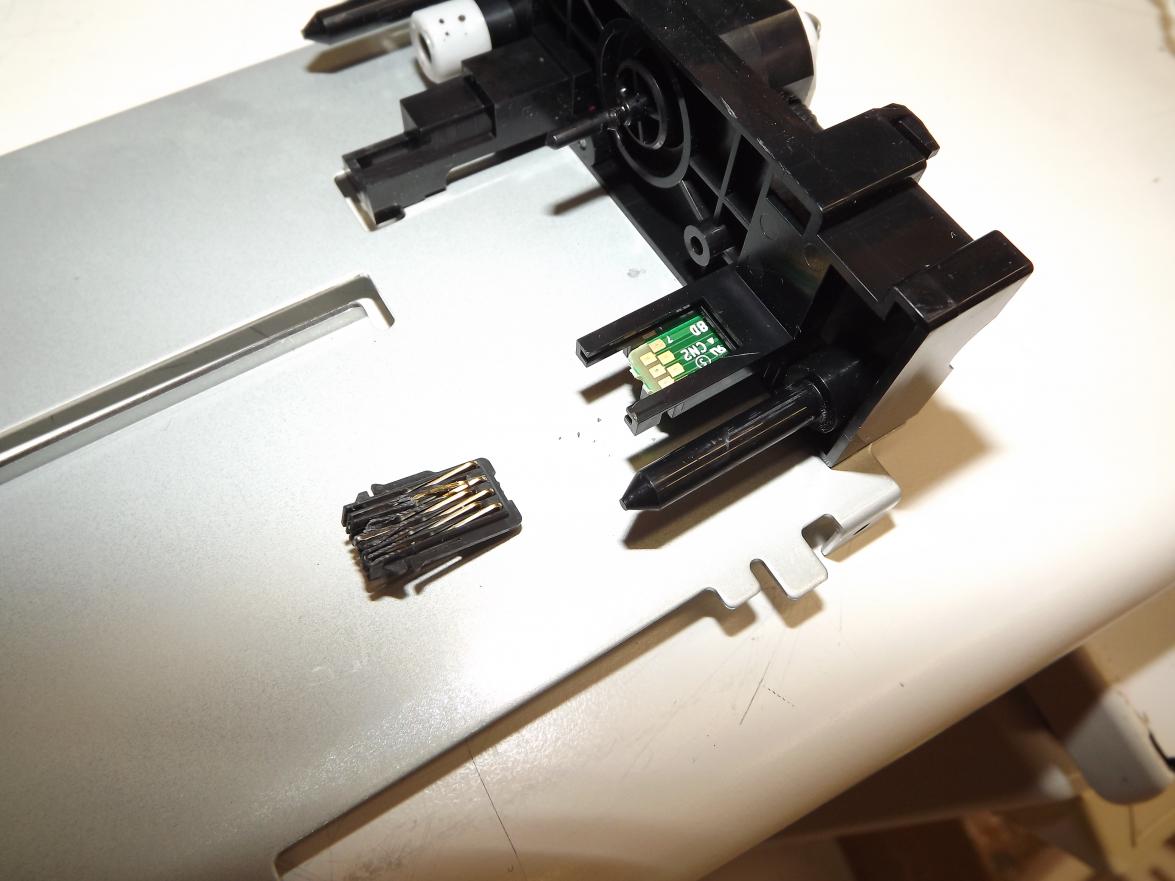
A replacement chip sensor costs less than $2, but unfortunately, there’s no easy way to replace it. I have replaced chip sensors in the past, and although I’ve also seen the post about removing the reset of the sensor with a chip-less cart, then installing the new using a chop stick, I didn’t feel very confident with that procedure, so removed the side panel to access the chip sensor at the back of the cartridge bay. It’s probably easier to replace the whole cartridge bay, though there’s a big cost difference between the sensor and cartridge bay. I did take photos when I replaced a sensor in a 7880, and would be happy to share them with you if it’s helpful, but otherwise we don’t provide instruction or support for working on your own printer, as we’re not certified technicians (though have a lot of hands on experience over the years).
Yes, I’d welcome any info or photos you have of your sensor replacement. I won’t be using any of those weird techniques using chopsticks or yanking carts out.
I took images of cart, but uploader here doesn’t allow it. I have emailed them to you at tech support.
At this point, I have a down printer, a bad sensor, tools and a sensor to buy, a lot of delicate work ahead to attempt a repair, and… a filled IJM 350 LLK cart that I’ve never been able to get a good reading on since day one.
I will attach your images for you, showing the cartridge, chip area and printer’s chip sensor:
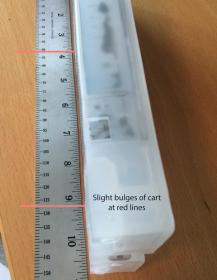
Based on your photos, I don’t see anything obvious with your cartridge or chip that would cause the sensor to get damaged. It’s normal that the cartridge sides aren’t perfectly flat, and the areas you marked slight bulges on your cartridge side don’t contact or effect the chip sensor area.
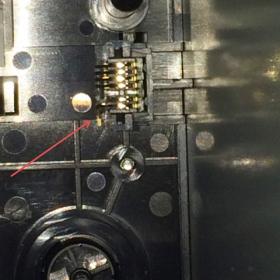
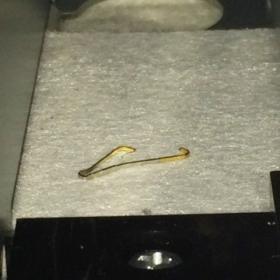
As you can see, the original chip sensors are made of tiny fragile wires, that can be easily bent or broken. Replacement sensors are made with flat pieces of metal, so are sturdier and much less fragile.
To replace sensors, you will need to follow the Epson Repair Manual to remove the side cover of the printer, and cartridge bay to access the chip sensors. You can get the repair manual from www.2manuals.com, and replacement sensor from www.CompassMicro.com. At that point, the repair manual instructs to replace the whole bay, but instead, I replaced just the sensor. Here are some photos showing my process: