Better Image.
Better Image.
The design on these printers allows for quite a lot of ink to drop (ink cart leaking happens with OEM carts as well) and it doesn’t look like much ink has dropped. Do you see any drips below the printer?
I would not worry about pulling the bay out. I see we sent you a replacement Yellow cartridge on the 8th. You should have it soon. Make sure to prime it. You can pour the yellow from the old cart to new cart using the funnel that came with your original set.
Sometimes wrapping a little paper town around the base of the funnel keep ink/air bubbles from coming up out of the cart during this fill procedure.
best,
Walker
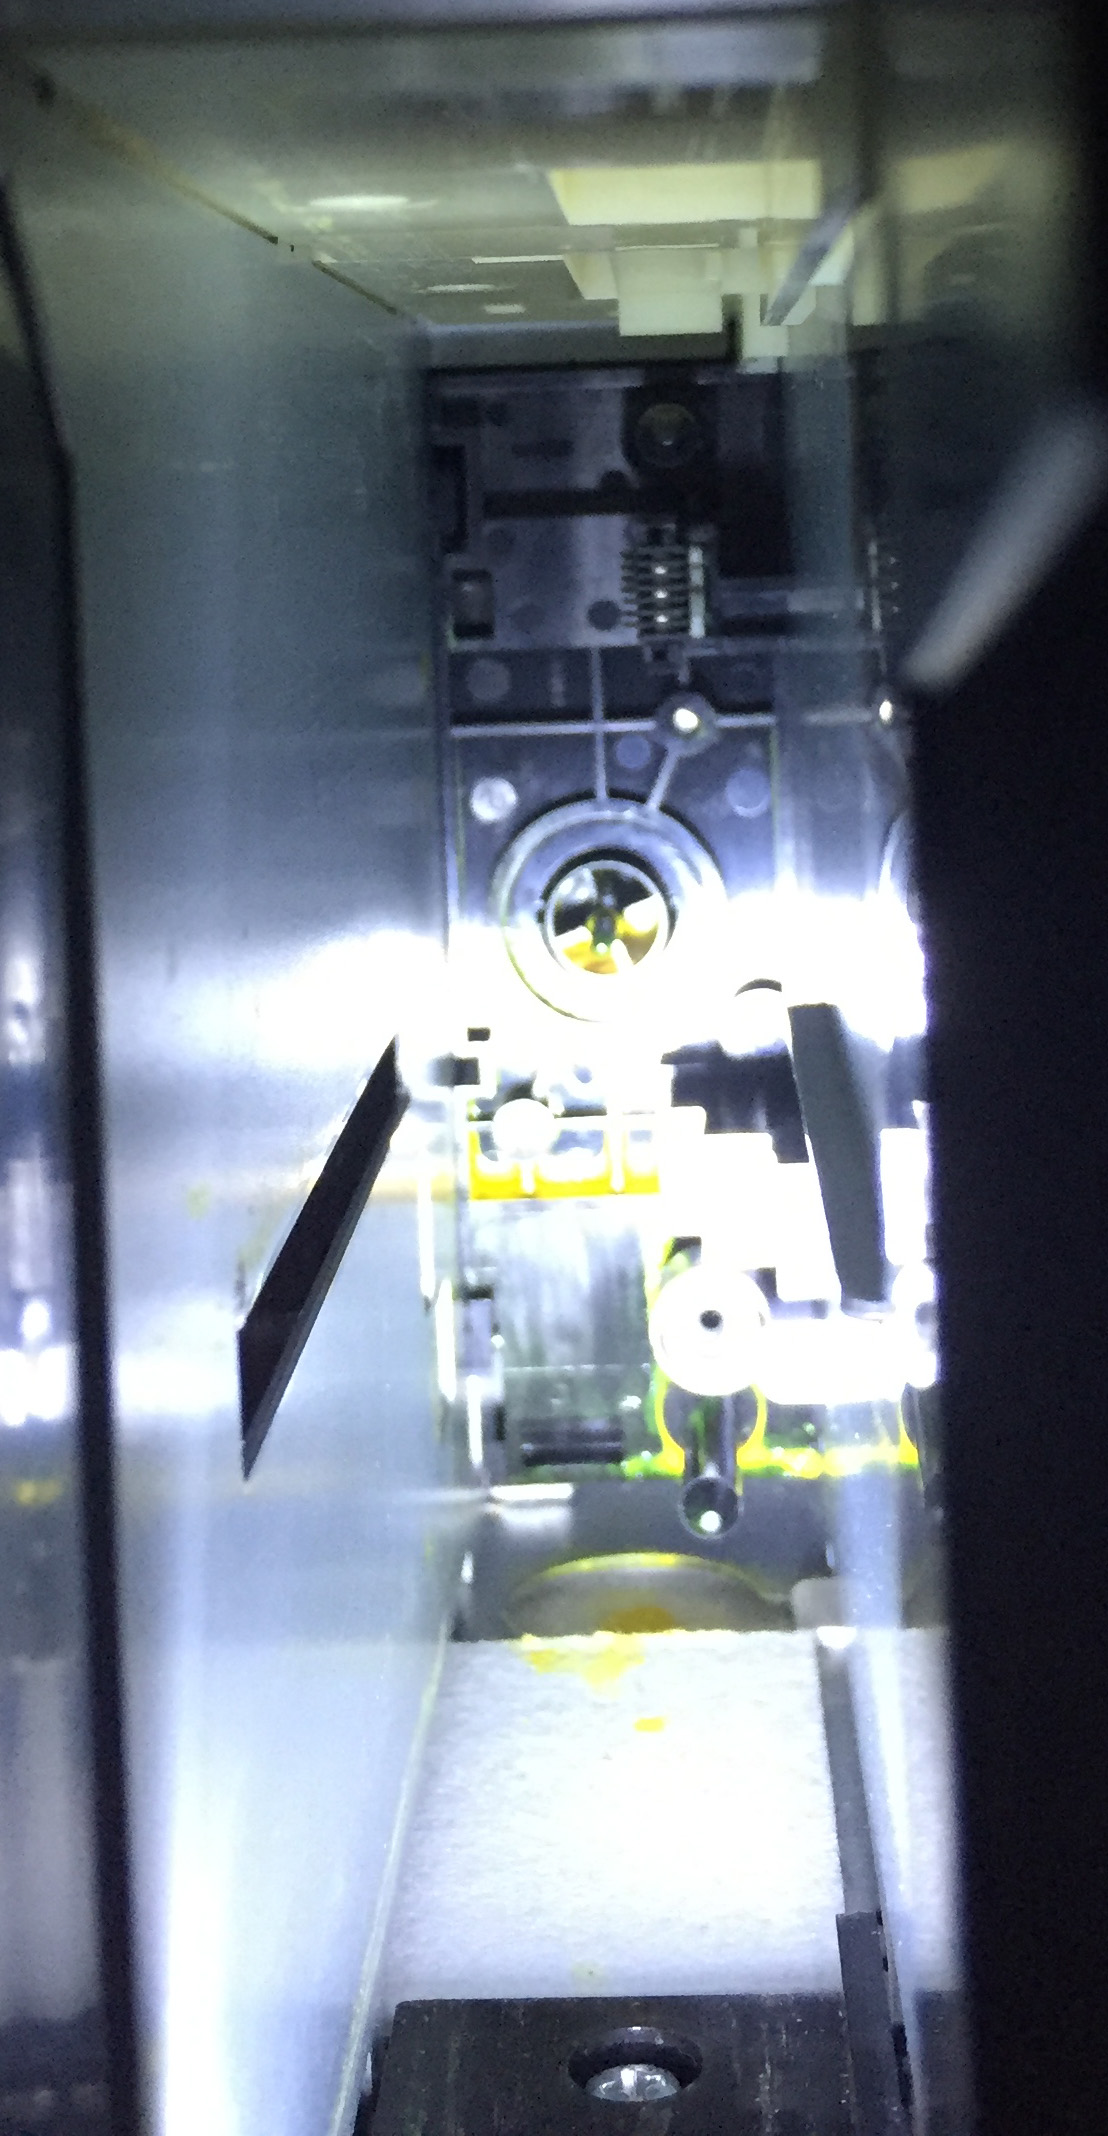
You may also want to check the little air pressure outlet (at the bottom of the ink bay I believe). Make sure it doesn’t have yellow stuck in it. SimpleGreen will clean that nicely.
From what I see of the second image, your air pressure port is fine.
best,
Walker
The replacement cart was partly filled & primed & inserted, printer still shows the Replace Cartridge error & flashing X on the yellow cartridge icon. The reason fir thinking about removing the ink holder is the unknown amount of ink that may be behind it, and not knowing what problems that could cause.
This is the second yellow cartridge.
Question, do you have the original OEM yellow cartridge? If so, reset it and put that in the printer. If it works, take the chip off that and put it on the IJM cartridge.
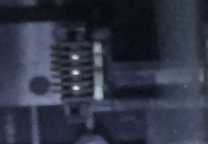
If no cartridge works, it’s most likely a bent wire on the chip sensor (the sensors are legendarily flaky with OEM and non OEM carts alike). This sensor is $1.50 at compassmicro.com but can be a pain to replace because you need to take the ink bay out.
Take a look at the sensor to see if wires are bent or broken. Looking at the photo I see one wire that may be bent down a but but it’s hard to tell.
///
Alternative:
Before I worked at IJM, I ran these printers with IJM carts for over a decade. I would aways just use epson OEM chips they fit on these carts.
Pro tip: any 9880 chip besides the MK chip will work. You do not have to put a Y OEM or IJM chip on the cartridge. If you use an LK chip on there the printer will just through a “non-genuine ink” message at you and you can just hit pause and it will work. So if you have any_ oem chip or other IJM cartridge lying around, try it and let me know.
Replacing chips on the x880s:

best,
Walker
I’ve tried replaced & reset the chip a few times, without success.
Eugene Norris
Welborne Fine Art
Back to my original posted question today - are the steps I listed all needed in order to get the ink holder out of the printer? I’m repeating the sequence from the Service Manual here for your convenience -
Panel Assy (p 229); Maint. Tank; Spindle; H Top Cover Assy (p 230); Carts; I/H Cover Assy (p 231) and then, finally, the Holder Assy, IC, Right (p 289).
Eugene Norris
Welborne Fine Art
Yes, those are indeed the steps (confirmed). Sorry, should have said that off the get-go.
If you are ready to go through with the ink bay removal, I highly recommend getting 4 ink sensors (the more robust model that cost $1.50 ea) and put them in when the ink bay is out and it’s easy to get at them. I think that is your issue here and it would be useful to future-proof yourself in this case.
best,
Walker
Walter, 2 items:
OK, making progress in getting the ink bay out to replace the chip contact thingies. In the 7880 Service Manual on p.290, step 10 says to pull out the pressurizing tube from the holder assembly. Does this mean to disconnect the tube from the holder assembly? Looking ahead, I don’t see how to reconnect it. Maybe pull apart the hose joint?
Apparently the flushing box is a discontinued item at Compass Micro. I’d like to replace it & the capping station while I’m in here. Is there another source?
—Gene
Eugene Norris
Welborne Fine Art
What I generally do is rest the assembly on a chair or box so that I can just sort-of swing it out at an angle. This way I don’t have to disconnect the assembly. However, I think the air-tubes just fit into a socket by slipping over. There should be photos. I also make sure to take a photo (with cell) of every part before I dissemble.
best,
Walker
OK, so I don’t disconnect the tube. Next, I want to replace the flushing box & capping station cap while I’m in there. I see the steps for the flushing box but nothing for the cap. what do I do?
I think the important thing is to make sure you did this step right, and
then go to the next. It’s good to keep the variables to a minimum here so
you can backtrack any problems easily if something goes wonky.
If the part is not available at compass micro, you may want to call them to
see if it can be special ordered.
Best,
Walker
Yes, all will be done in turn.
Eugene M. Norris
Welborne Fine Art Images
876 Ponce de Leon Dr
St Petersburg, FL 33715-2026
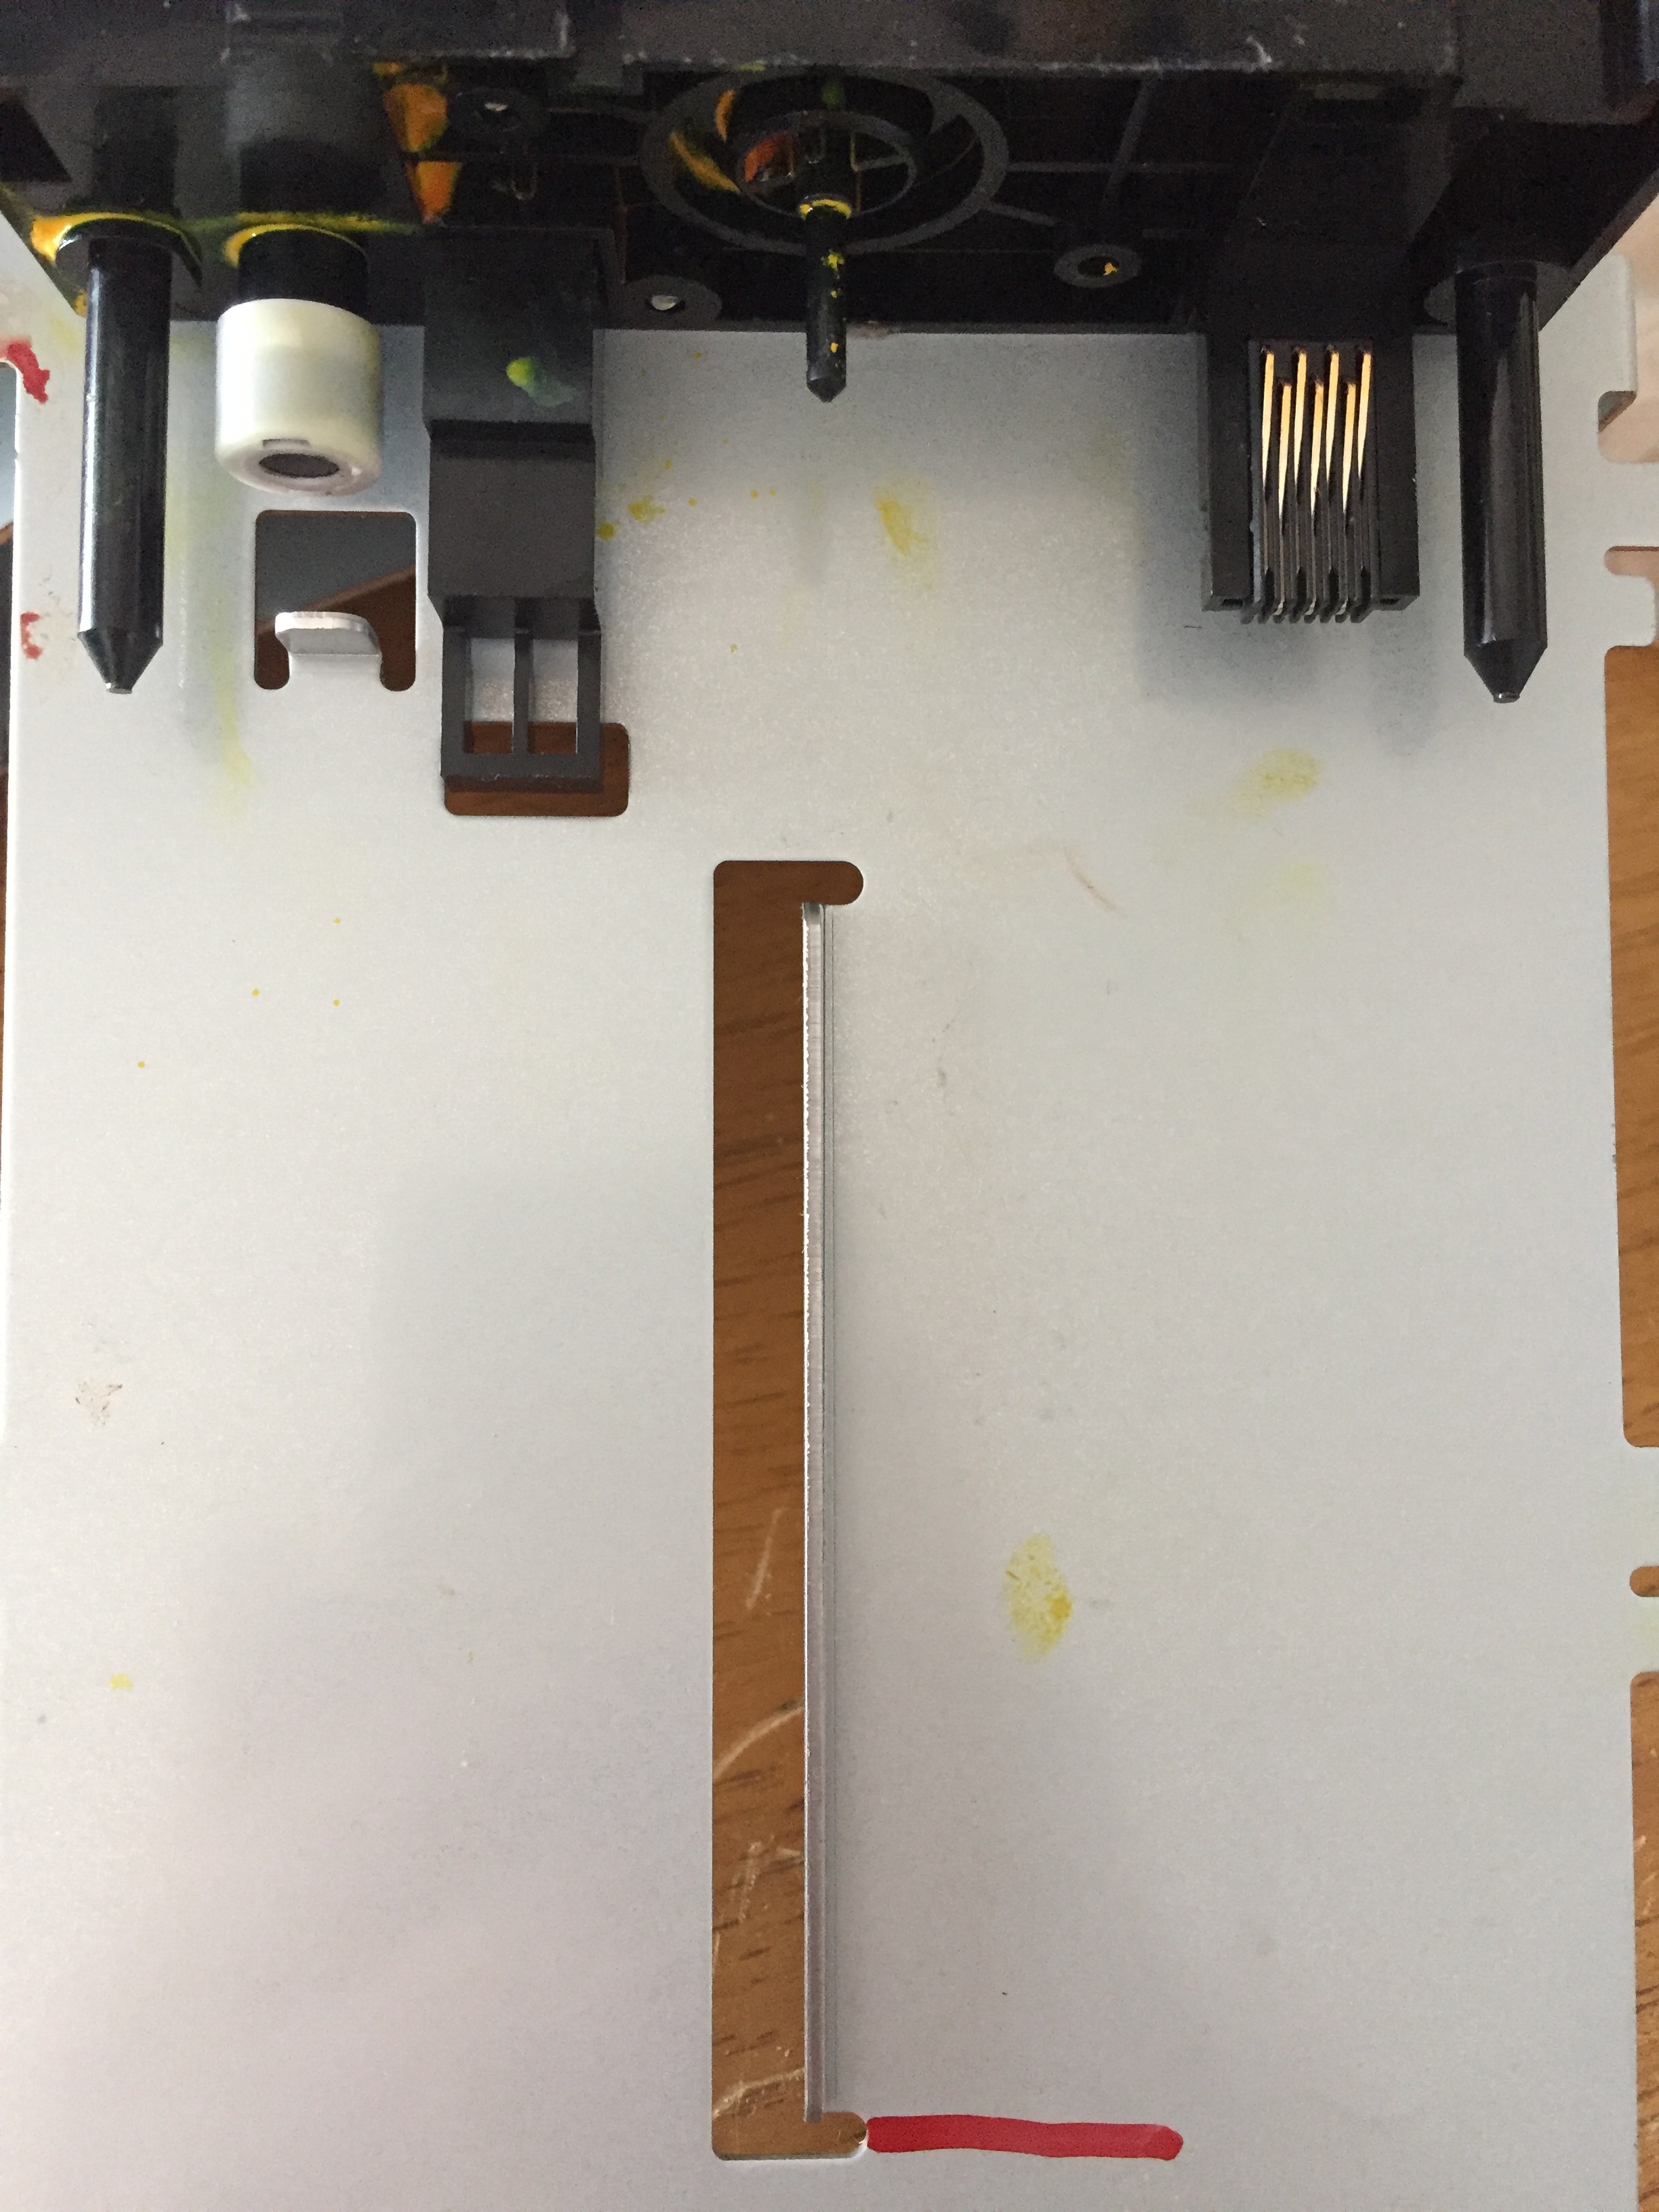
OK, I’ve removed the ink well & separated the Y channel. I can see the chip connector and it looks fine. Now, I should replace the part anyway, but from looking at Dana’s May 2015 photos, I can’t see how to remove the connector. Here are 2 pix of where I am.

Oops - here is the 2nd photo. A third frontal view of the Y area will be sent separately.
Third pic - front of Y channel area. Don’t see how to get the connector loose.
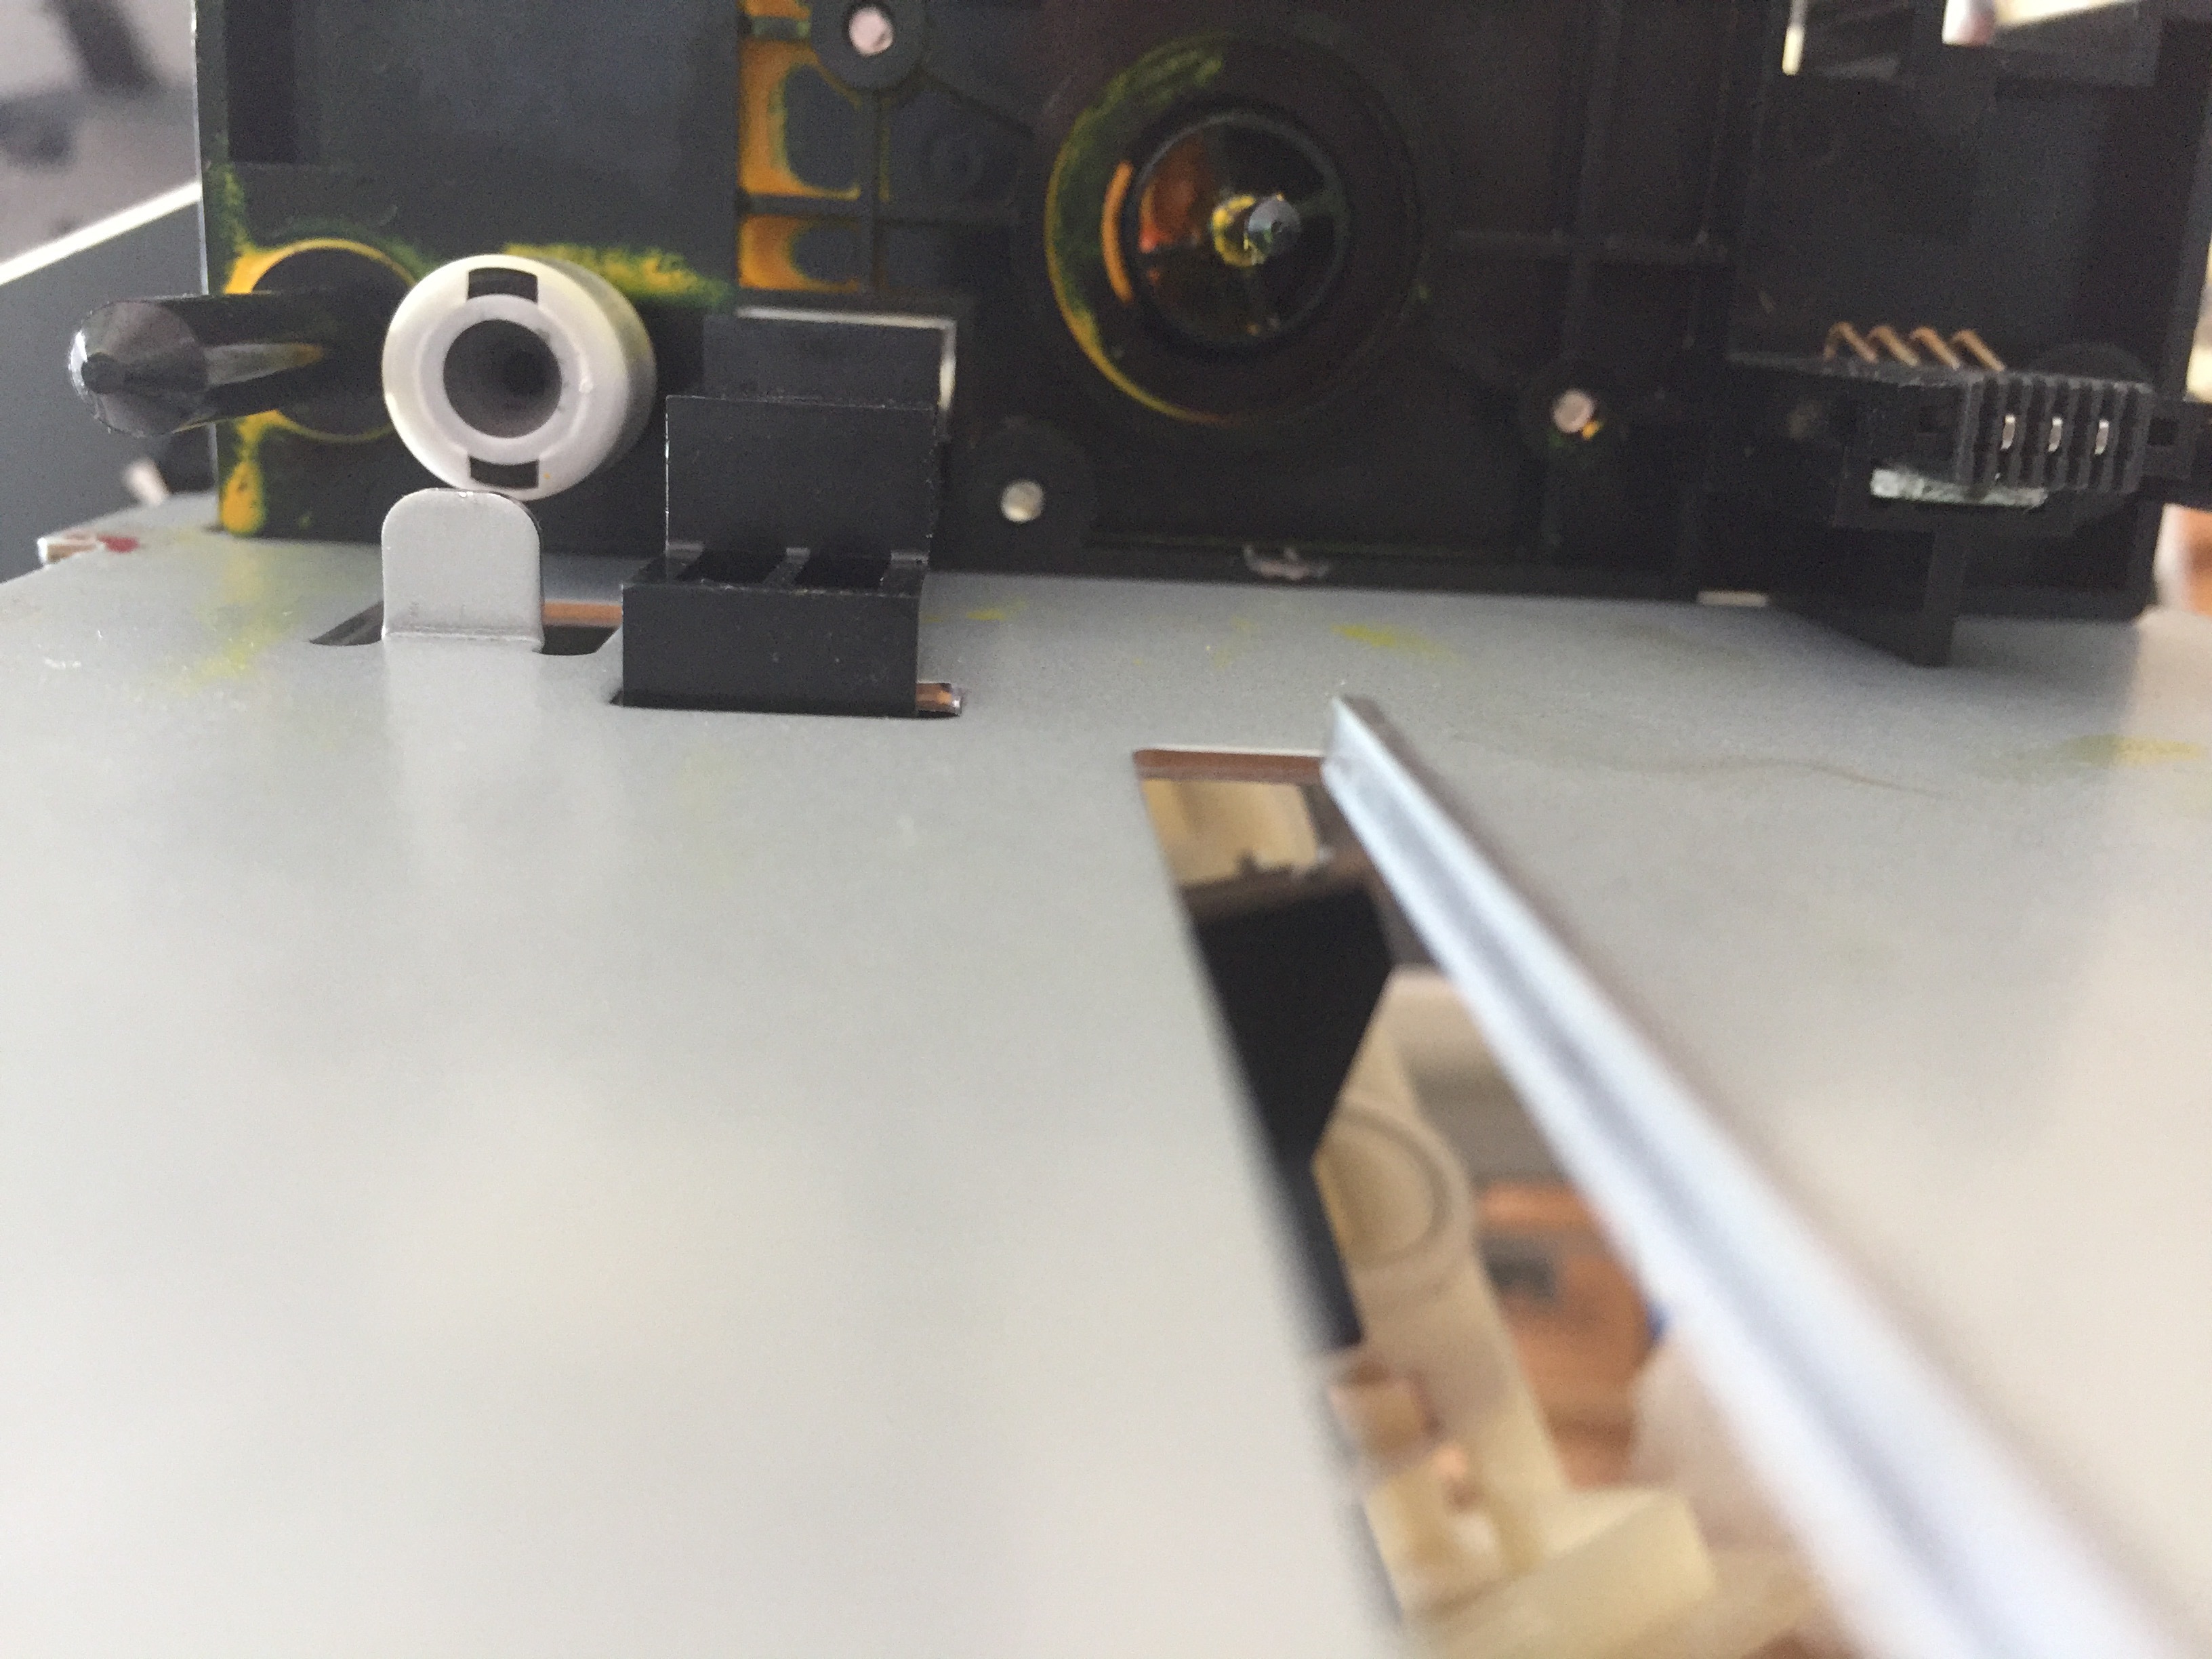
Dana’s photo of the crucial step hides what’s happening, unfortunately.
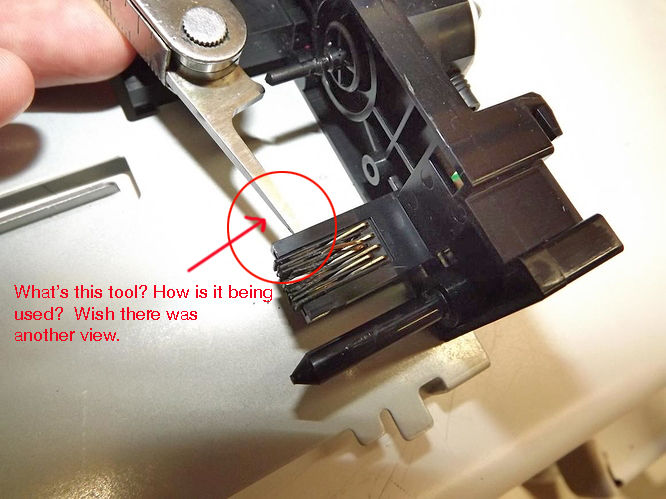
There are two locks that you need to push in (she is showing one side). Then you will be able to pull out the sensor.
best,
Walker
Yes, I can see that, but I think both sides need to be pushed at once, don’t they? That’s how it seems, looking at the new part.
Eugene M. Norris
Welborne Fine Art Images
876 Ponce de Leon Dr
St Petersburg, FL 33715-2026