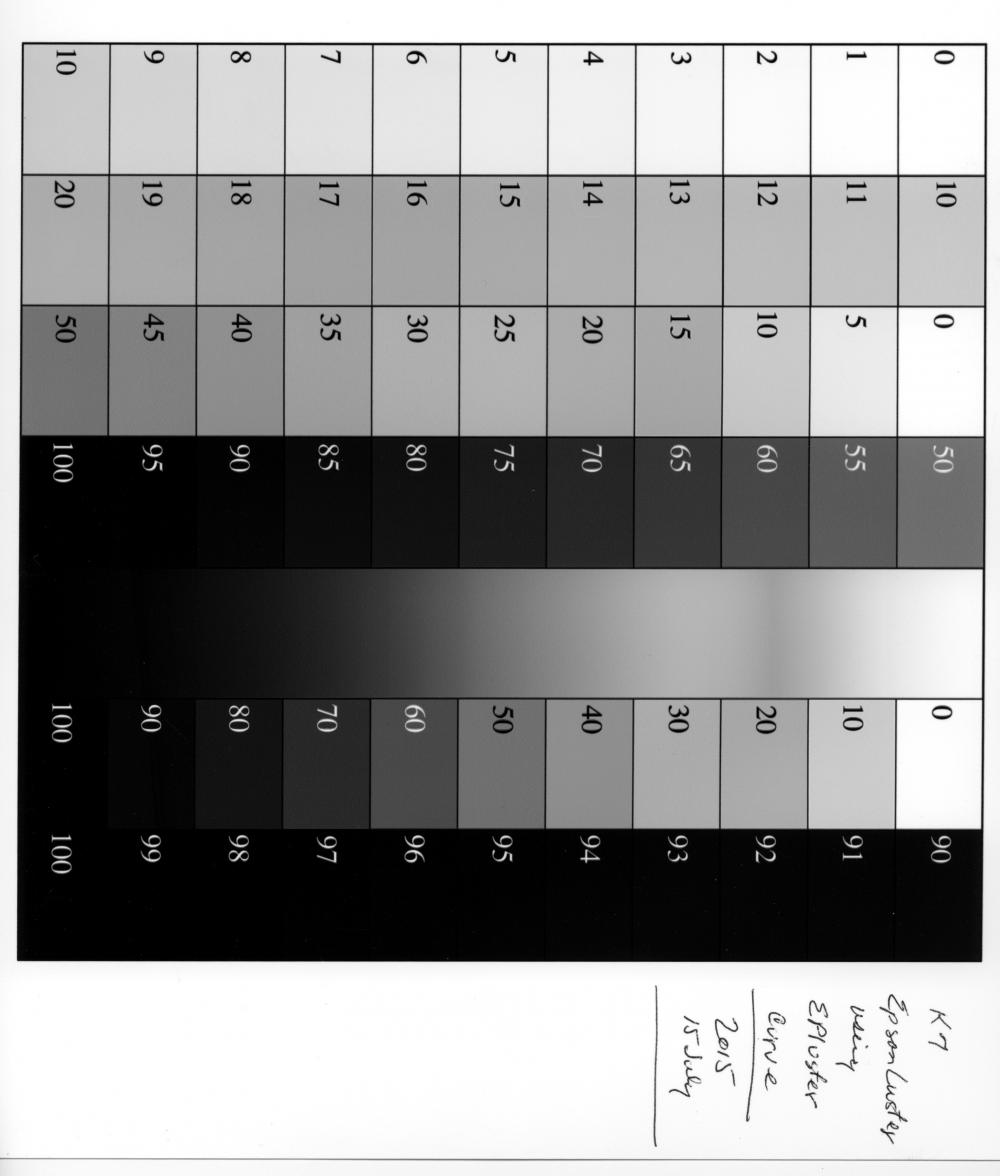
I installed a K7 ink set on and Epson 3800. I been having troubles printing and finally decided to run and 8bit step wedge through it. I came up with somewhat an astonishing result, an image of which is attached. The step wedge print was made using Epson Luster with the 3800-3880-MPS-EPluster.quad QTR curve. There is a tone reversal around the 20% K step. I have also included and image of a Nozzle check. I thought that I might have inks in the wrong position. I did try switching the #6 and #5 shades but got the same result.
Any thoughts?
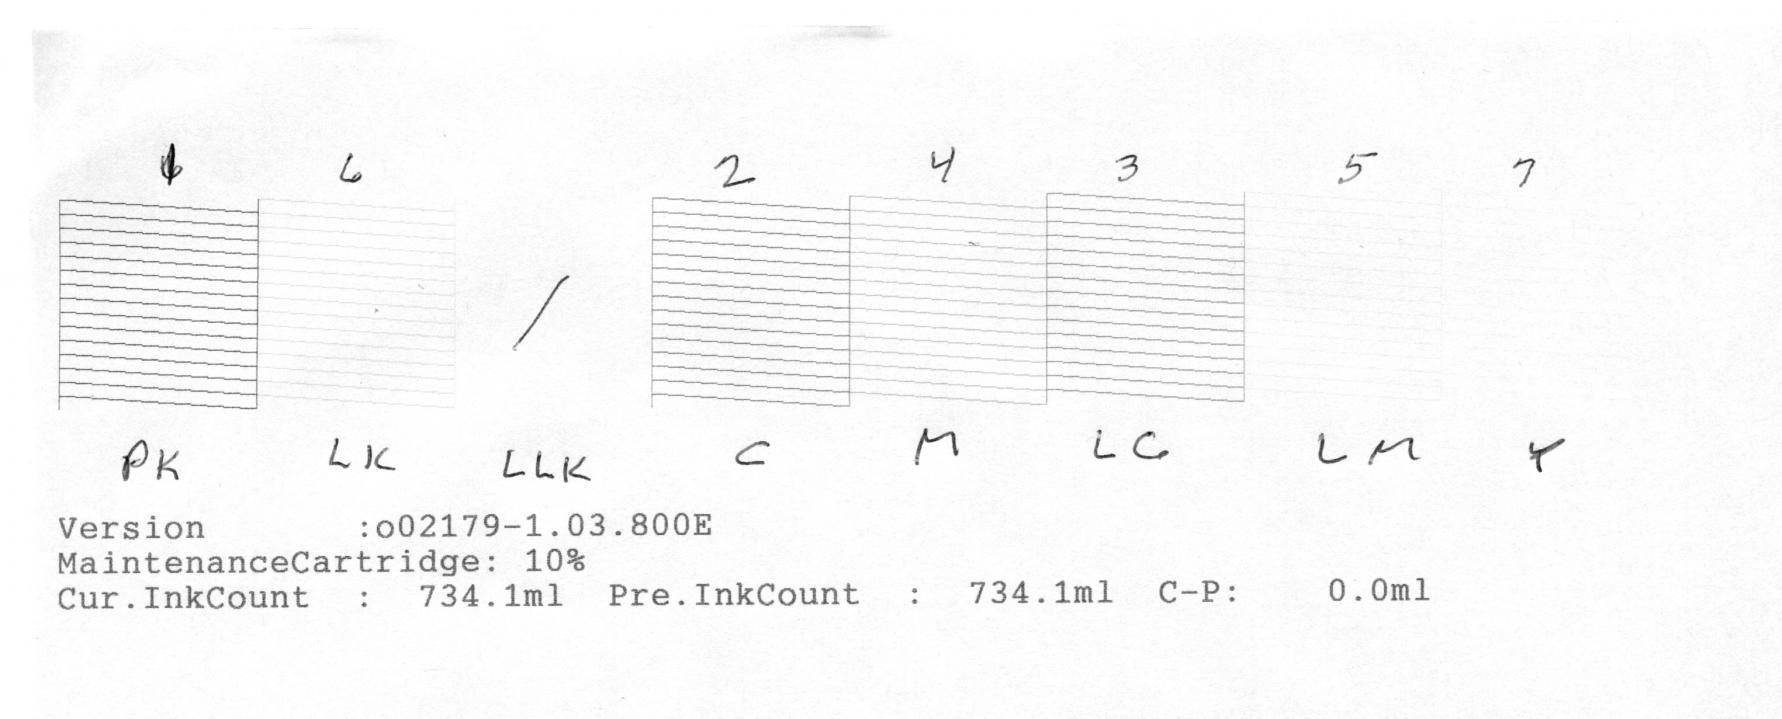
It appears from this Nozzle check that your shade 5 & 6 are switched. How many cleaning cycles did you run after switching these positions? It takes quit a bit of ink to move from cartridge, through the lines and into the head. If you didn’t get the ink to the head after switching carts you wouldn’t have seen a difference.
The easiest way to determine if your inks are in the correct positions to print an ink separation with QTR calibration mode. You can find instructions here:http://www.inkjetmall.com/tech/content.php?144-Print-Ink-Separation-Image-thru-QTR-Calibration-Mode
Kelly,
Thanks, I did forget to do any cleaning cycles after I switched the ink. My bad. I’ll check out the ink separation print as well. Thanks for your help.
Cheers,
John
Hi John~
As Kelly pointed out, your nozzle check shows the shades 5 + 6 are switched. If there’s a chance one or more carts were mis-filled, and now that you switched two carts (which the results of wouldn’t show up for several prints and//or cleaning cycles, due to the internal ink lines between carts and the head), you will need to check the individual inks.
You can check ink in carts by doing a Q-tip smear test, and check ink in the printer by printing an Ink Separation chart thru QTR calibration mode.
Instructions for printing the Ink Separation image can be found here: http://www.inkjetmall.com/tech/content.php?144-Print-Ink-Separation-Image-thru-QTR-Calibration-Mode
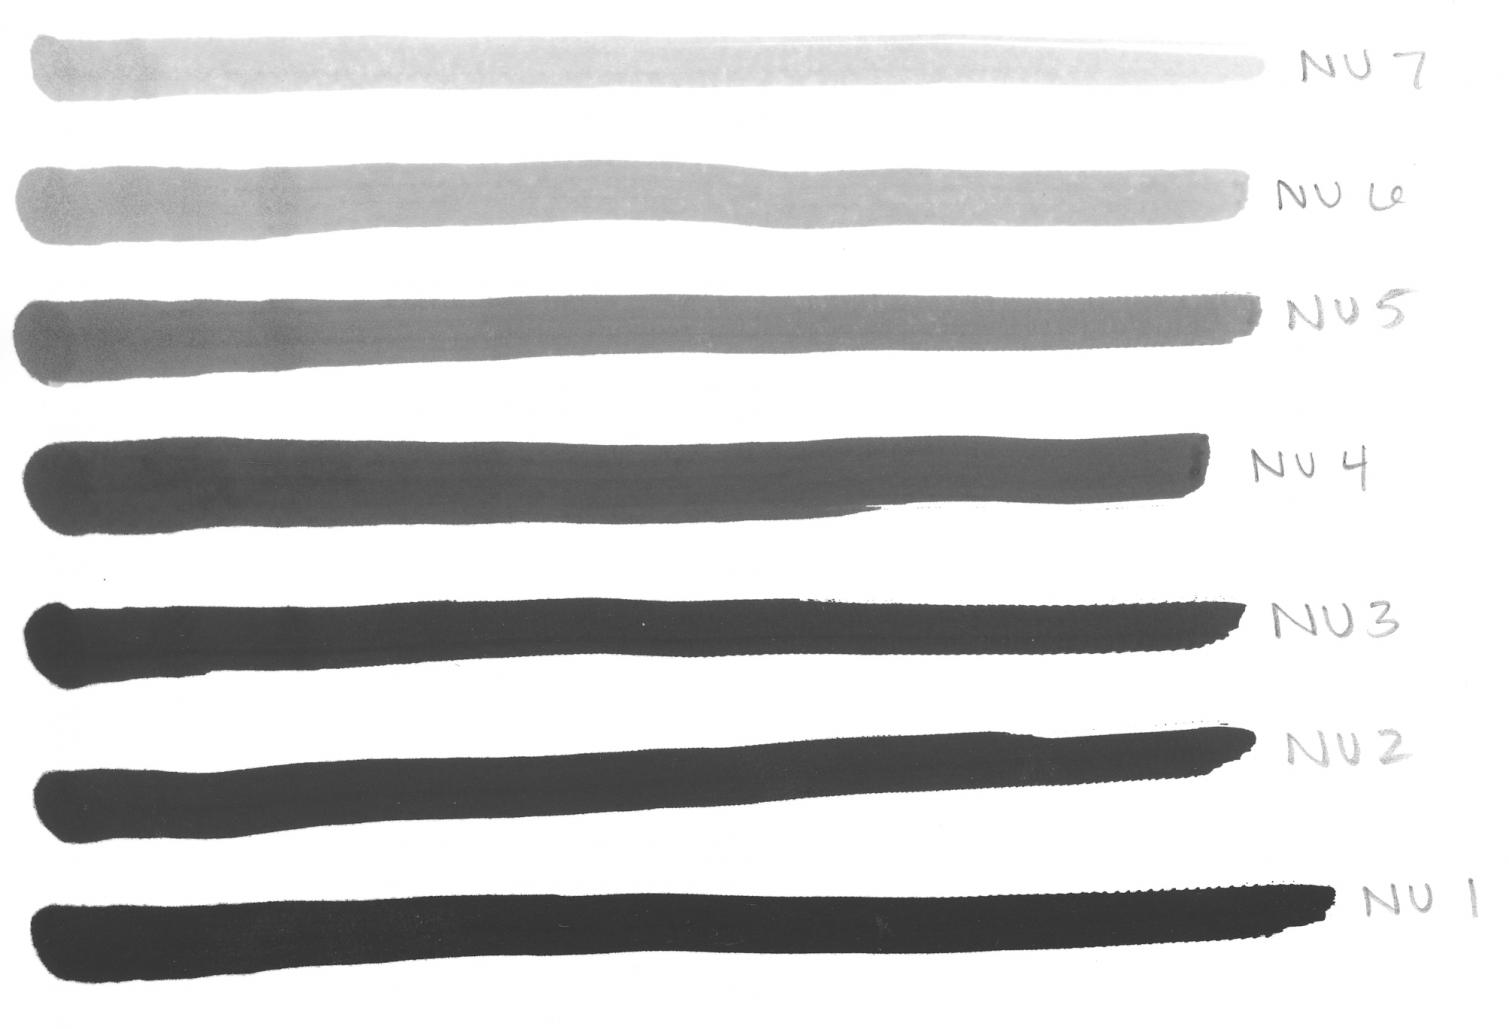
To test the ink in your carts, shake all the carts, then get 9 Q-tips and a sheet of paper (the best results will be obtained on the print side of a piece of inkjet paper). Place your carts in order from darkest to lightest (following the ink shade placement chart located in your cartridge instructions), and open the fill hole of the first cart. Put a Q-tip up to the fill hole, then tilt the cart so the Q-tip gets wet with ink, and lower the cart. Trying to apply even pressure and make a smooth mark, smear the wet Q-tip across the paper and label it with the cartridge color position. Repeat with other carts using fresh Q-tips, and labeling each mark as you go (and re-insert the cartridge fill hole plug). After all carts have been smear tested, dry the smear test and evaluate the results.
Let me know if you have questions, or what your results are, and we’ll go from there.
Thanks~ Dana