I am looking for suggestions from the IJM experts as well as the user community on how to clear a stubborn “clog”.
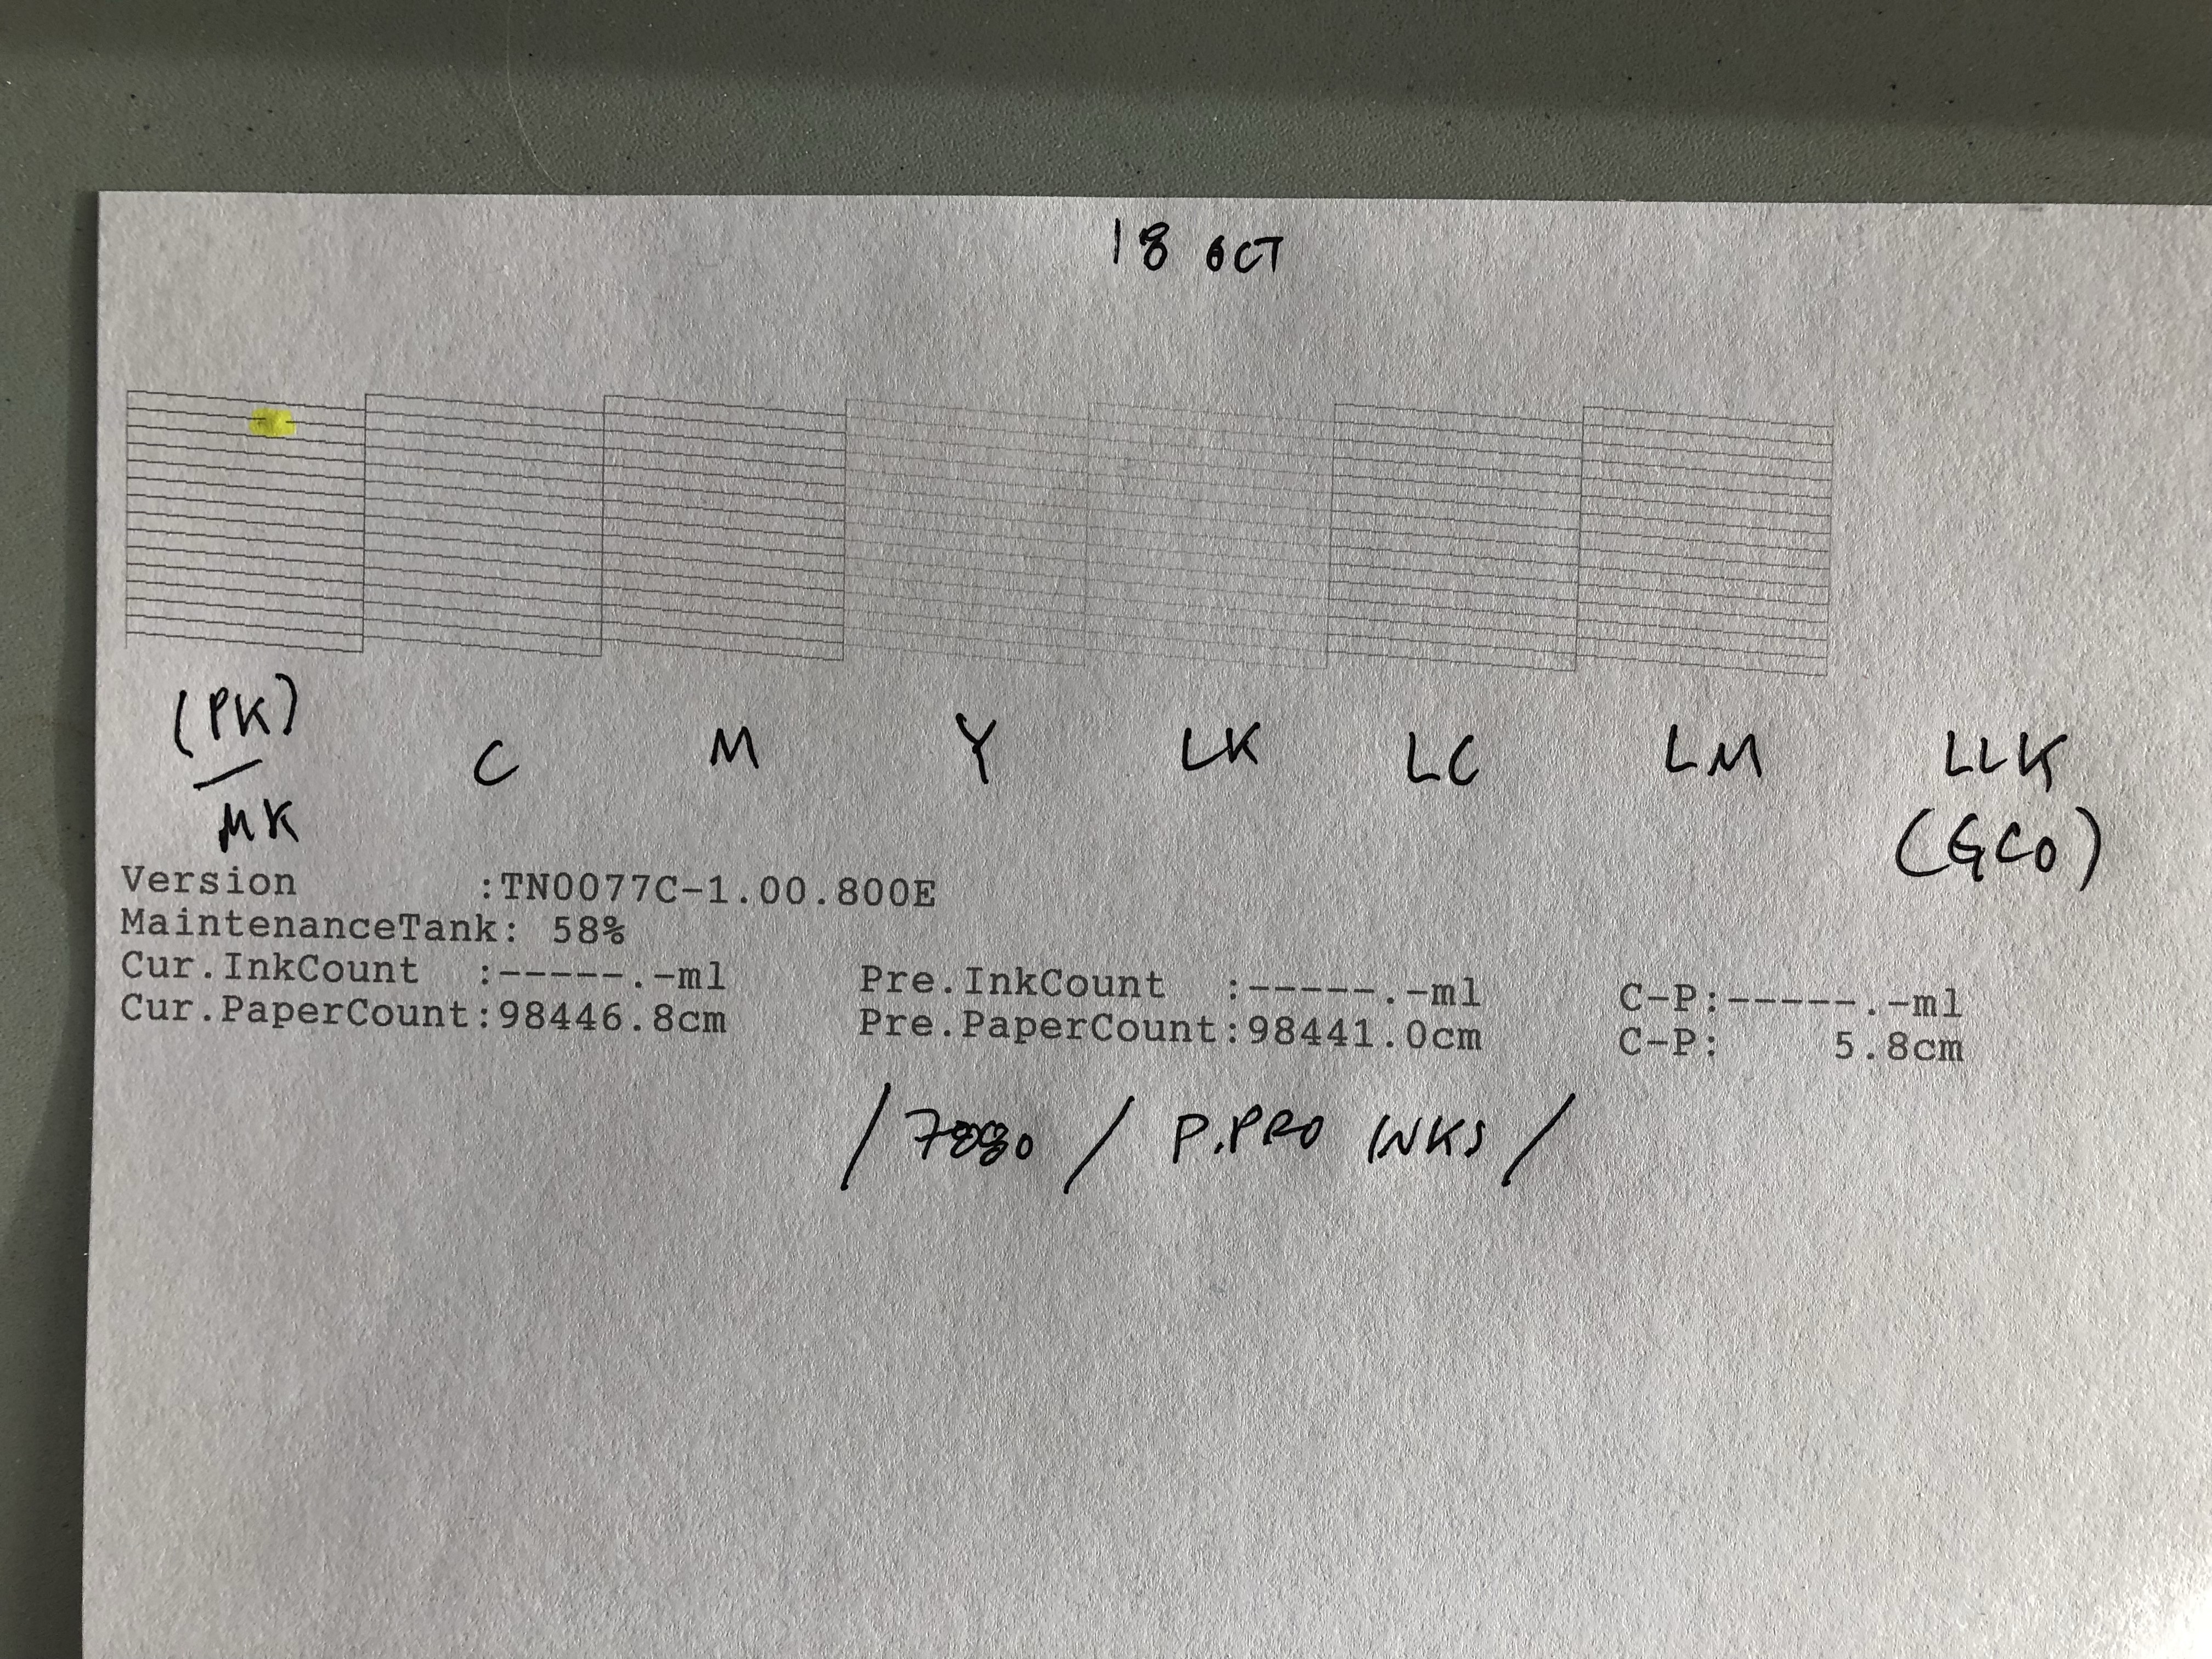
Below is a photo of the nozzle check. I have highlighted (in yellow) the problem spot. Printer is 7880 with Pro inks. I use the printer at least once per week, primarily printing negatives.

These are the things I have checked, cleaned, or done to get rid of this “clog”.
-
I run a nozzle check using the Epson printer utility every morning and / or afternoon before a print session. If I encounter a nozzle check problem I use the utility to do a cleaning.
-
I have cleaned the capping station, wiper blade, flush box, and print head per the IJM maintenance video (I do this quarterly).
-
I remove and agitate the ink carts, in a downward position, once per week.
-
I have shimmed loose fitting carts to provide a secure fit. And I have visually checked that there is no air in the ink lines; and checked that the carts are primed (and point them downward when agitating to insure prime is not lost).
-
Using the print tool and QTR in calibration mode I have printed the PK/MK ink flush pattern.
Other suggestions?
thanks!
MIchael
1 Like
Have you considered replacing the damper for that channel?
I cured multiple clogs by replacing all the dampers at one time and squirting a small amount of piezoflush into the printhead while the inklines were disconnected. Take care to not flood the printhead with piezoflush, it can short out the circuit board. A set of 10 new dampers on eBay is about $30.
Thank you for the suggestion.
Yes, I have read through the service manual a couple of times; and read several postings here. It seems people have a great deal of problems, especially with leaking after installing the new ones.
When you replaced the dampers did you also replace the o-ring, nuts, and L-tube? Did you hand tighten the nuts or use a wrench? Any tips or tricks on replacing the dampers would be greatly appreciated.
I have some followup questions regarding ink damper replacement on the Epson 7880.
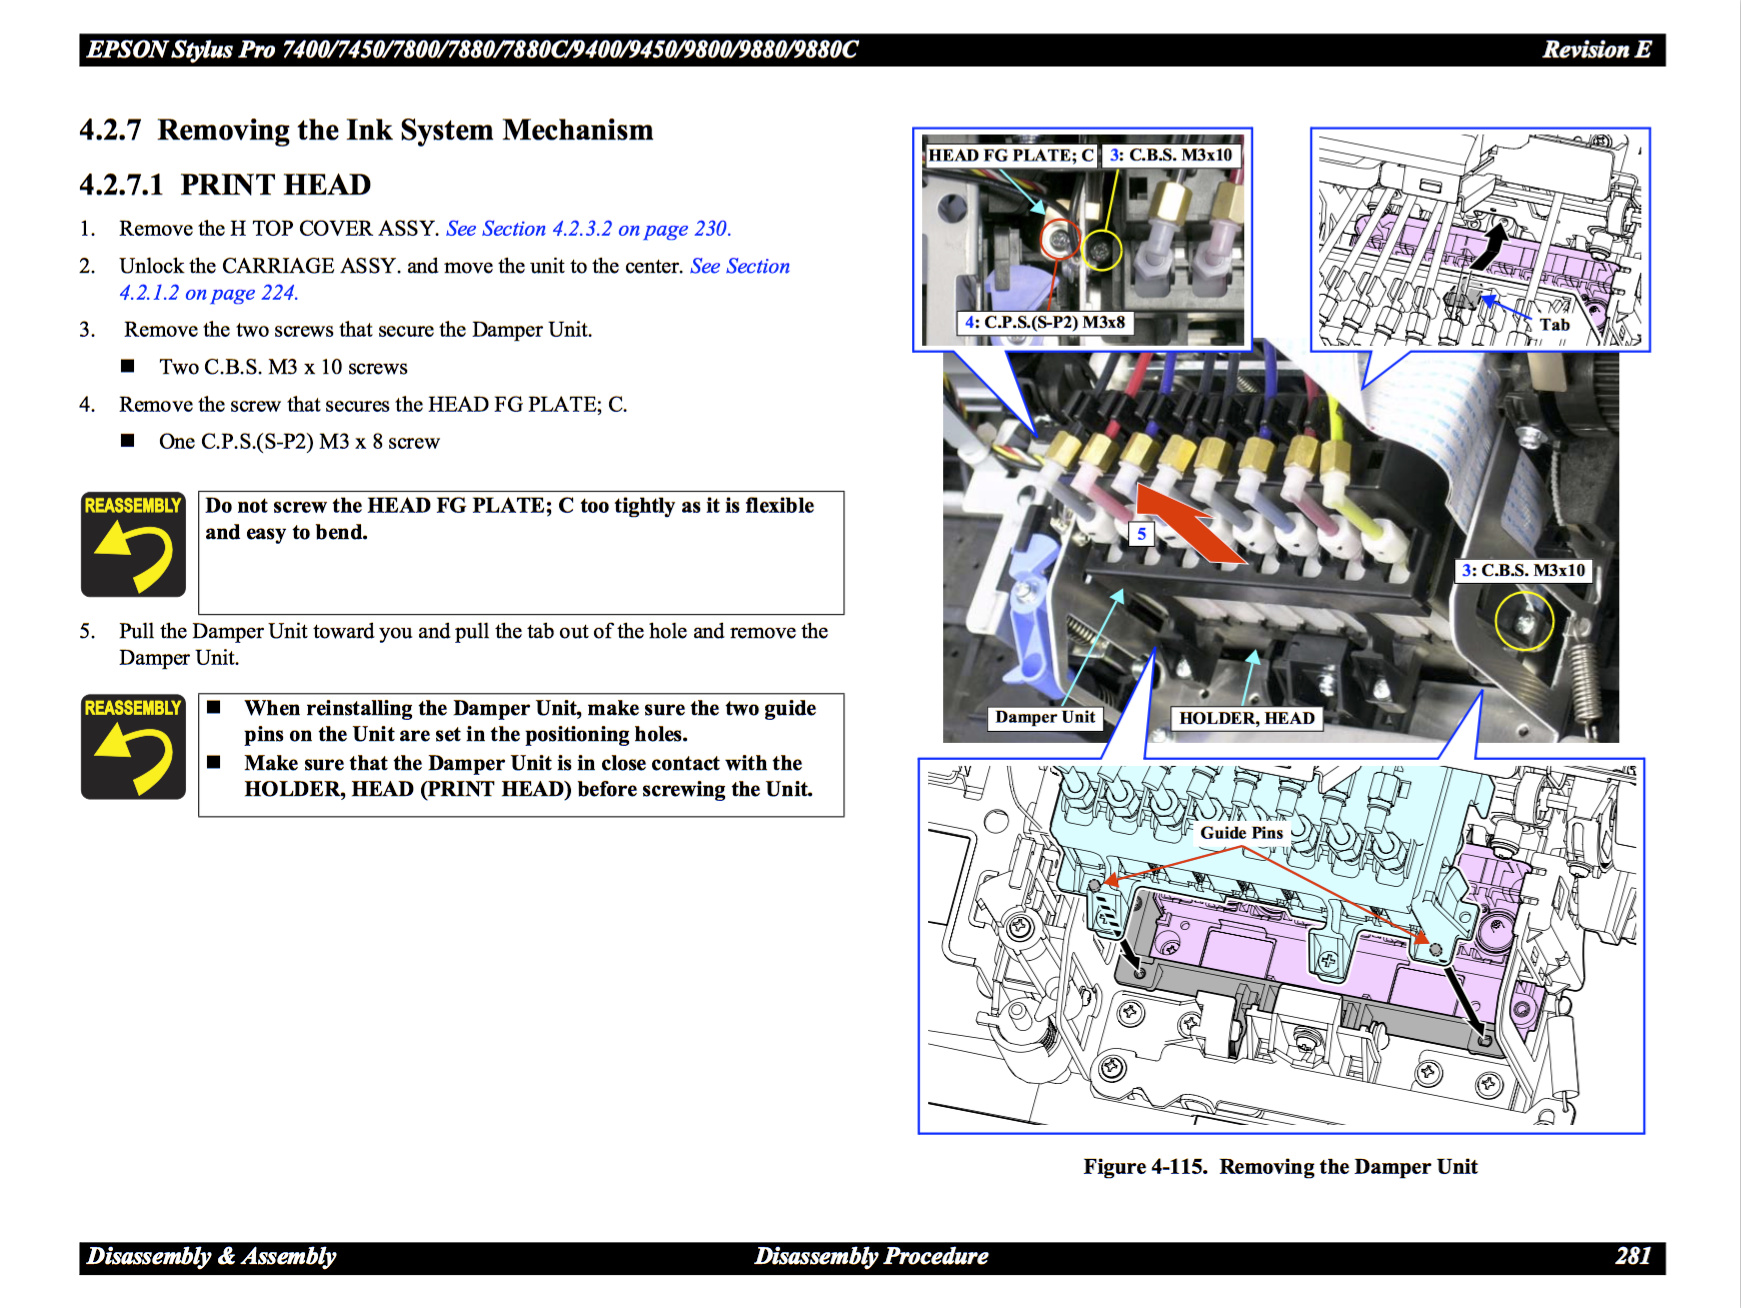
In the service manual on page 281 (shown below) it says, in item #4, “to remove the screw that secures the HEAD FG PLATE; C”. However in looking at photos of the ink damper holder, exploded views, and parts list, it seems that the HEAD FG PLATE; C screw only needs to be removed as part of the complete head assembly removal. Is this correct? And that item #3, two C.B.S. M3 x 10 screws are actually holding the damper in place.

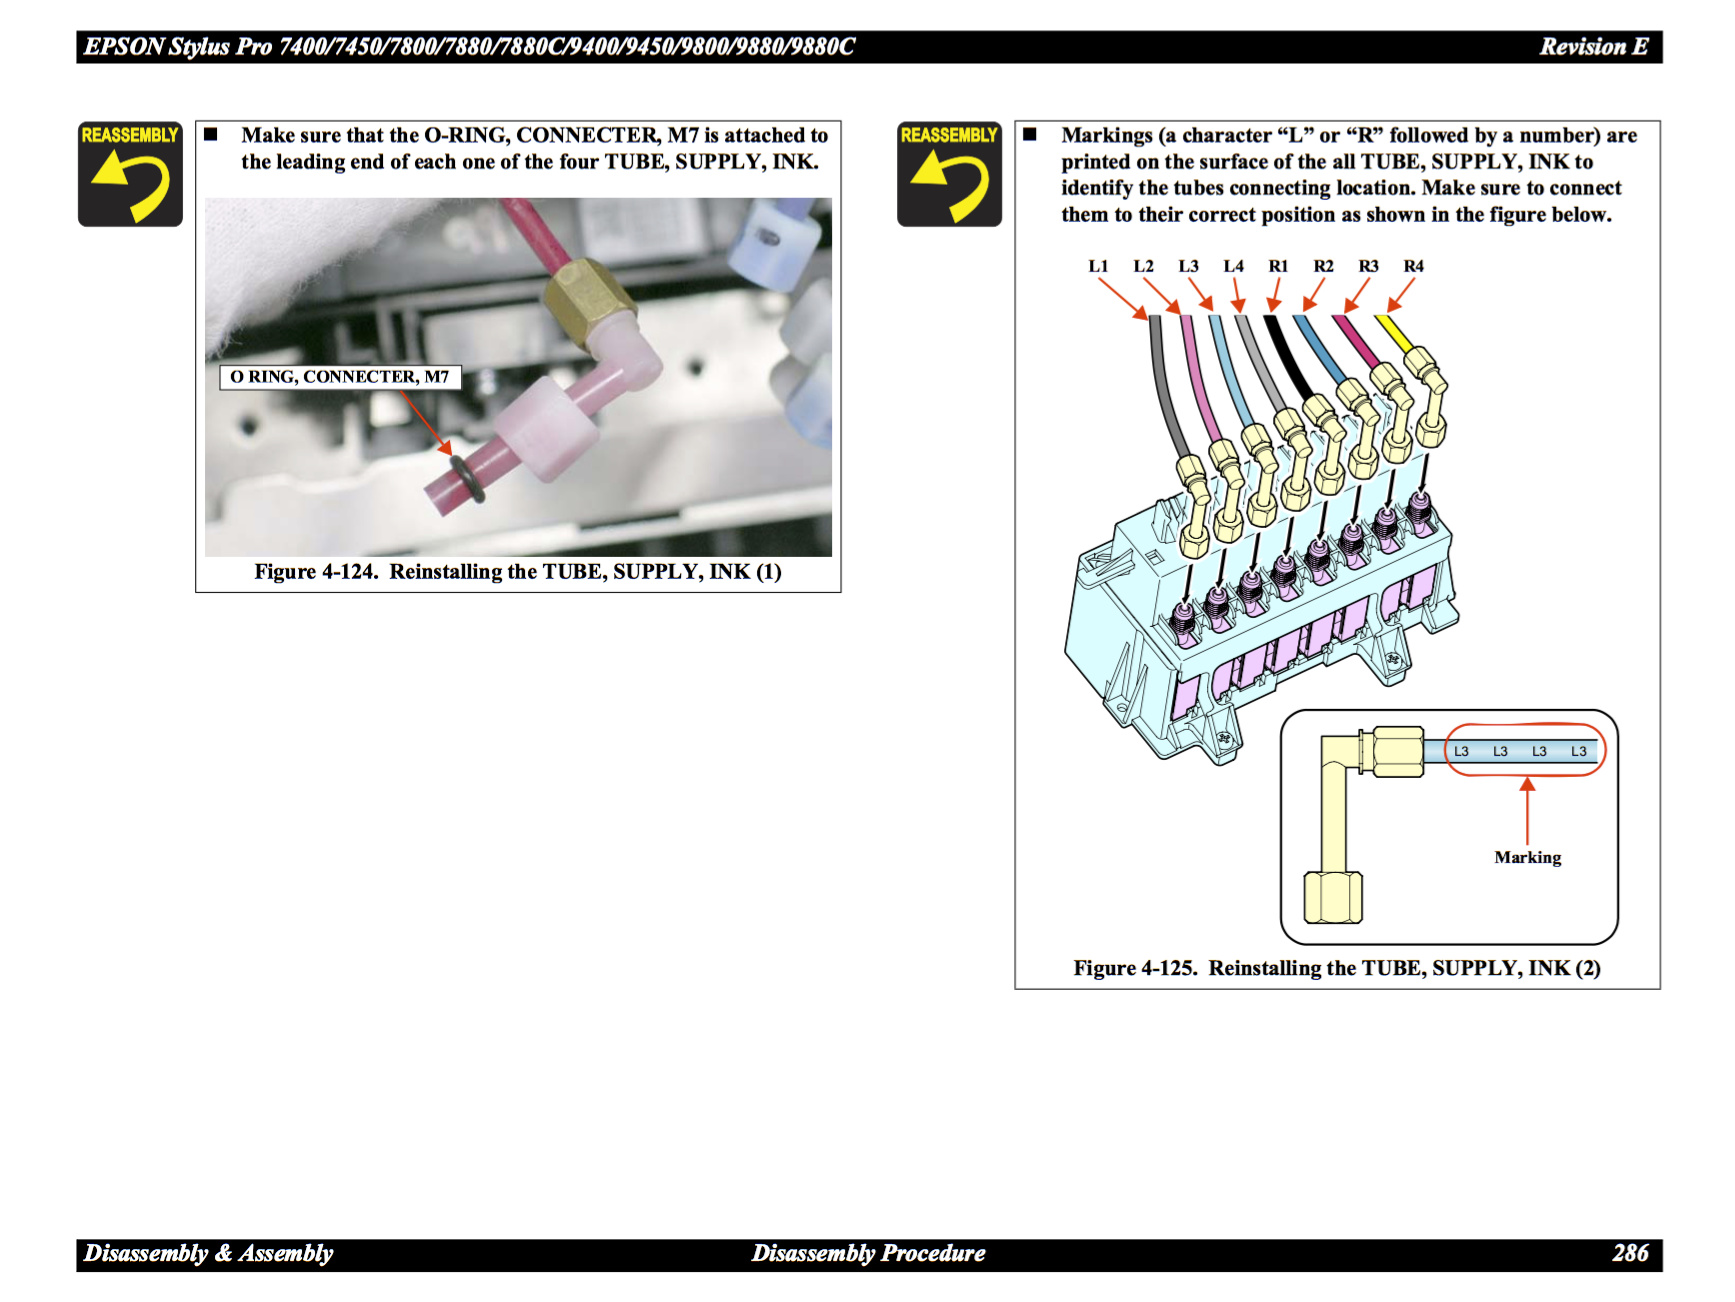
The second question I have is do I or should I also replace the L-tubes, o-rings, and nuts (nylon and brass) shown in Figure 4-124 below?

Is finger-tight sufficient to remove / re-attach the L-tubes to the new dampers? Or should I use an M7 wrench?
thanks!
Michael
I hope, by now, you’ve successfully replaced the dampers and solved your clog problem. But, in case you haven’t, yes, you should replace the “L” connectors and “O” rings at the same time.
These threaded connectors are delicate and the tiny “O” rings are easily deformed and will leak if not seated correctly. Hand tighten and then give just another 1/4 turn using the wrench to compress the “O” ring to properly seal the connection.
1 Like
Thanks for your additional suggestion!
I made sure the dampers I ordered included new o-rings and the M8 nut. I am not planning on replacing the L-tubes unless I run into a problem as I feel that removing as few as possible ink line connections will minimize potential leaks. I am waiting for a JIS thin shaft screwdriver I ordered before tackling this project.


