[QUOTE=KellyC;7590]Hi Phil,
The only thing left would be to try to save your image without an assigned profile, then open it in the QTRgui and print with the curve.[/QUOTE]
I will try that tonight with the 2880-MPS-EPexhibitFiber.quad curve.
[QUOTE=KellyC;7590]Hi Phil,
The only thing left would be to try to save your image without an assigned profile, then open it in the QTRgui and print with the curve.[/QUOTE]
I will try that tonight with the 2880-MPS-EPexhibitFiber.quad curve.
[QUOTE=jon;7591]Phil,
Epson Exhibition Fiber (and we know who makes this for Epson) is the paper that keeps coming up. Could you drop a few sheets of yours into the post to us or express it and put in a piece of cardboard so it does not bend. We will print on it with our 3880 setup as yours and see what our results are. If there are enough sheets in the package - and our results are poor - we can make you a custom for it. It’s worth a try. And Ultra is the film you really want. Unless you have a hardware issue - the over inking on both the EEF and film can only be media related, workflow related, or software corruption (so take Kelly’s advise and reinstall!).
Best,
Jon[/QUOTE]
In the UK EEF is known as Traditional Photo Paper. I have a few sheet left in A4, som eof which I’ll use later for more test prints. I also have some A3+ boxes of EEF which I sourced online. I could cut some of that down to size and try it too. For what it’s worth, I also tried other non-matte papers and got pretty much the same results. I will try out the suggestions with no color profile and/or Adobe RBG color profile and, if still no improvement, will send my remaining sheets to you. Thanks for the offer to create a custom curve - much appreciated. I was listening to an interesting podcast on Breathing Color’s website the other night, some I’m even more keen to get this resolved now! http://www.breathingcolor.com/blog/third-party-ink/
You mentioned Ultra film - not with you there. What are referring to?
Regards,
Phil.
I did send you those files on April 14th to the email address you provided but I have now resent.
[QUOTE=Dana-IJM;7606]One more thing- can you print an Ink Separation image on Hahnemuhle Photo Rag paper, then dry the print with a hair dryer for about a minute, or air dry overnight, then measure the 60% patch of each ink shade, and give me your individual ink shade measurements, to review to our measurements?
Thanks~ Dana[/QUOTE]
I will do this tonight before I switch to Photo Black to re-print the waterfall image with no color profile.
[QUOTE=Dana-IJM;7617]Thanks for sending the images Phil. I opened your waterfall image, and noticed it has an embedded profile of sRGB, which will not produce accurate results with QuadTone RIP and Piezography. Please set up your Photoshop Color Settings and use Gamma 2.2 or Adobe RGB (1998) workflow as per our manual, and let me know how this effects your output.
Also, the 21 step strip doesn’t have an embedded profile, so I’d like you to try printing the 21 step strip image attached, which does have Gray Gamma 2.2 embedded, and let me know how this effects your output/linearization.
[/QUOTE]
I should not have sRGB set as my working Profile in Photoshop. I originally had ProPhotoRGB (as I roundtrip between Lightroom and Photoshop) and Gamma 2.2 but those settings have been lost. I do recall some time back that I had some real issues with Photoshop and had to reset all my configurations back to the defaults to resolve it. I completely forget to reconfigure the color settings so all my recent tiffs have been saved with sRGB. Annoying!
I’ll print the strip later too.
Thank you all for your ongoing efforts with this - much appreciated!
Hi Phil~
I believe Jon was thinking of another customer who is getting poor output with Exhibition Fiber, and is also using our digital negative system. Pictorico film doesn’t apply to your setup.
Please make all test prints on Exhibition Fiber (AKA Traditional Photo Paper) using the 3800-MPS-EPexFiber curve I sent, and not the 2880 one. I feel the 3800/3880 curves have better gloss compatibility, and 2880 curves have a bit too much ink for glossy printing.
Yes, I’ve had Photoshop reset my settings before… very annoying! Please check this. I printed your image with sRGB embedded and got darker output than the one I converted to Adobe RGB when opening (then saved as a new image to have two with different embedded profiles to test), though the darkness was mainly in the shadow range, and not highlights like you’re experiencing.
Knowing your individual ink shade measurements on Photo Rag will be helpful.
Keep us posted!!
Thanks~ Dana 
[QUOTE=mpan66;7622]I should not have sRGB set as my working Profile in Photoshop. I originally had ProPhotoRGB (as I roundtrip between Lightroom and Photoshop) and Gamma 2.2 but those settings have been lost. I do recall some time back that I had some real issues with Photoshop and had to reset all my configurations back to the defaults to resolve it. I completely forget to reconfigure the color settings so all my recent tiffs have been saved with sRGB. Annoying!
I’ll print the strip later too.[/QUOTE]
Please set your Lightroom Preferences to output to Adobe RGB 1998. ProPhoto has a Gamma of 1.0 and in any event is a color space that can not be printed. AdobeRGB 1998 can barely. ProPhoto is for the future of printing to displays rather than printing to paper.
I have four A4 sheets ready to go. I’ll post them later today. If you need more than 4, yell now.
[QUOTE=Dana-IJM;7625]Hi Phil~
Please make all test prints on Exhibition Fiber (AKA Traditional Photo Paper) using the 3800-MPS-EPexFiber curve I sent, and not the 2880 one. I feel the 3800/3880 curves have better gloss compatibility, and 2880 curves have a bit too much ink for glossy printing.
Knowing your individual ink shade measurements on Photo Rag will be helpful.
[/QUOTE]
I reprinted using a version with no profile and one with embedded AdobeRGB - they both suck. Exactly the same. If you got different results, it makes me wonder if I’m doing something wrong but I really can’t think what.
Ink shade measurements (printed on Photo Rag with matte settings) - LAB /RGB:
Ink 1 black: 17.2, 1.6, 1.7 / 45, 42, 40
Ink 2 Cyan: 26.3, 2.4, 5.5 / 68, 61, 54
Ink 3 magenta: 45.8, 2.6, 5.1 / 115, 107, 100
Ink 4 Yellow: 87.7, -1.9, 10.3 / 223, 221, 199
Ink 5 Light Cyan: 46.8, 1.6, 4.5 / 116, 110, 104
Ink 6 Light Magenta: 62.3, 2.1, 1.7 / 154, 150, 148
Ink 7 Light Black: 80.9, 0.9, 1.7 / 203, 201, 198
Regards,
Phil
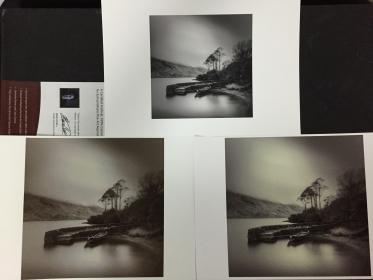
Last night I decided to print another image. This one is lighter and I saved it as a tif with an embedded AdobeRGB profile. I’ve attached a photo - the actual prints don’t look grainy like they do in the photo. The top one is the image printed on my 3880. The bottom left is printed with my R3000 on Epson Traditional Photo Paper (same as EFF) printed with QTR (using the 3800 curve) and the bottom right is printed with QTR on Photo Rag.
The darkening is far less severe, there there is some horrible banding and clearly some yellow still in the system. Would the banding be because of improved tonal separation in printing revealing flaws in the image? Image attached as a jpeg.
Hi Phil~
Thanks for providing Lab values for your individual ink shades on Photo Rag paper. It’s a bit confusing how you have the inks listed, for example ink 4 isn’t yellow (yellow should be shade 7 ink)… I assume you just listed them in the wrong order, as your printed ink separation chart looks normal (other than yellow staining, which is still very obvious in your latest prints). We compared your measurement to our known good, and found your shade 5 is significantly darker than it should be (by about 9 points, which is huge). Also, your measurements for shades 3 + 4 are nearly identical (we’re focusing on the L value), like those two carts may have been filled with the other inks (?), and shade 6 is about 3 points darker than our numbers. Your inks shades 1, 2 and 7 are the only ones that closely match our numbers. Do you have any ink remaining in your bottles? If so, please supply us with lot#s on your ink bottles. Did you shake the ink bottles before filling and refilling carts? Since you’ve done two Initial Fill cycles, I assume you’ve refilled the carts, correct?
My prints of your waterfall image look as I’d expect based on the density values of the image, and I printed with the same 3800-MPS-EPexFiber curve that I sent you.
Please let me know so we can move forward and hopefully get you happily printing~ Dana
When you had a head clog, what channel(s) was it in?
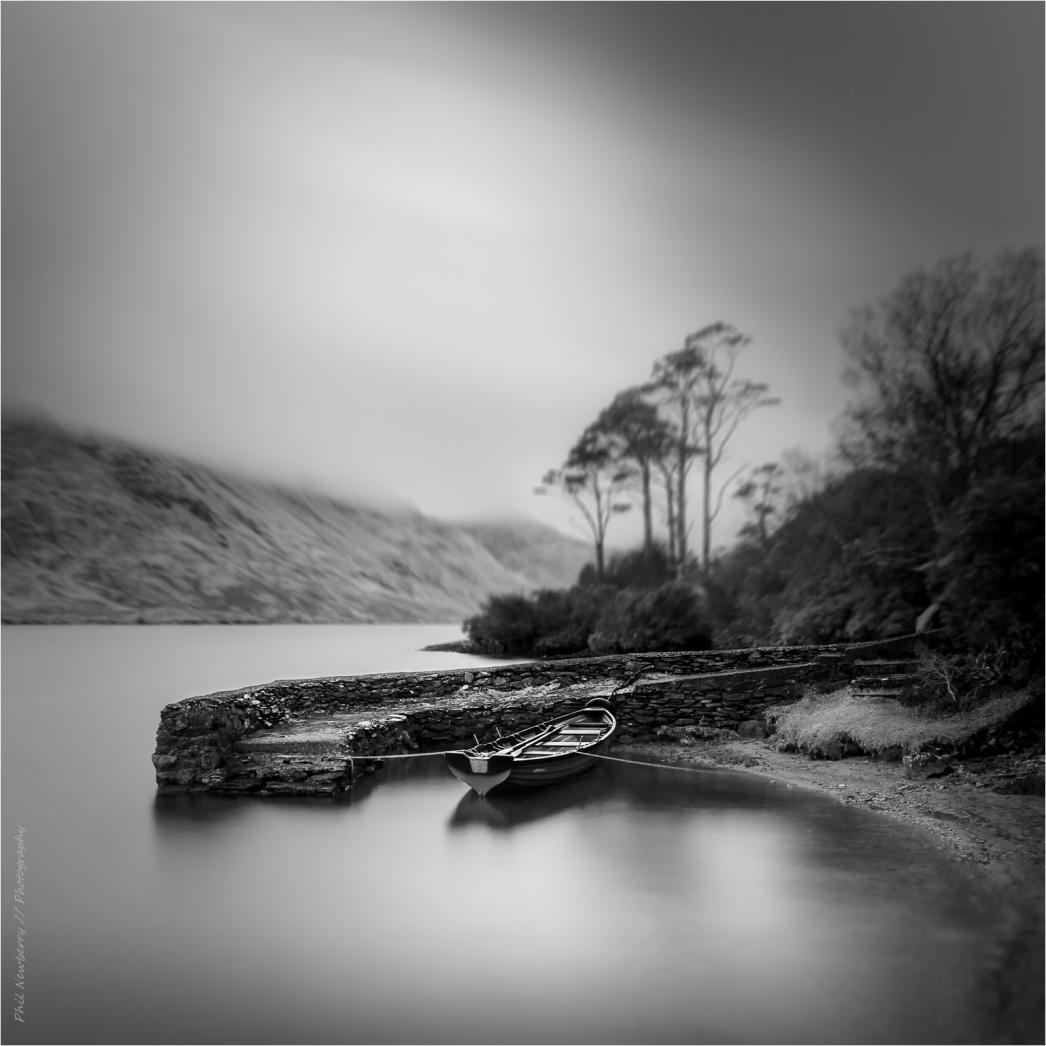
Also, in your new image above, I clearly see vertical lines (especially in the sky)- is that just the jpeg, or also in the TIF print file? Piezography will print any artifacts like this, so proper imaging is important for the best print results.
~Dana
Hi Dana,
I measured and listed the values exactly as they were listed in the Ink Pattern Page using Calibration Mode.
I was methodical in my approach to filling the carts and I thought we’d ruled out the possibility of incorrectly filled carts with the smear tests?
Yes, I have ink remaining in the bottles and yes I shook the bottles, just as I did last night when I refilled the PK cartridge in order to print another set of test prints. And yes, I’ve refilled the carts, especially after wasting nearly the capacity of a cartridge purging to remove the yellow (which did seem to result in a pure grey test print but the yellow has somehow returned).
It’s late here in the UK now so I’ll supply the lot numbers tomorrow.
Many thanks, once again!
Regards,
Phil.
Phil,
You are having a devil of a time with this. I wish you were close enough to come and take a workshop. How far are you outside of London? I will be there in July. I think that we will have a car for a few days.
Your still having yellow staining is indicative of your printer’s damper filter still holding the Epson Yellow ink pigment. A good flush might solve that. Eventually it will all come out. But, it sounds to me like either a lot of yellow ink has been passed through it or was allowed to sit without printing for long periods. If the latter is true, you may also have yellow pigment lining the ink lines. PiezoFlush would scoot that all out.
I think that your Lab values may indicate quite a bit tomorrow. If you are emailing them to tech support also CC me.
I really want to get this solved for you. Your work deserves printing and you deserve a more pleasant experience.
Best,
Jon
Hi Jon,
I’m not far from London. I live 5 minutes from Gatwick Airport. It’s about 30-40 minutes on the train. When were you planning to come in July? I’m sure we could sort something out - that would be great!
I have some fluid called Magic Bullet that I used when I had severely block black ink heads. Will this suffice or is PiezoFlush something different? I’ll have a read around cleaning the damper filters. It’s not something I’ve done before.
Lab values are already posted (back on page 5).
Thanks Jon - I really appreciate that and the help you and the team are giving me.
Regards,
Phil.
It was the Matt Black head.
[QUOTE=Dana-IJM;7652]Hi Phil~
Do you have any ink remaining in your bottles? If so, please supply us with lot#s on your ink bottles. [/QUOTE]
Here are the lot numbers:
Matte Black: 131223
Photo Black: 140725
Magenta: 131202/1010203
L. Magenta: 130625
Cyan: 140721
L. Cyan: 131227/1010410
L. Black: 131223
Yellow: 131223
Regards,
Phil.
PiezoFlush is our own formula. Not certain what will happen by using Magic Bullet.
[QUOTE=mpan66;7672]Hi Jon,
I have some fluid called Magic Bullet that I used when I had severely block black ink heads. Will this suffice or is PiezoFlush something different? I’ll have a read around cleaning the damper filters. It’s not something I’ve done before.
Phil.[/QUOTE]