Simple QTRGui question

If I load an image into QTRGui and get the warning “Image does not fit” then what happens if I print in spite of the warning? Will the image be scaled to fit, or will the image be truncated?

I know that I could find out myself by printing, but I don’t want to waste the ink!

The situation arises because I’m printing digital negatives for contact printing and I want my brush marks to show. In photoshop, I scale my image to print size, say 6" x 9". Since I’m printing on letter paper, I make the canvas size 8.5" x 11" with a canvas extension color of black so that when the image is inverted, the border will be clear. Since you can’t print all the way to the edge of the paper, QTRGui complains that the image does not fit:
.image%20does%20not%20fit

For QTRGui the page dimensions and printable areas are defined in the PPD files in C:\Program Files (x86)\QuadToneRIP\PPD . I don’t claim to fully understand these files, perhaps someone understands them better than I, although I’ve managed to understand them enough to hack them to add my own custom sizes. For reasons that I don’t understand, the units in use in this file are 1/72". Perhaps related to the 720dpi that QTR prefers. The margins are specified as 9 units, or 1/8". I seem to recall reading Roy Harrington say this himself somewhere.

p.s. While QTRGui seems to enforce these margins based on the PPD, the printer also enforces some kind of margin. If you lie to QTRGui about the page length, and specify a longer page than you actually have in an attempt to print right to the trailing edge, the printer won’t do it. It will stop a few mm short. I think the QTRGui margin of 1/8" is a bit larger than what the printer enforces.

1 Like

I’ll take a guess at this John. I use a Mac and Print-Tool, but I have QTRgui also via Crossover, though I don’t actually print with it. It’s more to be able to follow a few friends who I help and who are using Windows. On the Mac, I create custom page sizes with all margins set to zero. I expand the canvas size to the full sheet size and fill with black just like you did. It prints the image with clear edges. I don’t see any option to set margins on GTRgui so I’m guessing it uses Epson defined defaults, even with custom sizes, but I suspect this won’t matter. Just do it!

1 Like

I don’t let myself print with this warning still showing, although I’ve got a vague recollection that I may have done it once by accident. If that recollection is accurate, I think it may have truncated, that’s assuming it actually printed. Try an image on plain paper at 720 and cancel it soon after it starts, and that should answer your question without much waste.

QTRGui insists on a margin of 1/8" on each edge. It can be hard to specify the margins manually for an image that exactly fills the entire printable area, because there aren’t enough decimal points to do so with precision. The solution is to use the option to centre the image, rather than manual left and top margins.

Hi Brian,
I determined that the image is truncated, not scaled (see below). In the long run this knowledge will save a lot of black ink, and it doesn’t require knowing what margins QTRGui or the printer insist on (by the way, I looked for that information and couldn’t find it anywhere!).

I created an 8.5 x 11 image, filled it entirely with black and drew a gray interior rectangle 7.5" x 10" (see attachment). I printed with a piezoDN curve. Since PiezoDN inverts the image, it printed all white with an interior gray rectangle. The printed rectangle measured exactly 7.5 x 10, so there was no scaling.
test%20black%20border

John,

What you posted doesn’t show anything being truncated, but you also said it printed gray line on white (clear?) background, so … is this what you sent, rather than the output? If so, is it the bottom line that was truncated?

I think if you check the margins on a predefined paper size in the Epson driver you will find for most desktop printers that they are 0.12 for top, left, and right, and 0.56 for the bottom. That may be what you are stuck with here since QTRgui doesn’t seem to have the option to for the user to define that parameter.

If that is the case, then what you need to do to avoid getting truncated is to shift the image position up by 0.06 to clear the bottom margin.

Keith

Keith,
The image I posted is the original image – the one I sent to QTRGui. The canvas is full sheet size (8.5 x 11) and is filled entirely with black except for an inscribed 7.5 x 10 gray rectangle, representing the boundary of the actual image (if there was one). The printed result (on paper) is paper white except for the gray rectangle, which retains its original dimensions 7.5 x 10, showing that the image was truncated, not scaled.

When printing on Pictorico, I will expand the canvas to full sheet size with a canvas extension color of black. On the transparency, the area outside the image will be clear all the way to the edge of the sheet.

A ppd is this: PostScript Printer Description - Wikipedia

QTR is built on Gutenprint v 4.2 which used a point system for units (1/72 of inch).

Gutenprint v4.2 enforced 1/4 inch margins. Newer versions of gutenprint and Epson drivers allow for full bleed printing but this will never make it into the QTR code unless Roy decides to update QTR’s code-base.

best,
Walker

1 Like

I suspect that these units are typography “points”. A point = 1/72 inch. Probably used when the CUPS system was originally developed and just carried forward. Nothing to do with QTR’s preference for 720ppi input files.

John,
If the rectangle was not cut off at the bottom, how are you coming to the conclusion that it was truncated? From your description, it appears that the output is exactly what it should be.
Keith

John,

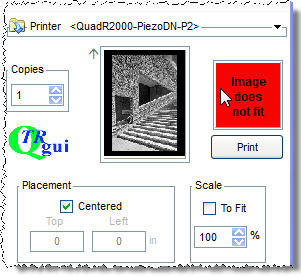
There is no problem here. The image is not getting truncated. The purpose of the black canvas fill, in the context of making PiezoDN negatives, is to prevent the printer from attempting to print solid black to the edge of the film, which is exactly what would happen without it. You do not want that to happen. It makes a mess. I speak from experience.

More importantly, and something you may be unaware of given that you made a 10" rectangle to print on 11" long paper, is that there are leading and trailing edge requirements that are a function of the paper transport system. Each printer model is a bit different in this regard, and there even seems to be some variation within any particular model. It also depends on whether or not the star-wheels have been removed or disabled.

I don’t know anything about the R2000, but I can give you examples of the 1430 and 3880.
On my 1430, with star-wheels intact and engaged, I need a 1" margin on both leading and trailing edges. With star-wheels removed or disabled, I need a 1" margin for the leading edge and a 1.5" margin for the trailing edge. Some people have reported needing 2" for the trailing edge.

On my 3880, with the star-wheels disabled, I need a 0.5" margin on the leading edge and a 1.5" margin on the trailing edge.

Whether or not the star-wheels leave marks varies from printer to printer. My 1430 works fine with them intact, but on my 3880 they leave pinholes which means they must be disengaged to avoid that problem.

As for image size, this means that I can print up to 9" long on a letter size sheet on either of these printers. If I want to print a masking edge (which I rarely do) that would reduce the image size further.

This is a limitation of QTR and applies to printing normal positive images on paper as well as to negatives regardless of what inkset is used. It is not a Piezography thing. It is discussed in the manual on p.50 (or 38 going by number on page.) Also see the PRINT! PRINT! PRINT! section on p.111 (99). As someone who always prints with fairly wide margins, this has not been much of an issue for me (except when printing 129-step targets), but I can see how it might be quite an adjustment to someone who is used to printing with small (or no) margins.

In a practical sense, this all means that if you want to print a 10" long image (long in the sense of direction of paper travel in the printer) you will need to use a sheet size larger than 8.5 x 11 letter size. 11 x 17 is one option. Another is 13 x 19 cut in half to 9.5 x 13. Or, if you happen to have a 17" wide roll of Pictorico laying around like I did, cut it to whatever length you need (12" in my case) then cut it in half width-wise to 8.5".

I hope this is helpful.

Keith

The rectangle was not supposed to be cut off. It represents the bounding rectangle of my image. The image is surrounded by a 1" border of black. It was this 1" border that got truncated. I should not have said “the image was truncated”.

That is exactly my point! I think I caused confusion in the original post when I used the word “image” when referring to the document as a whole. I should have said “canvas” and reserved the word “image” for the part of the canvas I care about, which is represented by the 7.5 x 10 rectangle. When I sent the document to the printer, the canvas was truncated; the image was neither scaled nor truncated. This is the result I was hoping for. So this is the method I will use for printing negatives.

I realize that the 1" margin may need to be increased for the reasons you mentioned, and that it could happen that I need to use paper larger than 8.5 x 11 to print a 7.5 x 10 image. Those are good points to remember!