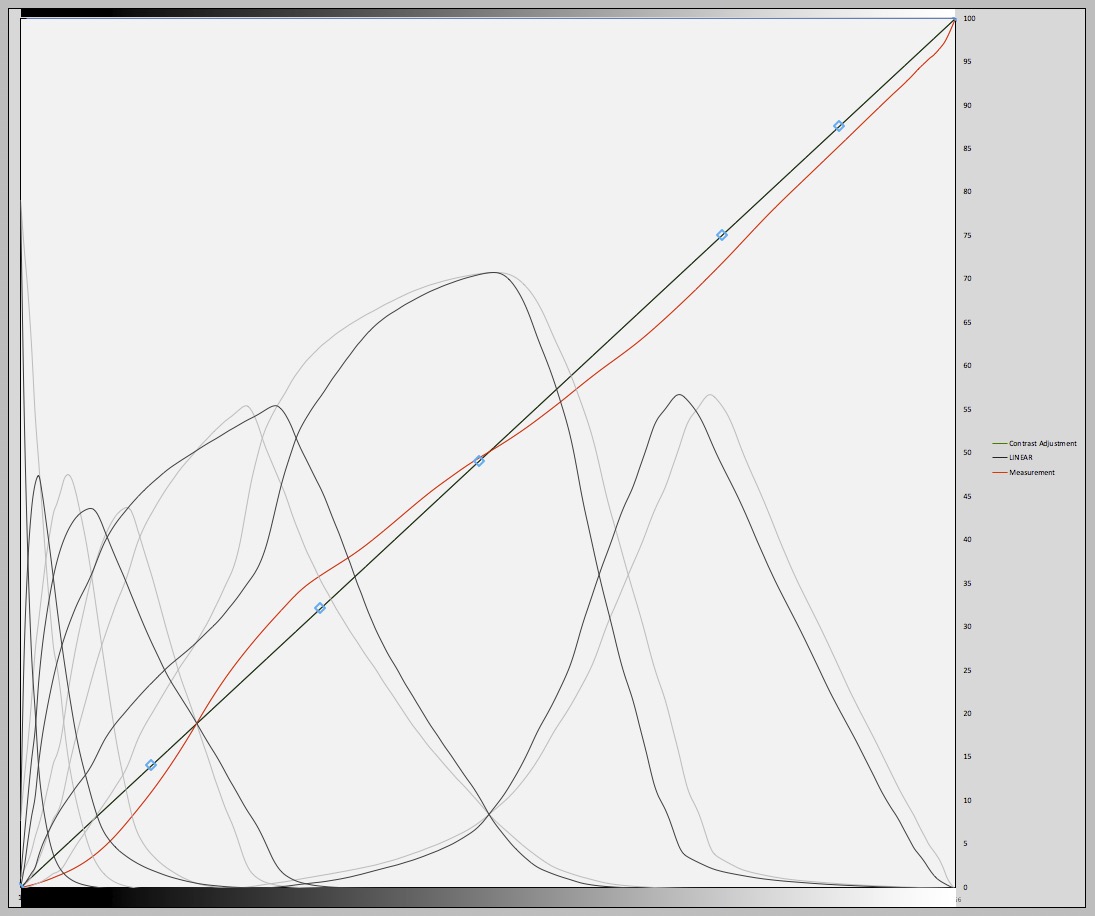
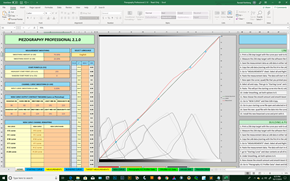
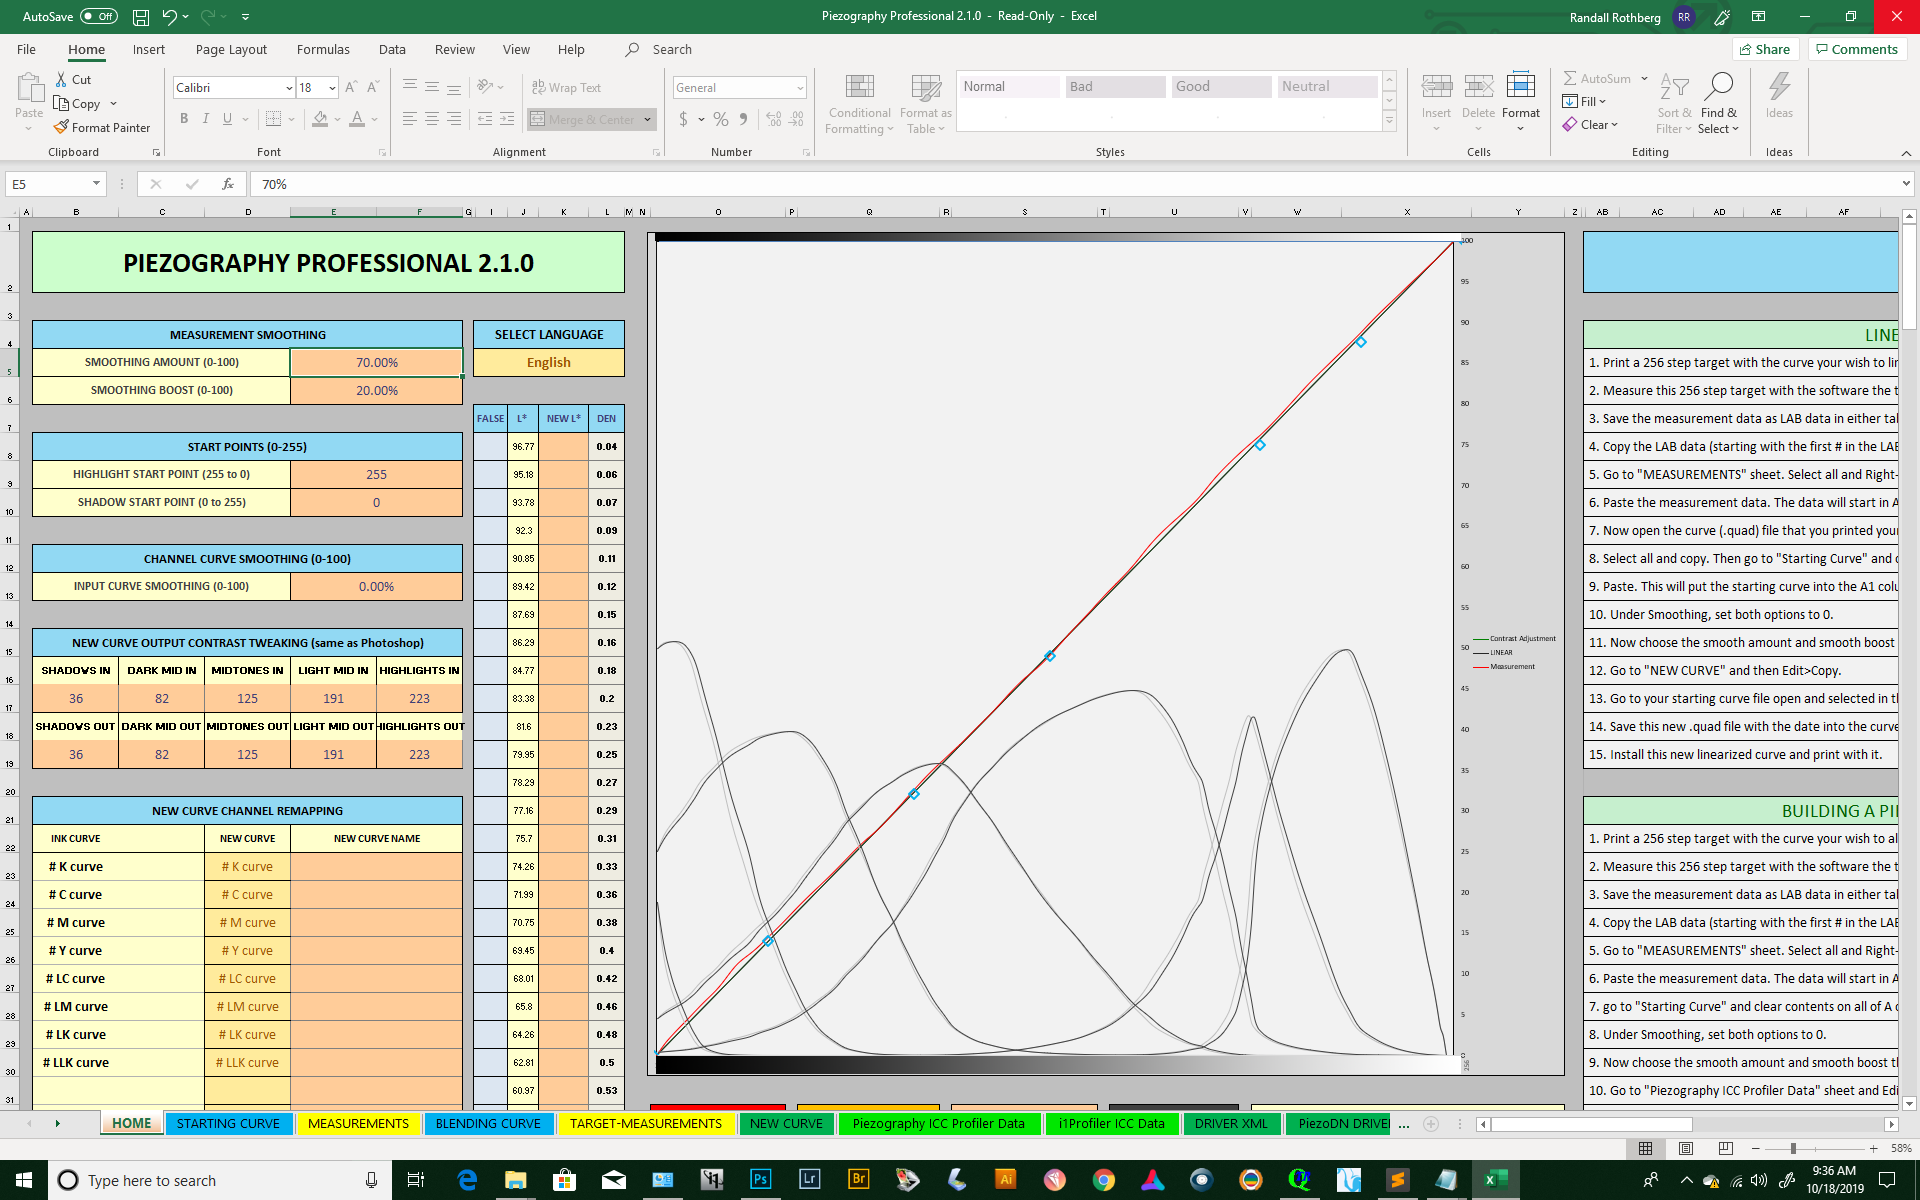
If the red line is pretty straight and pretty close to the black/green straight line than it’s ok. If it’s wavy or pretty far off (more than 4%) than something happened during your calibration process.
best,
Walker
If the red line is pretty straight and pretty close to the black/green straight line than it’s ok. If it’s wavy or pretty far off (more than 4%) than something happened during your calibration process.
best,
Walker
Yes - that’s it. Time to make prints.
Here is an example from earlier this year when I relinearized an existing quad for Canson BFK Rives on my 3880using P2 K6 Carbon and UHD matte black. The first image is the original quad; the second is linearized for my system.
I call that good.
Keith
One more iteration might be worthwhile to fix that lower mid-tone dip. When doing iterative linearizations be sure you are working from the previous linearization - the one that produced this curve - not the original quad.
Whadaya think @IJM_TechSupport?
Keith
Thanks, I’ll do that.
yes, 1 more iteration
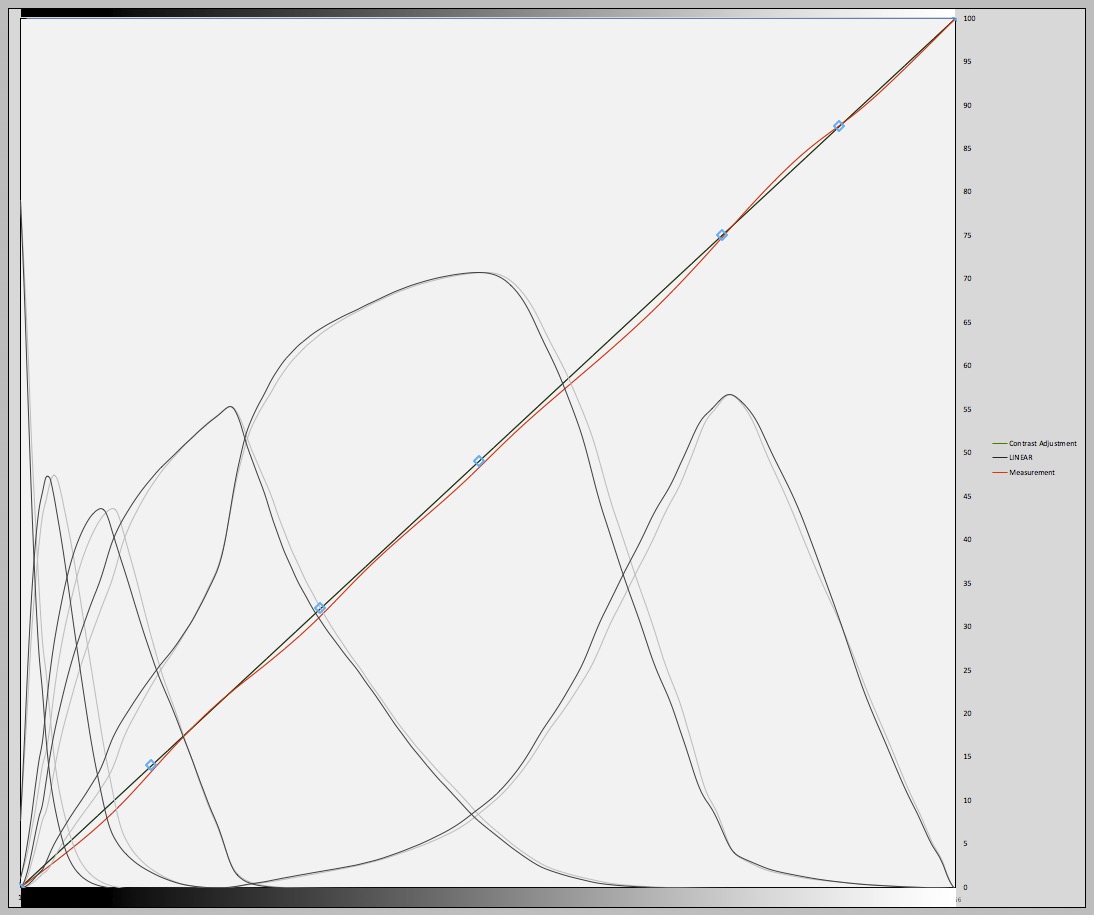
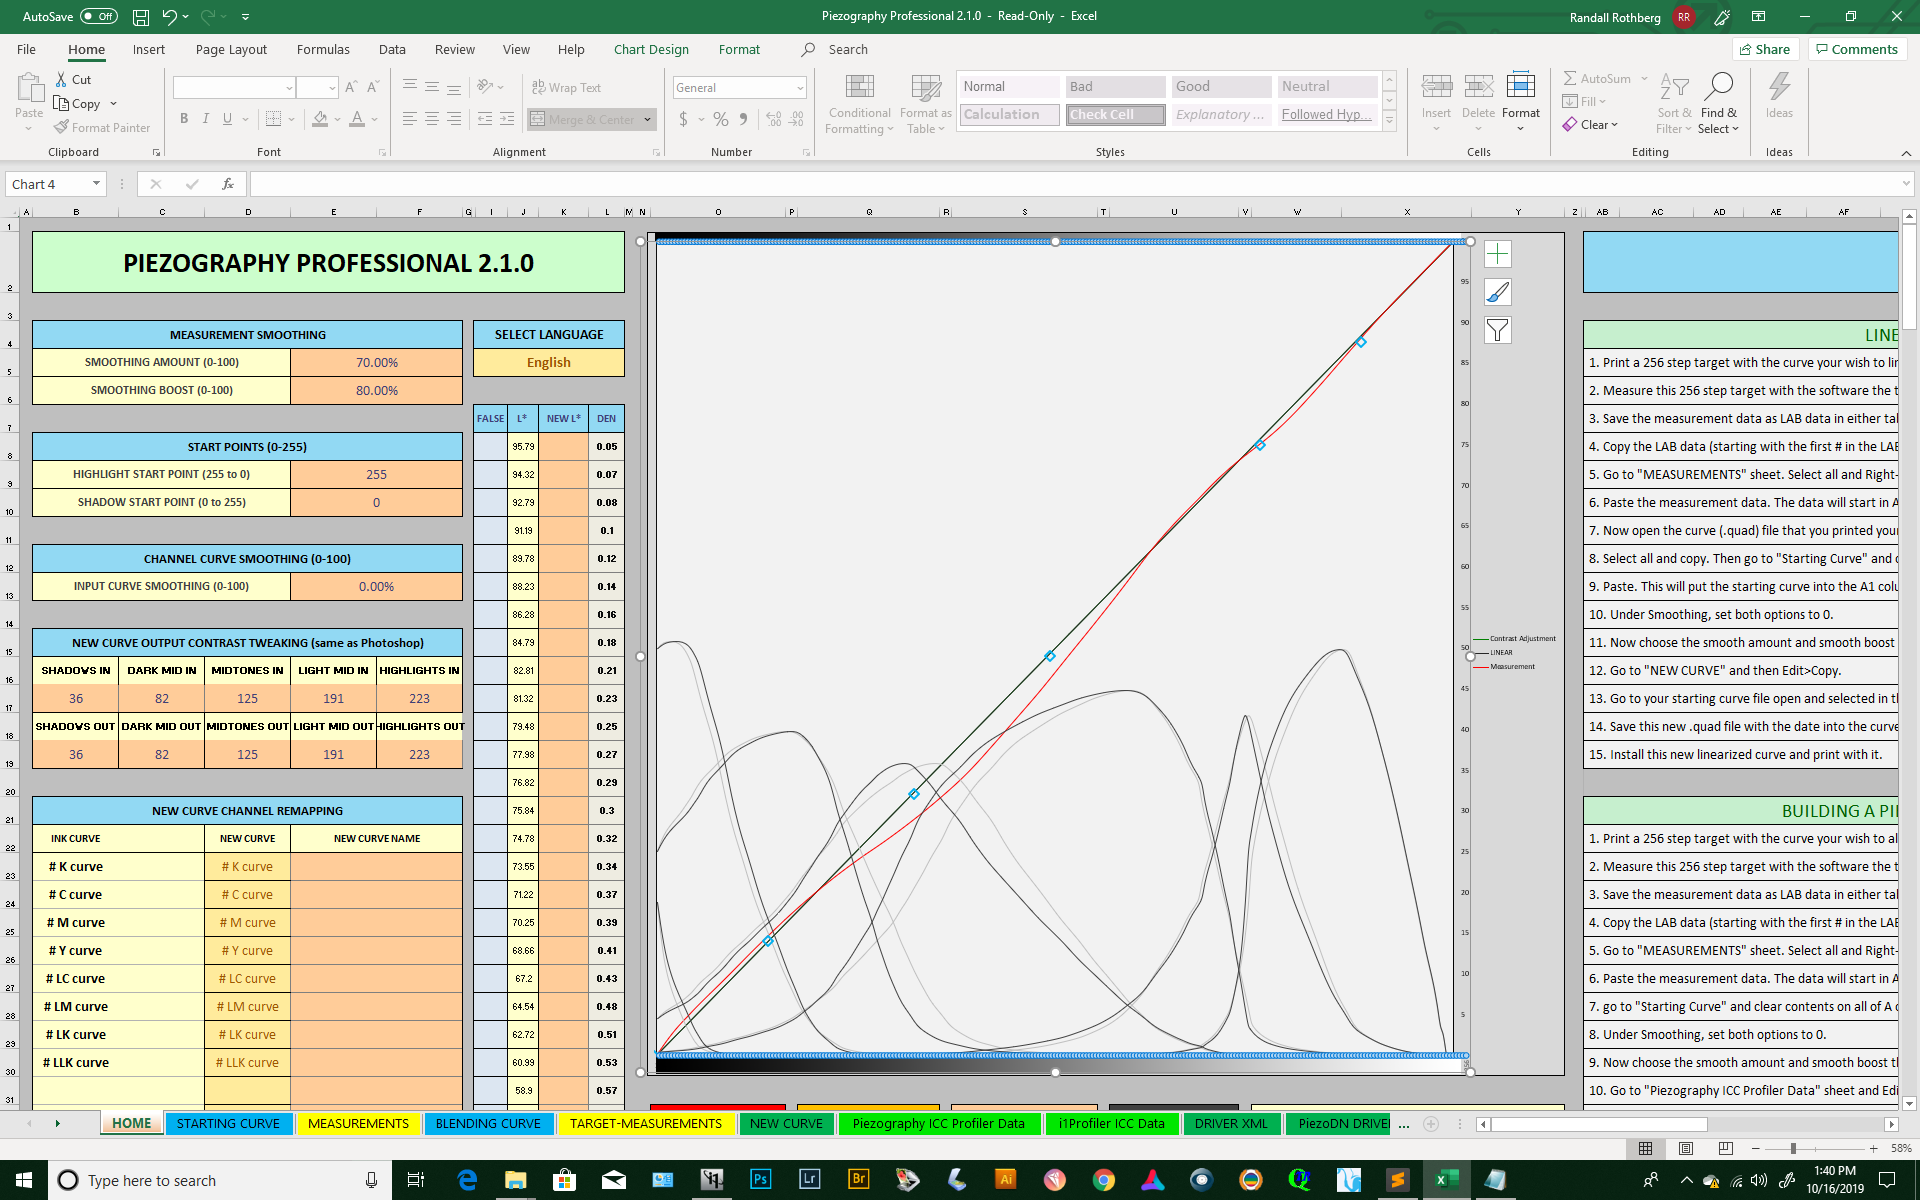
Wow, I thought I had crossed the goal line, but…I did a second validation and the red line is pretty much spot on. I was quite thrilled. So I copied and pasted the New Curve onto the Starting Curve (which was the first validation curve), copied the information, pasted in Sublime Text to the desktop, named the quad file with “quad” at the end, copied the file, pasted it into the K7-3880 folder, where it appeared. Then, I tried printing and, horrors, I get the message you see on the screen shot. QTRrui can’t open the curve file because there is no such file or directory. But there is. And now the crazy part. I can print with the original curve, I can print with the validation curve, but not with this latest re-validation which really straightened out the red line. I’ve tried everything I can think of: redid the validation, copied and pasted data again, tried different ways of pasting the info, but alas nothing makes a difference. I looked in the forums but couldn’t find anything. I don’t get it. It seems to me that the second validation is just building on what came before, and if everything that came before functions just fine, why not this one?
On October 16, 2019 at 6:30
The second validation curve.
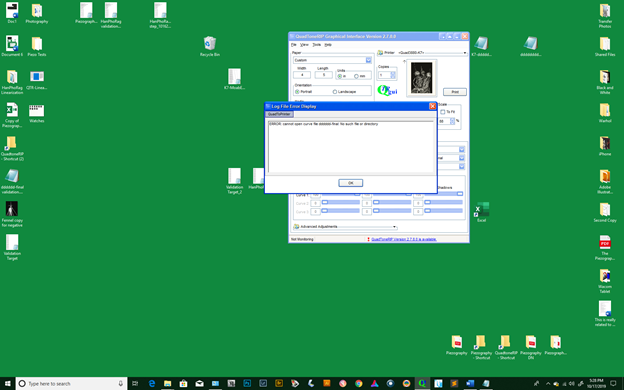
The disheartening message.
Now I’m confused. You should now have 3 quads for this paper/ink: the original, the 1st linearization, and the 2nd linearization which is the one you validated by printing the target with it then measuring and plotting to produce the graph above. That is the quad that you should now use to make prints on this paper. It’s already installed since you have already used it. You do not need to make another linearization from it.
I think maybe you are overthinking the process and as a result making it more complicated than it really is.  I’ve never done that, never, no not ever.
Or have I missed something?
Keith
The process:
Print Piezography 51 target with HahnPhoRag quad in k7-3880 folder
Scan
Enter scan figures in Measurement column
Enter HahnPhoRag profile in Starting Profile column
5)Copy New Profile and paste over Starting Profile
Select numbers from pasted profile in Starting Profile column, copy them, paste them in Sublime and Save As a profile with “quad” at the end. Copy this quad into the K7-3880 folder in QTR.
Using the above quad, I printed out another 51 target, scanned it, and did the same process as above as a validation. The red line on this validation curve had the slump and a second iterization was recommended.
Using the quad from this second curve, I printed a third 51 target, scanned it and entered data in the Excel tool. Now the red line was pretty much spot on. I pasted the curve from the first validation into the Starting Curve column and pasted the numbers from the scan into the Measurement column. I then went to the New Curve column, copied it, and pasted it over the Starting Curve. I copied the pasted data into Sublime Text and Saved this as a quad.
I copied this quad into the K7-3880 folder in QTR.
This last quad is the one that won’t open with QTRrui which says no such file exists.
I do have three quads. One won’t open, the last one, the one that produced the spot on red line.
On the screen shot with the good red line, do I not have to copy and paste the New Curve over the Starting Curve, and this pasted over data will be the curve from which I will print?
My bottom line is: with that last good curve, don’t I have to create a quad and save it to the K7-3880 folder? How else could the printer use this curve?
Curve 1: used the original HanPhoRag Piezography quad

**Curve 2 (first validation): used the quad that was created from the Curve 1 **

Curve 3 (second validation): used the quad from the first validation curve to get this curve. Now, don’t I have to copy and paste the New Curve here over the Starting Curve (which comes from the first validation), save it, and copy it to the K7-3880 folder, and it will be the quad from which I will print. Unfortunately, this is the quad that can’t be recognized even though it exists in the folder.
I wouldn’t blame you if you are getting sick of this, but every so often someone comes along like me who really makes you earn your salary. Sorry.
Thanks Casper, that made my day! While I am a beta-tester for IJM/Piezography (Piezo DN specifically), I don’t get paid for it. Like a few other experienced users on this forum, I’m just trying to help a fellow user with troubleshooting.
From your step-by-step description above, I think I see at least part of the problem. But first, let me try to clarify some terminology & process stuff in plain language.
Validation: When you take an existing curve such as those provided by IJM and print a target, measure the results, and enter those measurements into the PPE spreadsheet to see how well it works on your system. If the resulting plot (the red line) is very close to the black target line (such as in your 3rd graph above), that is considered to be linear and you don’t need to do anything else. But if it looks like your 1st or 2nd examples above (or maybe worse), then you need to perform a linearization.
Linearization: When you make a new quad curve which is calculated by the spreadsheet to adjust ink levels as needed to achieve a linear result. This is made by copying the data from the yellow-orange part of the NEW CURVE tab, pasting it into a text file, and saving it with a new name and the .quad extension.
You can use the name of the original quad and add an identifier such as -lin to the file name.
E.g.: K7-HahnPhotoRag-lin.quad
Or you can use anything that is meaningful to you. On a Mac, QTR has a limit of 40 characters for curve names, which may or may not be the same in the Windows version.
This brings up another question. Specifically which K7 inkset are you using? (Selenium, Carbon, Neutral, Warm-Neutral, or Special Edition.) If K7-HahnPhotoRag.quad is the correct name of the curve you started with, I think you may have started with the wrong curve, or at least not the optimal one for your inkset. Looking at the created date of the files, I see that there is a group (not designated by hue) that were created in 2008. The rest appear to have been created in 2016. This isn’t necessarily a problem, but you should be aware of it.
Also and related, are you using the older standard black inks or the newer high-density (UHD Matte and HD Photo) black inks? If it’s the latter, there are curves specifically for those inks in the folder Curves-HD though they are K6 which means they don’t use Shade 7. This isn’t that big of a deal though. The HD blacks can be used with a K7 setup too.
Walker may know all this since he has access to your purchase history, but I don’t.
Back to the problem at hand.
If a quad won’t open, as you said is the case with the 3rd one, there is no way you could have actually used it to make a test print. If it won’t open it’s not available to print with! In the bold text below your 3rd screenshot, you wrote: Curve 3 (second validation): used the quad from the first validation curve to get this curve. That would mean that the 2nd and 3rd target prints were made with the same curve. Are you sure about this?
One thing to check if a new curve is not available in the drop-down list is that the extension .txt wasn’t inadvertently added by the text editor when you saved the file. It must be filename.quad only.
Another thing to try is to close and reopen the app. Or even restart the computer.
This rambled on a bit more than I intended, but I may have forgotten something nonetheless. 
Keith
Hello,
Sorry for not realizing you are not a paid employee. I’m new to the forum. I’ve seen your name so much that I just assumed your were Walker’s assistant. You are quite kind to be spending this time with me. A correction to my message: I printed the target using the curve formed in the first validation. I scanned and entered this data in PPE and entered the first validation quad data to the Starting Curve column. I ended up with that nice curve. Okay. So, for my final quad do I use the curve in the Starting Curve column (the curve from the first validation); or, do I copy the New Curve data and paste it in Sublime Text and then copy it to the K7-3880 folder? This is where the problem is: if I create a new quad from the New Curve data in this third validation and copy it to the 3880 folder, I get the message that there is no such quad. If I use the quad from the first validation, no problem. Why is the printer rejecting this last quad? Or, should I even be copying the New Curve (the yellow data)?
Target Prints:
#1…Used the original K7-HahnPhotoRag quad in the K7-3880 folder: got first curve on screen shots and created a new quad
#2…Used the quad generated from step 1 when printing the second target (the validation step): got the second curve, copied info in New Curve column and created another quad. This is the curve with the slump.
#3…Used the quad generated from step 2 to print the third target. This created the really decent curve. The screen shot is where things stand. Do I copy the New Curve data and create a third quad? This is the quad the printer doesn’t like. (At the end of things, I end up with four Quads: the original, and the three generated from targets.
Ok then, that is different than what you wrote before and it does make a difference. The short answer is that you can stop now and you do not need to make another New Curve.
If you are unsure why that is the case, let me try again to explain the difference between validation and linearization.
Validation is testing an existing quad curve, by using it to print a target which is then measured an plotted to see how close to linear it is. If it is very close, as is your 3rd validation print, then the quad is validated linear and you are done.
If it is not close enough to linear, as are your 1st and 2nd attempts, then and only the do you need to do another linearization by making a new quad from the New Curve sheet. When you do this, you follow up by testing it — validating it — to see if it is now linear.
Usually the process only takes 1 or 2 iterations. More than that usually indicates an inconsistency somewhere in the system which is unlikely with inkjet printing, but is more common when making digital negatives for “alternative process” darkroom printing which has several potential points-of-entry for process variability.
Hope that helps! You can make real prints now.
Keith
Keith,
Thank you so much for all the heavy lifting. You went out of your way to help me and, thanks to you, I believe I get it now. That business with the quad file not being recognized is mysterious, but that’s for another day…
Randy
@jkschreiber is a gem (unpaid by us). I am out sick at moment (and have been traveling internationally) so have been a bit lacking here.
In short:
best regards,
Walker