Hi,
I am converting a SC-P6000 from OEM to PiezoPro and I have run into the following problem (see photo).
This is a photo from the QTR calibration with 8 channel ink purge file after 20 passes onto A2 paper. As you can see Y and C are completely blank and M is very, very, very light. The other 5 channels look fine.
Before starting the conversion I was getting perfect OEM nozzle checks and visually the 8 channel ink purge file print looked perfect. I also cleaned the wiper blade and cleaning assembly.
I have done a Y/LLK and a C/M pair cleaning on normal. And when the printer powers on it also automatically does a cleaning.
At this point I have inserted a piezoflush soaked paper towel under the print head.
Advice on how to proceed would be most appreciated.
Possible reasons for this problem could be:
- bad head?
- clogged damper assembly on Y, M, and C?
- Air in lines? I visually inspected and this does not seem to be the problem.
- ???
Thank for any help or ideas you can provide!
best.
Michael
Update 1 –
After 72 hours with three changes (flush onto folded paper towel parked under the head), cleaned capping station and flushing box here is where we are: C (C:D) almost 100%, and M (W:D) and Y (W:L) showing signs of life.
Started another 24 hour flush head soak.
But strange how warm LLK (PK) now looks compared to before…
Hey Michael,
Did you prime / re-prime the delinquent channels?
The second PK don’t look like PK no more.
Tuo amico,
Keith
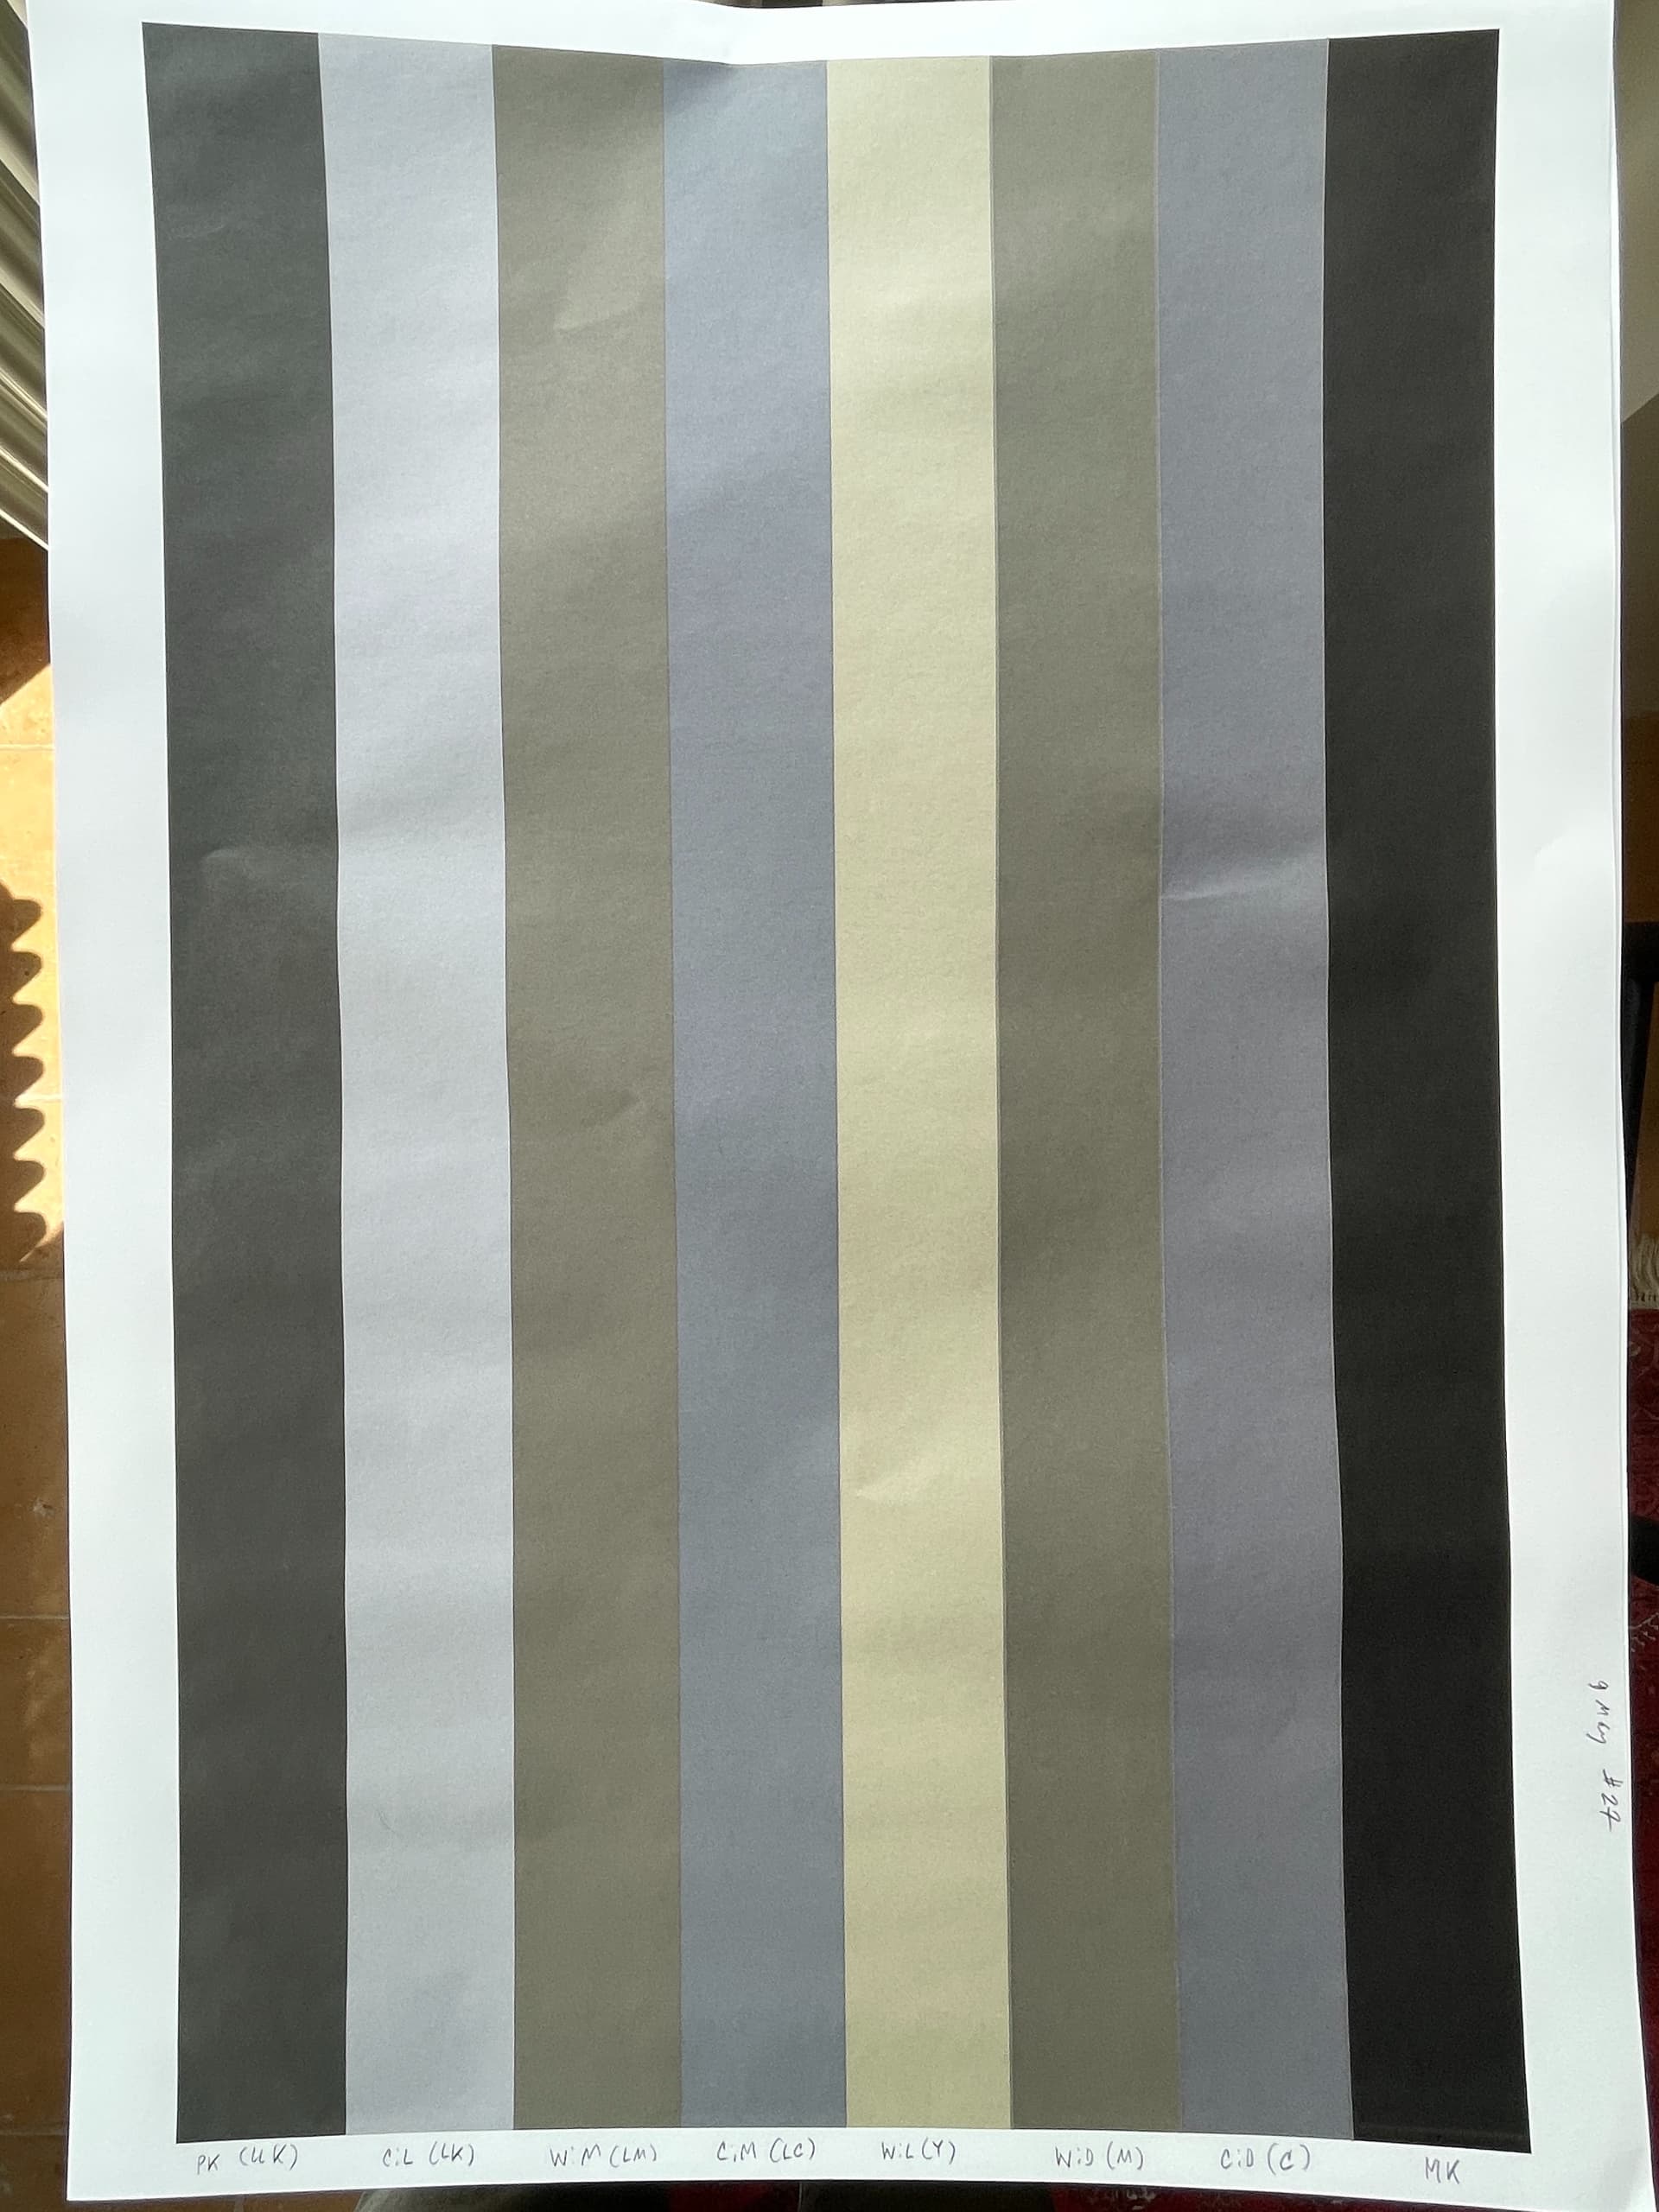
Update 2 - 9 May 2023
Hey Keith,
Not sure how to prime / re-prime (as I do not have a PC). Using calibration mode in QTR and 8 channel purge
ink file (mostly - also printed individual channels).
After an overnight flush / paper towel under head soak and one power clean (plus auto-clean on printer power up) here is where we are at:
(The paper is curled since I printed the target at 90% ink.)
Some observations:
- Clearly Y and M are back.
- LLK (now PK) is starting to look like it should. I think, perhaps, that residual OEM ink is in the line affecting PK?
- I do not recall but does W:L (pro ink) in the Y channel look very yellow? This could be staining / residual yellow ink in the line.
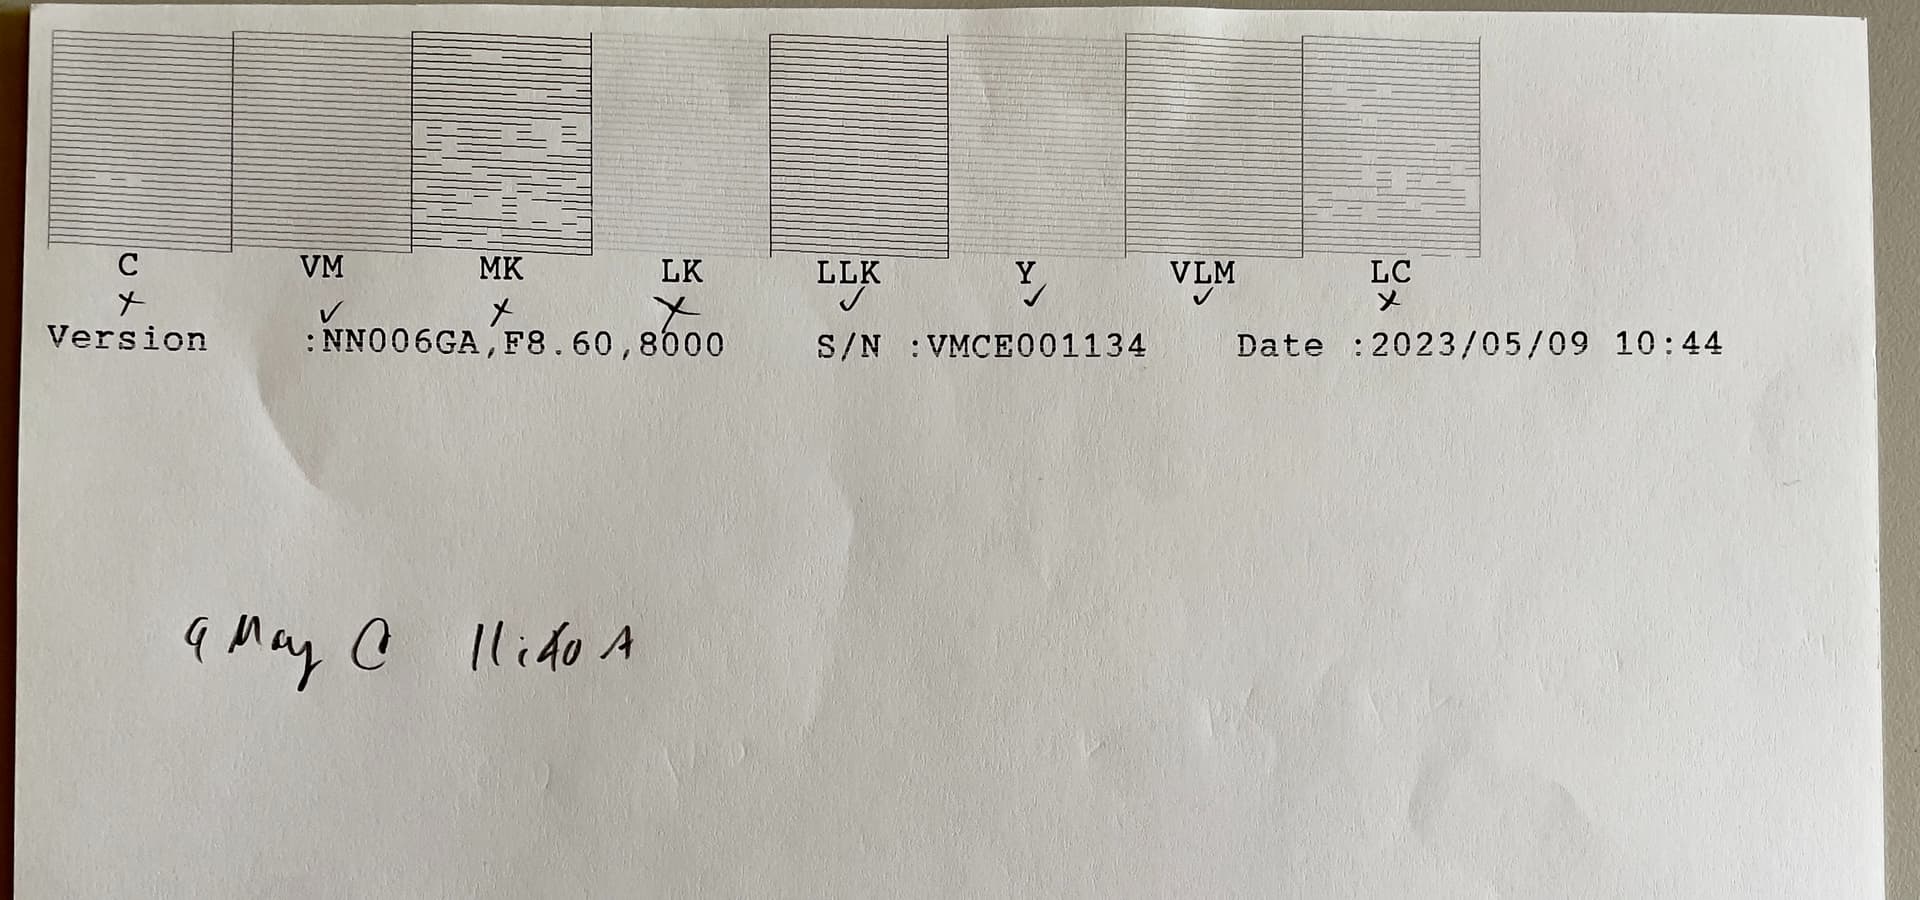
I also ran a nozzle check and 4 channels are perfect (M, LLK, Y, LM) and 4 channels are still showing problems (C, MK, LK, LC).
Next steps:
I am thinking about running Y (W:L) and LLK (PK) flush files a few times. Or do you think continue to run the full 8 channel purge ink file? I have recovered Y and M and LLK (PK) also seems to be reverting to actual PK
since Monday. I have run 4 A2 sheets before the uploaded one above (and 27 total A2 sheets since installing the Pro ink set). Note: it took ~50 A2 sheets to go from OEM to flush for all channels.
Thoughts?
thanks,
Michael
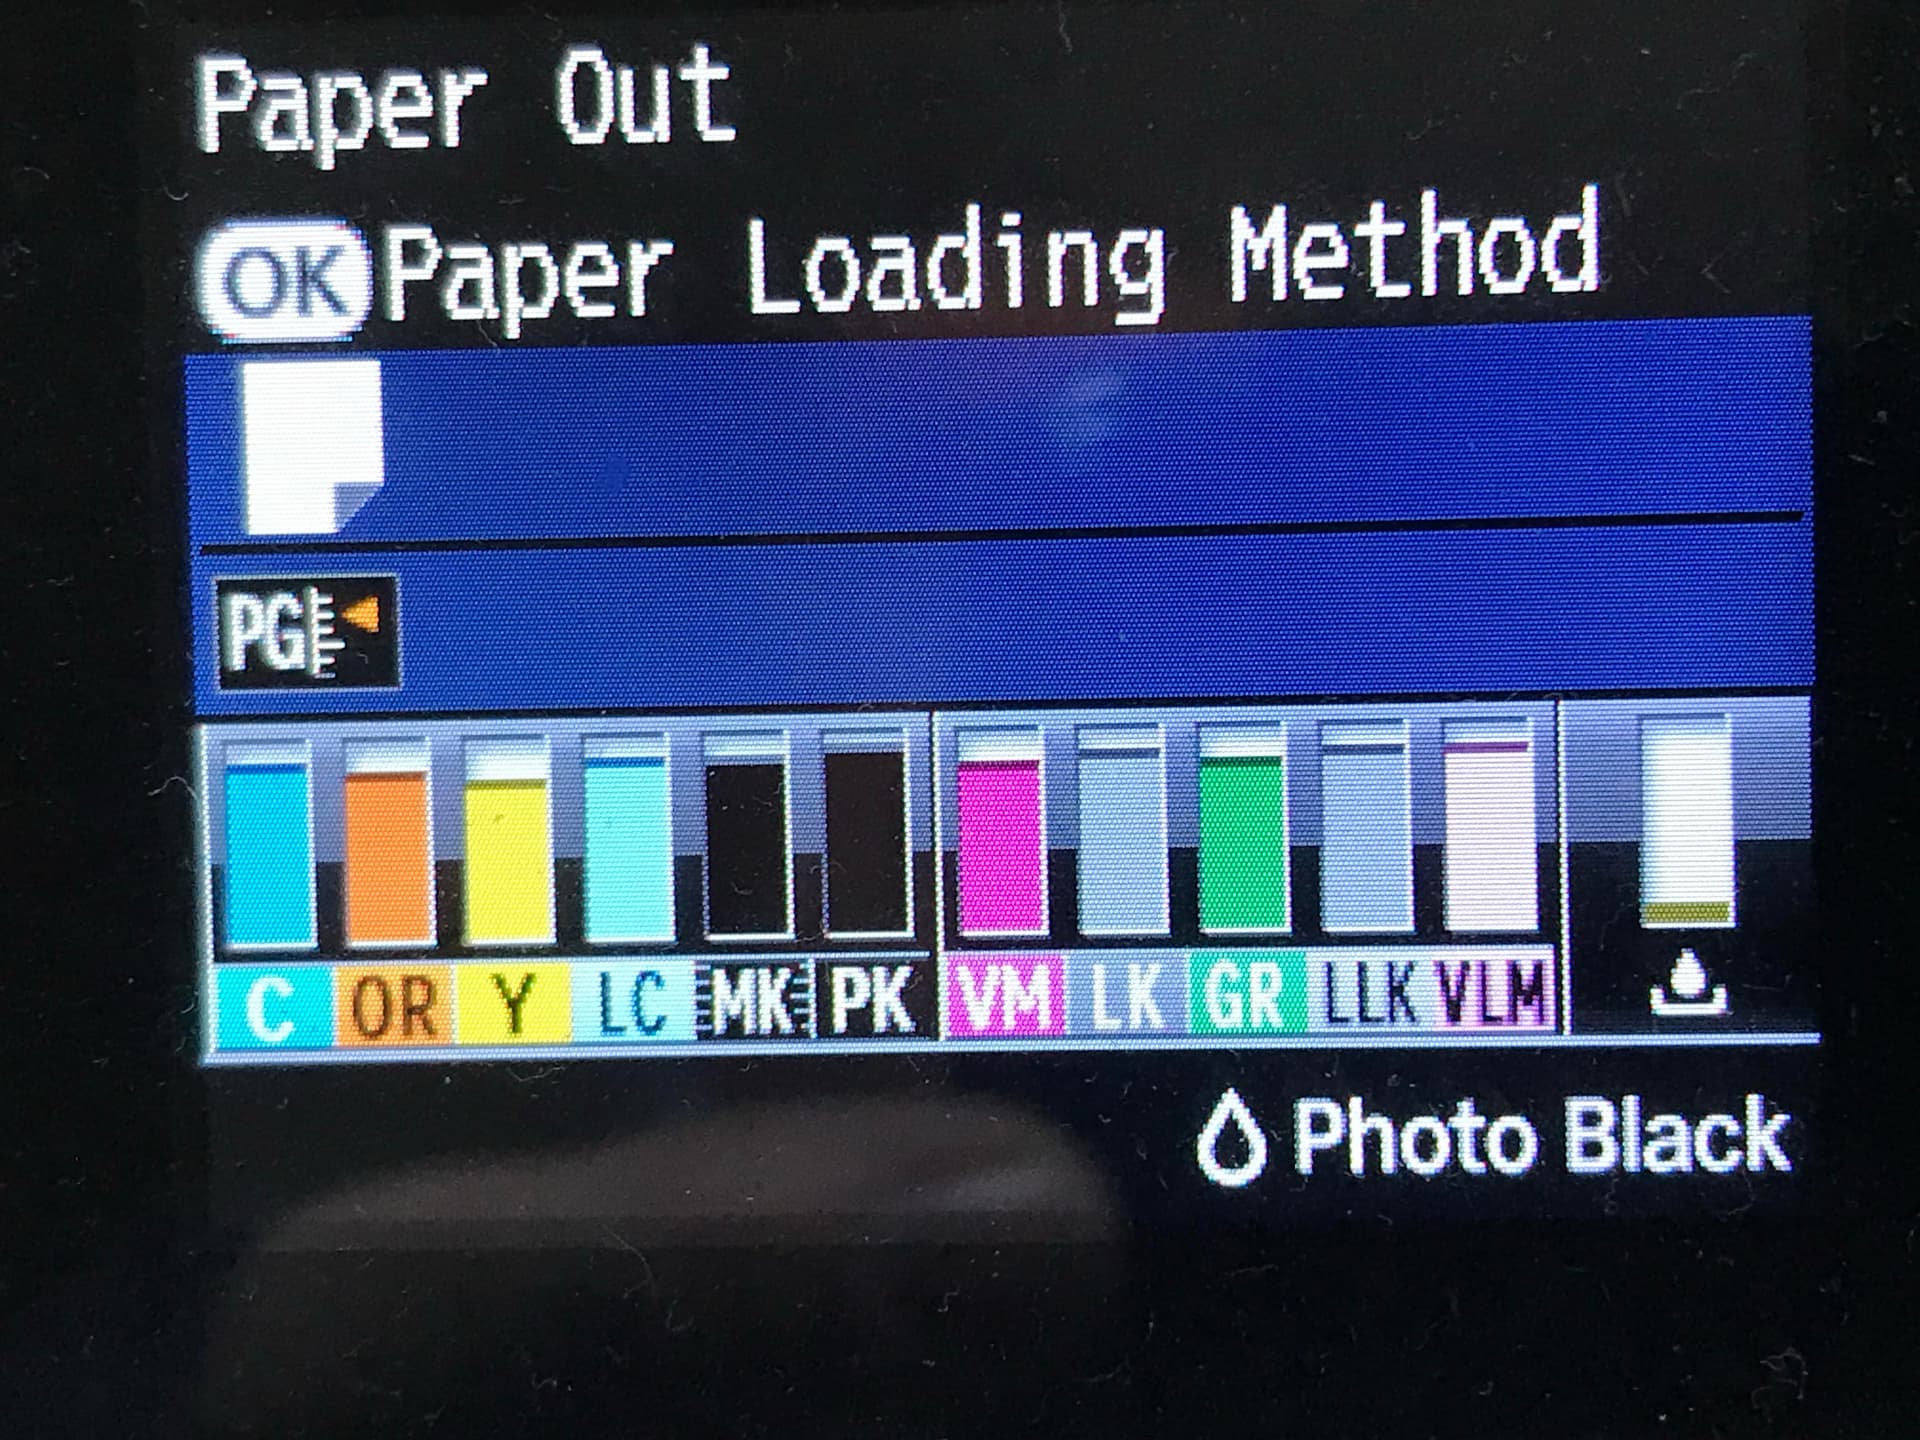
One more question… As this is the first time I have used the latest gen carts - internal ink bag - (on a euro SC-P6000) with series 1 chips, I am wondering why the PK shows up as displayed (while Matte Black is the active ink) while the other channels show the familiar cross-hatched display? Is this correct for this printer, carts, and series 1 chips? When I installed (or reinstalled after shaking) any carts I get the “non-OEM and proceed” messages from Epson.
thanks again!
Michael
This is unknown territory for me but historically non-OEM chips have disable the display from showing levels. It’s Epson’s passive aggressive way to give you the finger.
-Walker
Hello.
I have also just finalized my OEM to Piezo Pro conversion on a P7000 printer in Europe with the one time chips, that I understand you Michael also have. Here an image from my Epson Panel and the ink channels look “normal”. Don’t understand why yours look so strange.
I have understood that these one time chips are acting on the printer exactly as the OEM chips showing the “consumption” of ink and also stopping printing when close to end of ink before trying to print from empty cartridge. Am I right on this?
It was very difficult to know when have I flushed all residual inks out of the ink tubes. In practice I think I printed to many sheets of 10 channel Flush image jus to be sure. I found the yellow and Orange to be the most difficult to “clean”. It would be very informative to get the L* ab measurements for all the Piezography Pro inks printed on a well known paper, Canson or Hahnemüle, and measured from a 10 channel Flush print. Does anyone have these measurements to secure that we have flushed enough?
br Lasse
Yes, I am using series 1 chips on a P6000. It is odd that yours is showing as OEM and on mine on PK is showing that way. I wonder if it could be a firmware difference between the two printers; or that yours is a 10 channel and the P6000 is only an 8.
I was also thinking exactly the same thing as you: it would be nice if we had LAB values for the Pro inks on a standard paper to measure instead of “eyeballing” it.
My PK (in the LLK slot) does not look anything like PK! It looks closer to something like W:M or W:D.
It is possible I have not yet run enough paper through in calibration mode. So far I have run ~37 A2 sheets. As mentioned I ran cleaning carts through the printer first, after removing the Epson OEM carts, before installing the Pro ink carts. So I could also be fighting both OEM and cleaning solution residue.
Michael