I started this discussion on the QTR & B&W forums, so I won’t go over all that discussion but just give the results of that discussion.
I made a profile for printing on Harman Gloss Baryta and without the gloss over there was noticeable bronzing. I applied two passes of GO30000 and the bronzing was still present. I printed again and used Hahnemuhle protective spray. This did eliminate the bronzing. However, using the spray is not a good solution for our open lab environment.
I am printing on an Epson Quad3800K7 with a neutral inkset and I recently installed the PKHD ink in the PK position. There seems to be a issue with this combination that makes it difficult to make a profile for which the Gloss Over will eliminate any bronzing.
Walker requested that I try the Master profile, but I was not able to linearize it. I’m hoping there is a solution to use this inkset and the Gloss Over without any bronzing.
I should also point out this paper was apparently bought by Hahnemuhle and now called Hahnemuhle Photo Gloss Baryta.
Cheers,
John
Please zip and upload your .quad and also upload any screenshots you may have that show the print settings, image gamma, bronzing (or gloss differential) etc.
cheers!
W
The zip folder has the following files:
i1 measurements from the 51 step chart
The 51 step chart (which is not gamma 2.2 but untaged)
K7-NU-PKHD_MASTER.quad
QLin-GlossBryta-PKHD-QLin.quad (I used the MASTER file to print the step chart, then linearized the MASTER file using QLin for R Boutwell)
Quad300-Template.tif (which I used to test the QLin .quad cruve; this file is gamma 2.2)
Archive1.zip (113.9 KB)
Quad3800-Template.jpg.zip (816.6 KB)
please also upload the averaged 51 step measurement values!
This could be were you are going wrong . . .
Also, the quadlin quad is entirely blank.
And please upload a photo of the bronzing when using the PKHD curve so I can see what you are seeing.
-W
Never mind. I built a tool to average the measurements.
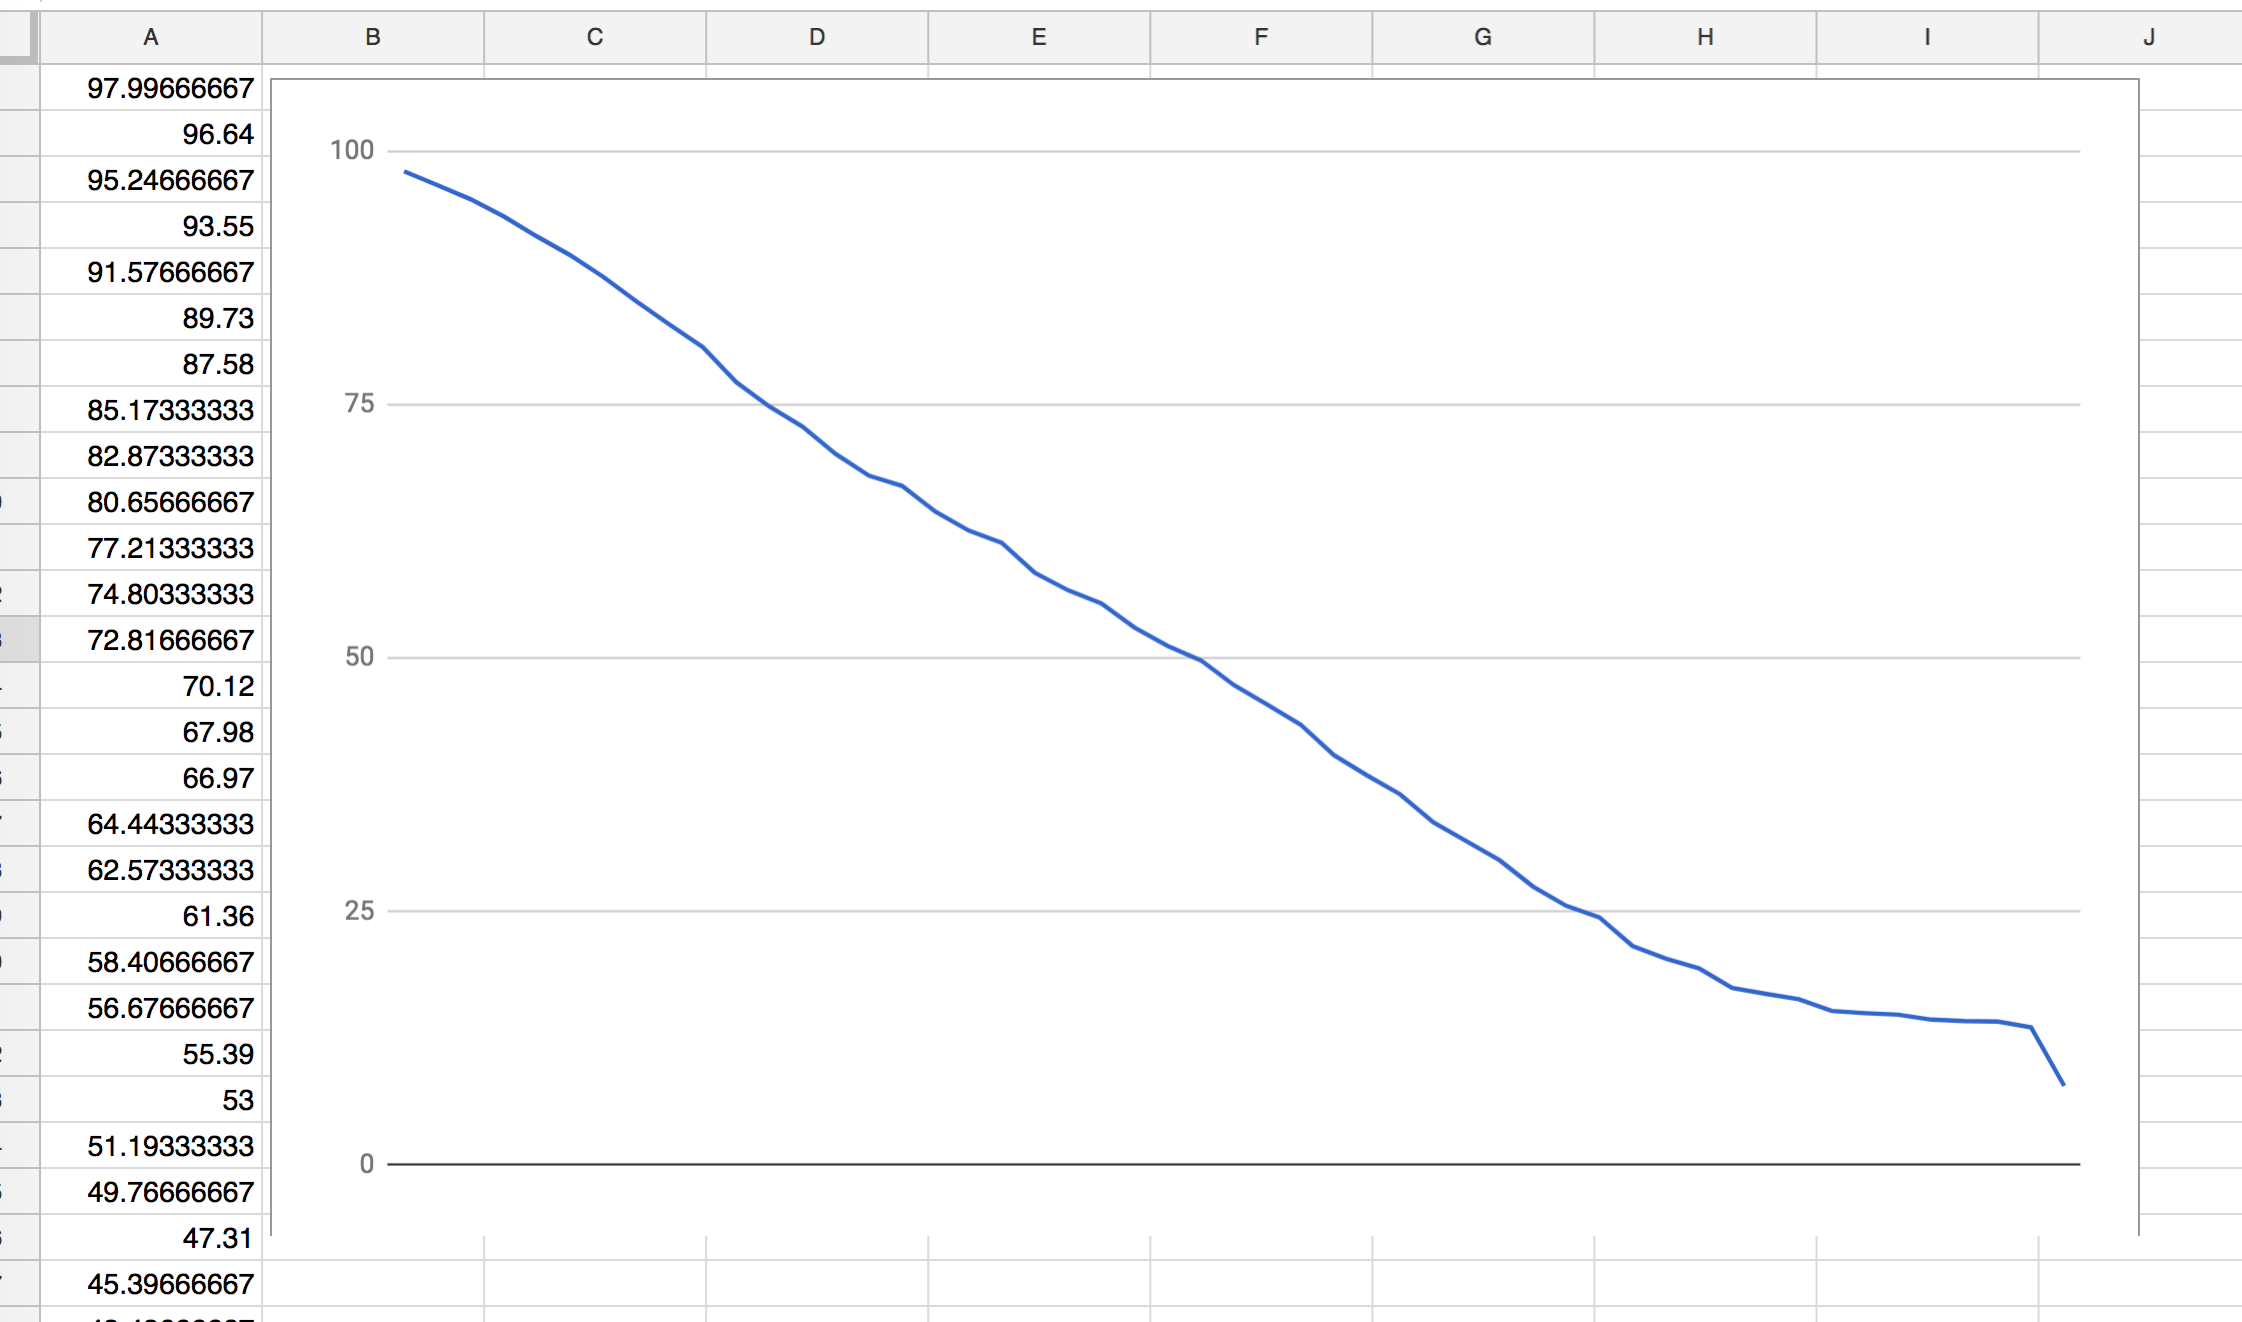
Here they are:
It looks like something is sure happening to your shadows. (Is this what you see as bronzing? This is normally called “gloss differential”).
Please print this 256 step target and measure it and send it back to me.
This is the target and i1Profiler workflow: i1Profiler-i1Prov1andv2-1.zip (2.0 MB)
Go to i1Profiler, Printer Profling, RGB printer, click into the first step and “load workflow” in the lower right. This will bring up the target measurement section. Connect your i1, calibrate, measure, and save the workflow and zip it and upload here. I will then be able to see better data. This “averaging” method is just janky as all get out. It will never give you a good smooth tonal transition . . .
Also, please upload an image of the 256 step target using the PKHD curve so I can see the gloss differential in the last shade(s). I can limit and should be able to get you a working curve.
Make sure you are using PKHD ink, and that you are using the GO30000 curve when gloss optimizing. Make sure your gloss optimizer is indeed Gloss Optimizer (not GCO). Your L* value should be dropping down to around L* 1.3 on the darkest patch with this ink and paper.
best,
Walker
ps: That target I just uploaded is “hard coded” gray gamma 2.2 and untagged.
The targets that you uploaded before which I assume were from Richard’s software? are not hard-coded and not-tagged. If a target is not hard-coded, and not tagged, and it’s Grayscale (not RGB) it will print dark. There is a confluence of issues that are blocking your path to a perfect print, but I think we can sort them out with the steps above.
Edit> I updated the i1Profiler workflow and targets above. One wrong file had snuck in there.
Walker,
Thanks so much for digging into this issue. The averaging tool I have also showed the craziness in the darks. If the QLin .quad is nearly black that would explain why the print was dark (no highlights and dark mid-tones, blocked up shadows). I’m currently waiting on the Hahnemuhle Photo Gloss Baryta paper. It should arrive at the end of the week, then I can make the print, measure it and send it back to you.
Cheers,
John
I don’t like to comment here on my tools, but there are a few things that need to be cleared up. There are two small problems with the files John uploaded, and I was able to solve it with one small adjustment. I loaded the 51-step measurement file and the master .quad file John used and they linearized just fine.
The first problem is the way IJM skips the second line in their .quad files, and is only apparent when opening the .quad file in a text editor. QTR generates two “header” lines before the first # K Curve line. My tools are designed to work with the QTR generated curves and they require the second header line. That second header line could be a just a “# and a space”, but it does need to be there. In my QuadLin tools, the empty quad preview window indicates there is a problem, and I will put a “this didn’t work” pop up box to prevent the .quad export in the next version…
The second issue is the bumpiness of the 51-step measurement data. I have seen several other sets of measurement data from John and they are ALL bumpier than I get with a i1 Pro. There is a built in smoothing formula in my linearization system to deal with these problems. But still, it linearized just fine (meaning the .quad file exported without error). I don’t see how including more bumps from 256 steps is going to make that any better, especially considering they are just going to get smoothed out with whatever curve fitting and smoothing formula IJM is using.
And for “hard coded” GG22 in the 51-step target? That has term has been thrown around from time to time and I still can’t make sense of it. I am looking at the Piezography 51-step target. It is an untagged target with 2% steps—obviously they change appearance when using a different working gray space, but if you do the IJM sanctioned GG2.2 working space then it will look/print as intended w 2% gray steps. Roy has said this on the QTR Yahoo group—2% steps are 2% gray steps when you send them through print tool with no color management. They might look different when they are viewed with different working spaces in Photoshop, but again, are treated the same when printed though print tool with no CMS. I’ve printed IJM targets and the standard QTR targets (which is basically the same as what I include in the download) and they are the same.
Those bumps need to be corrected for. I was commenting more about my onthefly graphing tool above (that it wasn’t doing anything other than averaging). If your smoother does that (beyond just the averaging) that’s awesome. That’s what is needed. I did just a straight average of each 3 measurements. The problem with inkjet printers is they deposit different amounts of ink from left to middle to right of a print. (more common in 17" pressurized printers like the 3880). So doing a simple average like I did above will still result in spikes and bumps. The size and dimensions of the actual printed target are also important in that respect.
Related to hard coding:
Open the 256 step target above (and also create your own from say color port, etc). The shadow values in the target above are not 1,2,3,4,5. This is what I mean by hard-coding. This is actually important to do to make a good target for GG2.2 printing with No Color management out of PrintTool. Otherwise use RGB targets set to 1,2,3,4, (straight untagged) and print from Adobe Color Print Utility.
best,
Walker
Also, excel allows for you to return the value of a row that contains a certain value (say “# K curve”).
Starting the data at row value of “# K curve” + 1 row will allow you to compensate for anything above the top channel.
Then each channel after that is just the # K curve row # + 257 (or any variant there-of, or you can do searches for each curve, etc).
best,
Walker
Richard, thanks for pointing out the need for an extra “#” line in the quad file. I used the Master .quad file and the measured data from the 51 step chart. I used your averaging tool and the when it was loaded into the Qlin software, the data looked more smooth than before.
Wlaker, I used this linearized .quad file to make a test print. I dried the print thoroughly and then ran it through the printer again using GO-30000.quad file for the over gloss. I have attached two iPhone pics of the bronzing before and after. So, you should be able to see what I’m seeing.
Cheers,
John
Archive.zip (936.9 KB)
PS: Walker, the Hahnemuhle version of this paper arrives today, so I should have the profiling data you requested sometime of the weekend.
It doesn’t look like you are really getting very much GO down at all.
I can still see gloss differential even (let alone the bronzing) on the second image (to the right) between the paper and highlights.
You are printing the GO30000? Have you done a nozzle check on glossy paper to make sure all your nozzles are firing with that channel?
You are printing a blank page right? (make sure the images are out of PrintTool and either print a while image or no image at all when doing the GO printing.)
-W
If the above has all been done properly, and you are still getting bronzing, I will have to load up a neutral printer on Monday and start that process. It’s been on my list. This legacy ink-set is not optimized for baryta papers (especially the super glossy ones). Part of why we came out with Pro ink was baryta papers . . . but I’m pretty sure I know how to fix it. It just needs a new curve architecture for HLs (specifically shade 6).
-best,
W
Yes, I am printing with the GO-30000 which I downloaded from IJM. I have done a nozzle check and all the nozzles look fine, however for the gloss paper, I can’t really see anything on the GO channel (LLK). I printed GO-30000 on a sheet to the gloss paper and looks to me that it is printing correctly. Are there any other means for confirming that it is working?
Cheers,
John
So you printed the nozzle check on a gloss sheet? And you looked at it at an angle to the light? This way you can see the nozzle check nozzle pattern have a small gloss differential to the paper. This allows for visual confirmation that all nozzles are printing.
More Monday,
W
I was not able to see the gloss over. So, tried a power cleaning. I can now see some lines in the gloss over channel. However, the power cleaning managed to clog up one, perhaps two of the other shades. So, I’m cleaning the printer now. I will keep working on getting it cleaned. But no new information until I get it cleaned.
I actually have as much trouble with Piezographic inks clogging as I do with Epson inks.
All for now.
Cheers,
John
If you have as much trouble with Piezo inks as Epson inks it;s because you have lots of crap and/or air in the dampers or head manifold or paper flakes in the cleaning assembly.
Piezo ink in-and-of itself actually won’t clog hardly at all. There isn’t much in there but tiny carbon particles. We go months without a single nozzle out in our 99xx and 38xx printers at Cone Editions.
That said, there are a million ways for an epson printer/head exhibit a clog that are more related to the history of the printer, it’s mechanical alignment and wear, than what ink is in it.
Very glad that you found that the GO was not printing though. It sure looked like that from the jpgs! Full GO coverage should solve 99% of the bronzing and gloss diff issues however I will also confirm this on Hahnemuhle Photo Gloss Baryta tomorrow.
all the best,
-W
Hey John. Just fyi on this. I ran a GO coat on a H Gloss Baryta sheet and it looks damn good. Bronzing gone. (I let it sit 24hrs.)
best,
W