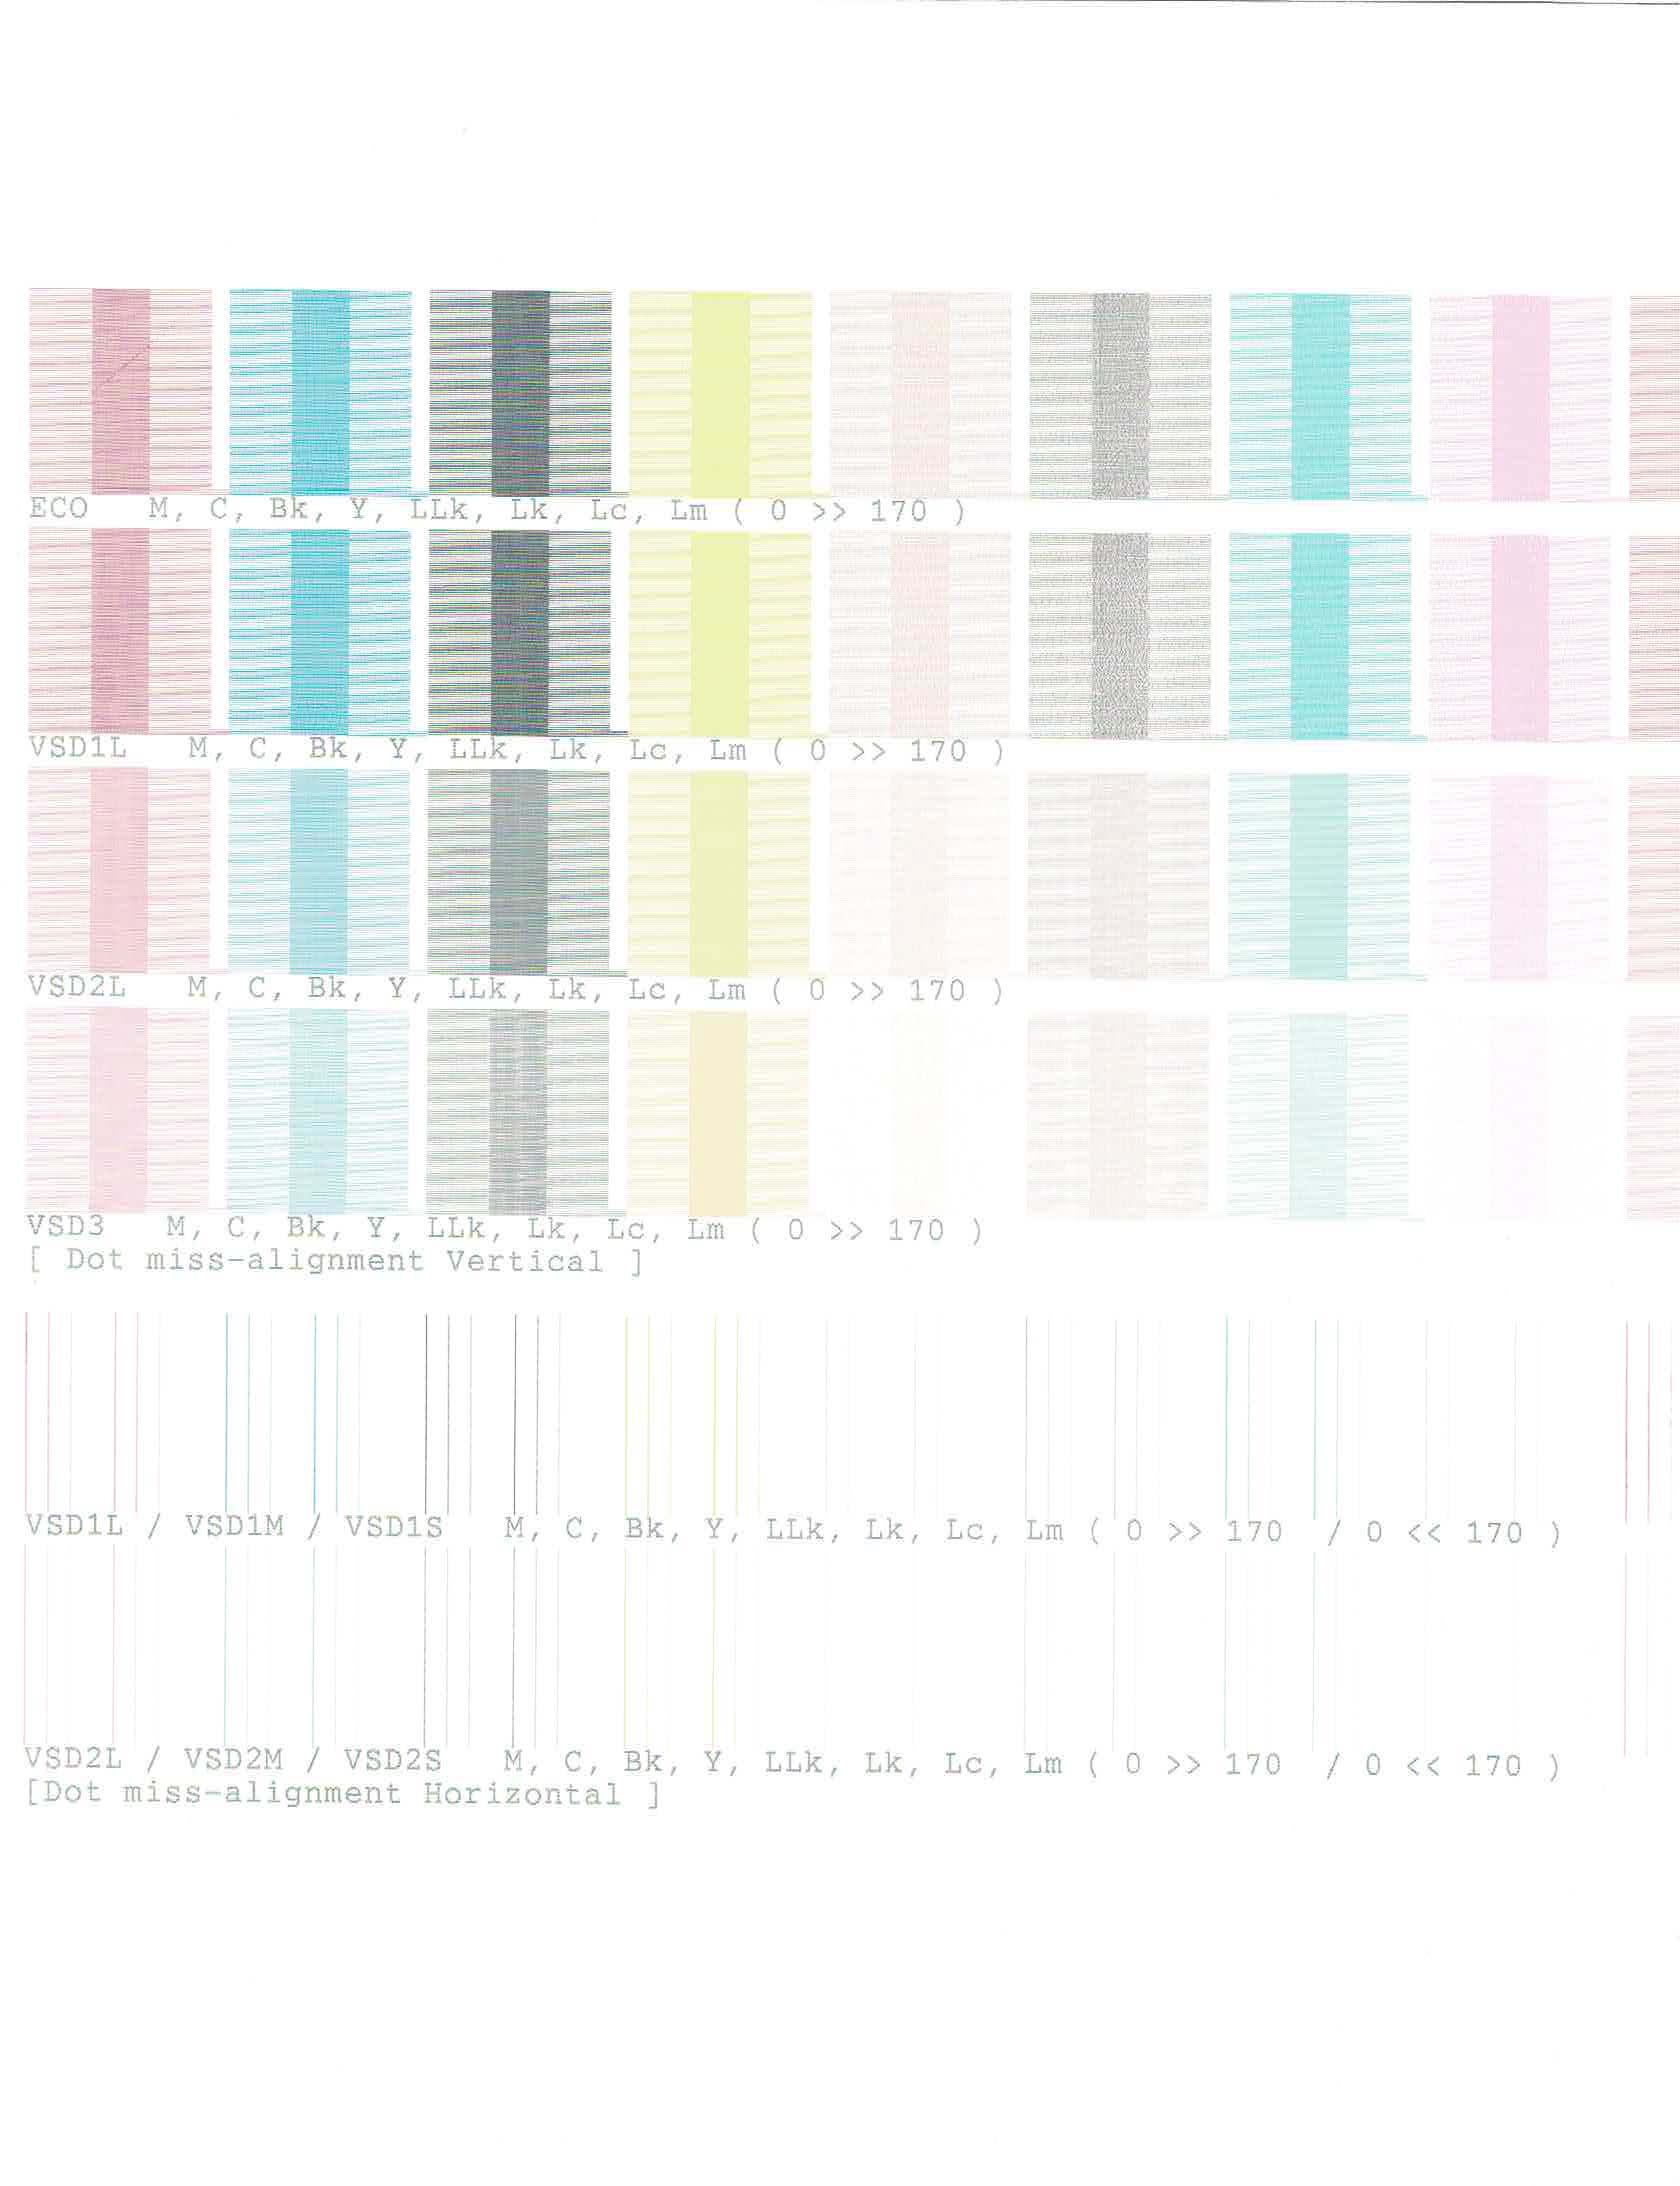
Repairing my 3880 has been a bit of an adventure, both with learning more about how the printer function, as well as some associated issues. Such as the best way to align the print head.
I have used the “Auto Align” option from the printer menu, as well as the “Manual align” — when the Auto Align program runs, once it finishes, there is no feedback about the head alignment — so I’ve never been sure how well it works. When I ran the Manual option, I changed the selections for all 3 numbers - they were all 5 at before, and I changed the values to 6,7,7.
With the adjustment wizard program, the Check Alignment option instructions are a bit obscure — It says check printout for symptoms of misalignment — and if any are seen, run a cleaning cycle. I’m not certain if this part of the program is checking alignment or nozzle function. ANYWAY, does anyone have any information on what I should look for with the printout in terms of problems? Also, what do the numbers on the printout mean — see the scan of my printout — does this indicate that everything is in alignment (note that there is a lot of scanner artifact in this copy)?
The wizard program also has an option “Auto Bi-D Adjustment” which seems to be a more extensive auto alignment program. Should I run this option rather than the options from above or from the print menu?
Thanks for any information or insight you can provide.
