Greetings!! I have a 9800 that has been running P2 without issues for just over a year mostly in the Matte Black mode via QTR Print Tool. Recently started to see some nozzle issues so switched to a set of flush carts and did 3 power cleans to get the flush to the head. Allowed it to sit for 24 hours but still showing clogged nozzles. Ran 2 more power cleans and let it sit for another 24 hours. Cleaned the flush station, capping station and wiper blade as per the 9800 video instructions (Outstanding by there way!!). Still getting totally random nozzle clogs after each head cleaning… they move around after every head cleaning which makes me think stuff maybe breaking loose from inside the dampers. The channel with the most issues though is the GO, LLB on the 9800, which is really strange. This is only now visible because of the flush solution dye… no way to judge when the GO is installed and a nozzle check is performed. I have just ordered a new set of dampers, and purchased the on line Service manual. Any thoughts from the Guru’s??? Thanks in advance for your wisdom and expertise!! Best regards, Robert
Well… the dampers arrived and have been changed out but now after multiple Power Cleans, the Light Magenta channel appears to be completely blocked on all nozzles… all other channels are firing as expected. I removed the damper module again and made sure everything was seated correctly. There are no leaks observed. Is it possible to have a bad damper??? Thanks in advance for any and all assistance as for now I am dead in the water… Best regards, Robert
Still having issues with the LM channel not printing at all following replacement of the dampers… Since I have had no response from IJM on this thread, I decided to to try some detective and creative problem solving and swapped the suspect Light Magenta damper to the Cyan position… and yes it was a pain to pull the dampers for a 4th time, but good news is I can now do it in my sleep. Following a power clean, Now the Cyan channel is totally blank on a nozzle check and the Light Magenta is firing on all nozzles. So the issue is definitely following the suspect damper. Still no leaks are apparent so not sure why this damper is an issue… I called IJM and talked to Wells and he suggested I post this mornings findings to the thread here in the hopes that someone from tech support may get an opportunity to review. In the mean time, we are still dead in the water here in New Orleans!!
Hi dutruchstudio~
Based on your report, it does sound like the LM damper isn’t working correctly for some reason, and I will have a replacement sent to you today.
Please let me know your results after installing the new damper, or you have further questions.
Best~ Dana 
Thanks so much for the feedback Dana… Any thoughts on why a damper would fail in this manner? It appears normal without tears or insult to the membrane… it almost sounds like there is some type of internal blockage but I can see flush solution internally so at least I know it’s getting into the damper… Thanks again for your wisdom and expertise! Best regards, Robert
You are very welcome Robert.
Although I’ve never had it happen, I know there are several small channels in the dampers, so it could be possible that one of the channels may have been blocked with material during manufacturing, and that’s restricting flow (?)
Thank you Dana!!! This is why IJM Rocks!! I’m also going to change the Flushing Box Assembly and the Capping Station. The Flushing Box seems fairly simple with just 2 bolts but the Service Manual does not discuss changing only the Capping Station, just the entire Pump Cap Assembly removal. It also appears that Compass Micro only sells the entire Pump Cap Assembly. Is there a described procedure for just the Capping Station and can you recommend a source? My thanks to you and the entire IJM staff for your expert wisdom and knowledge! Best regards, Robert
We like to rock!! 
Yes, the flushing box is very easy- just make sure to clean the connecting tube (unless you bought a new one), and make sure the tube leads to the waste tank before putting everything back together.
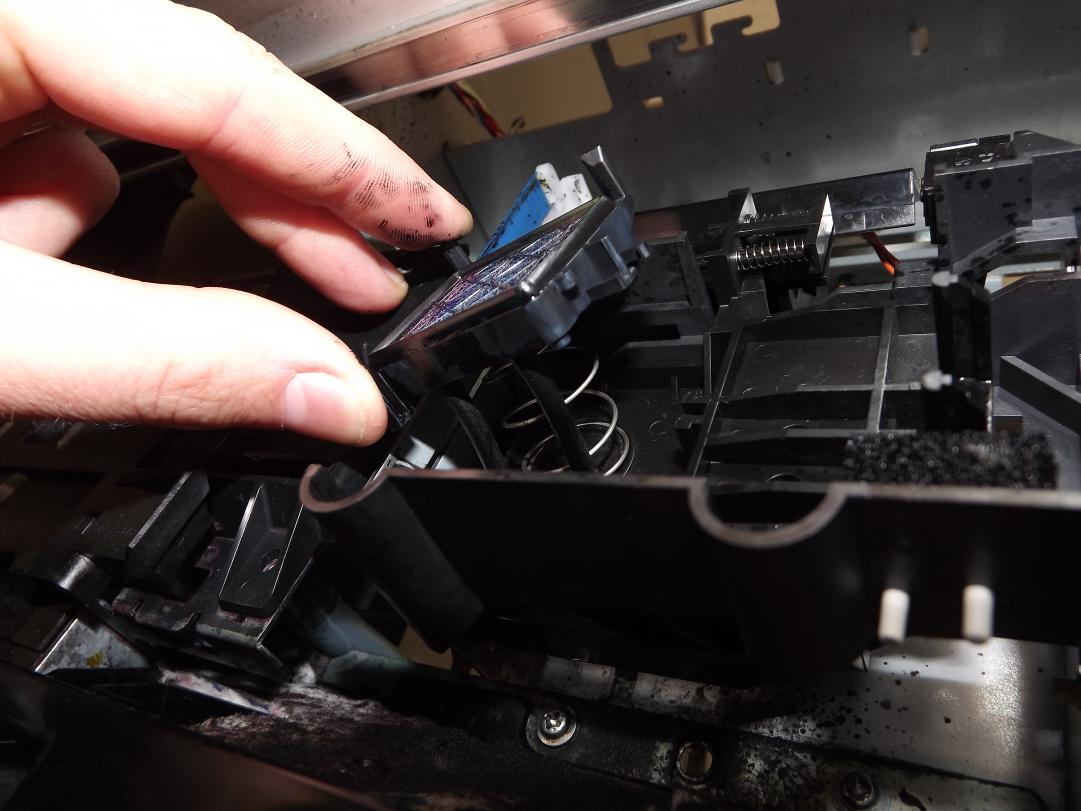
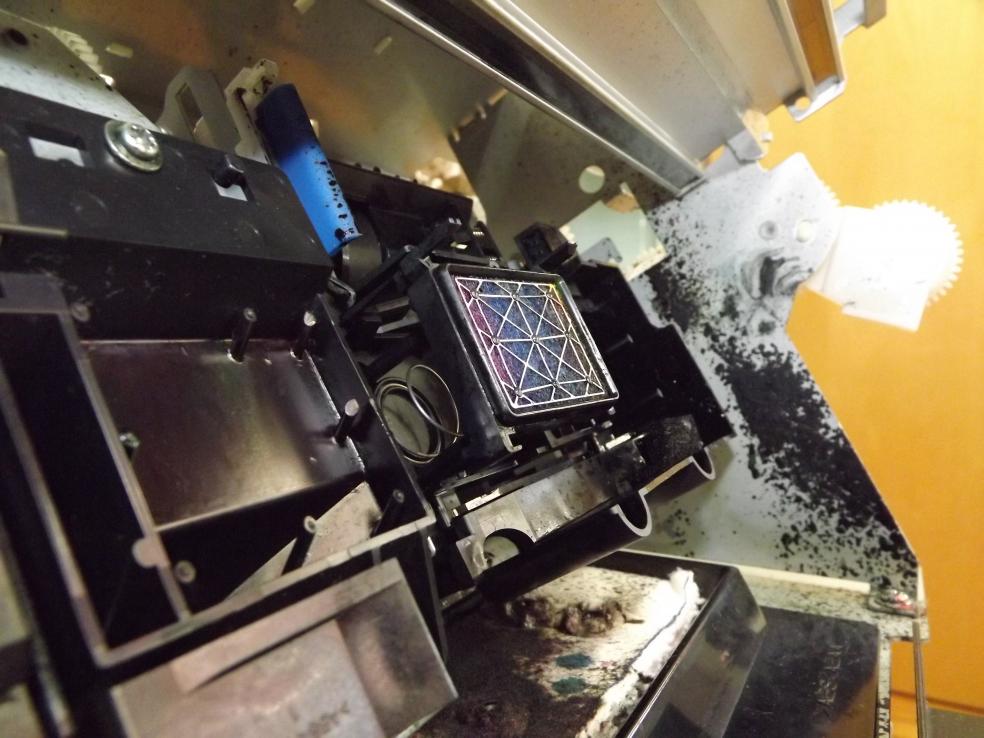
Epson likes to instruct on replacing parts the “easiest” way, which often means replacing more parts or taking off more parts than necessary, but in the long run is easier with less chance of issues in the end- which is why they instruct to replace the whole cap pump assembly, and not just the capping station it’s self. The capping station can be replaced, but you have to make sure the spring and tubes are connected on the back, and CS is correctly positioned.
I attached a few photos to help, but can’t provide any further assistance for replacing this part. YOU can find just the capping station on eBay and other places online if you decide to go this route, though it’s good to replace the pump every few years, so may be best to replace the whole assembly.

