When using more than one printer of the same model with Piezography and QuadTone RIP, the printers must be named differently for QTR to differentiate between the printers. Follow the instructions below, depending on if you’re using Mac or Windows.
MAC
Start with one printer connected to the computer and open the Applications> QuadToneRIP> Profiles> PrinterModel-K7 folder, as shown below.
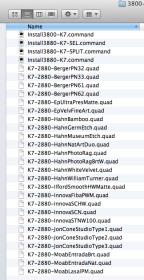
Highlight the install.command for the printer model you’re using, copy and paste to make a copy of the install.command
Name the install.command copy so you know which printer it is (like an abbreviation for the ink used in this printer). In the example below, there is now a 3880 install command for “SEL” (Selenium) and “SPLIT” (split-tone).
Double click the appropriate install.command for the printer that is connected, which will open the Terminal and install the curves in that folder. When finished, it should say “complete” at the bottom of the Terminal window, and you will now have that newly named printer model in your printer list to select.
Disconnect the first printer, and connect the second. This time, double click and run the other install command to install the second printer model with a slightly different name. After the second printer has been installed, both printers can be connected to the computer simultaneously, and just select the printer name you wish to use in order for QTR to know which printer to send the print job to.
WINDOWS
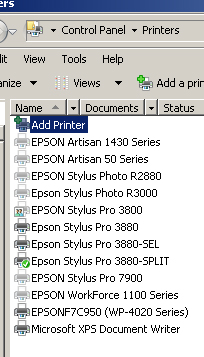
In the Control Panel, open the Printers list, and install a new printer, adding an abbreviation at the end so you which which printer it is.
When installing a new printer in the control panel, make sure to have the printer physically connected to the computer, so the computer writes the path to that specific printer. When installing the next printer, disconnect the first and connect the second.
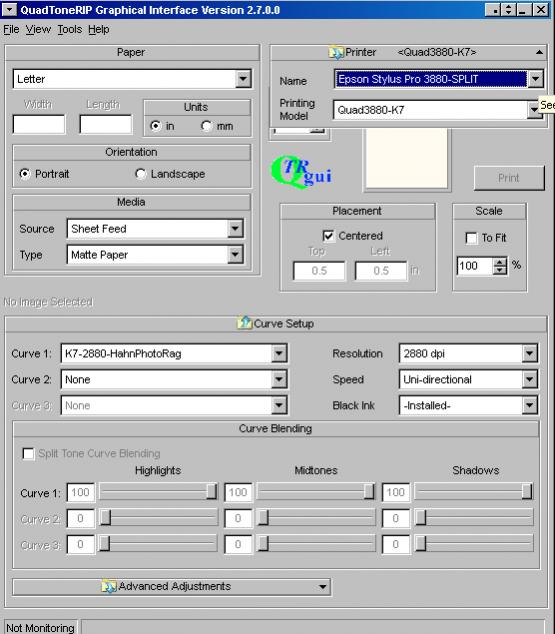
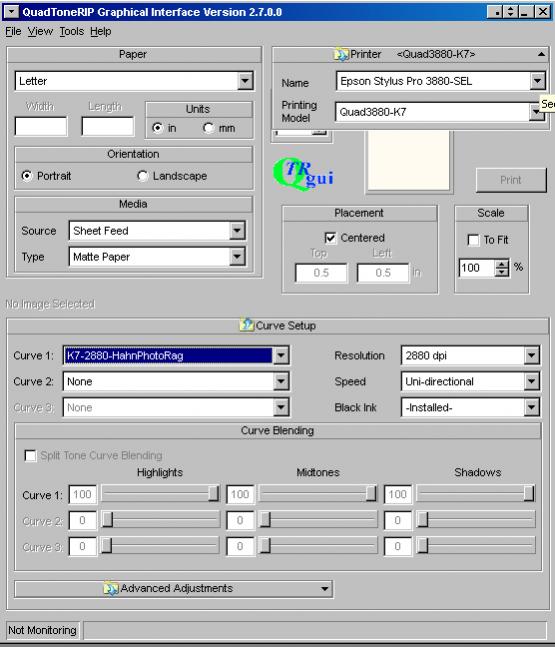
When printing, make sure to select the correct “Name” for the printer you wish to print to, and K7 version of the “Printing Model”.
The printer “Name” connects to the appropriate printer, and the “Printing Model” displays the curves for this printer model. See the examples below.
©Copyright Vermont PhotoInkjet, LLC All Rights Reserved. No parts of this can be reproduced without written permission.