Cleaning steps for the backplate here: Completely missing VM channel
I believe I have figured out how the ink system behaves in its entirety. What was missing up until recently was understanding what happened between the cartridge and the ink lines.
The Epson 38xx ink system has 3 one-way valves per channel; two in the dampers and one behind the ink tank holder. The valves closest to the ink tank and print head are pressure sensitive. Together these valves ensure that ink does not move unless desired. Ink will not fall out of the ink lines if the dampers are removed, and likewise ink will not fall out if the cartridges are removed while the dampers are intact. (There are actually 4 total valves when using OEM cartridges. The only reason for the valve in the cartidge is to prevent refilling. It does nothing to protect the ink system which is why the refillable carts omit it.)
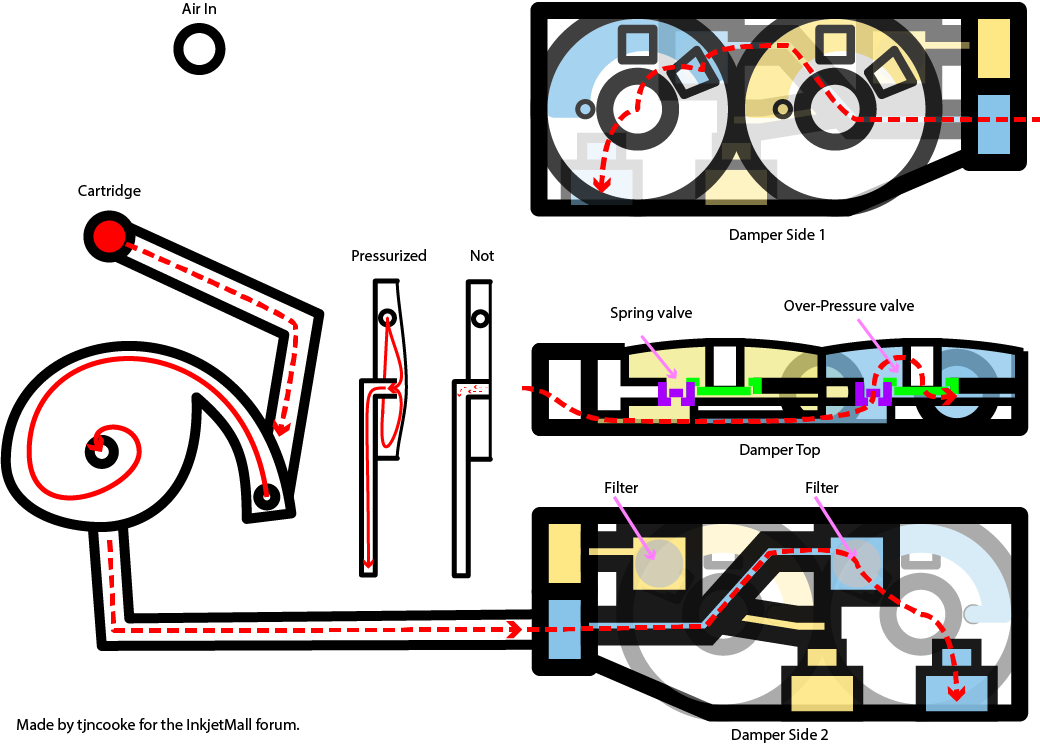
Lets step through the ink path. Please reference the diagram I made below.
When the printer is turned on air enters the cartridges through the “Air In” hole at the upper left. This pressurizes the ink, which flows in through the “Cartridge” hole and pushes the membrane out as shown in the “Pressurized” diagram. This allows ink to flow into the ink tubes.
When the printer is off, ink is prevented from flowing out of the cartridge because the membrane covers the ink outlet pipe. Even the dreaded ink wick due to capping station contact should not be an issue with these printers due to this design.
The shape of this valve is designed to mix the ink as it flows. If the printer sits for short periods of time, pigment particles can settle at the bottom of the valve but will be mixed when printing resumes. Extended sitting will deposit pigment at the bottom (see pictures in the above linked thread) which won’t be a problem until stronger cleanings occur. Normal printing and light cleanings won’t pull ink fast enough to disturb the settled pigment, but the higher ink flows under harder cleanings will. If you’re getting worse results after the 2nd or 3rd regular cleaning or after a power clean chances are this is the reason. The higher ink flow will dislodge pigment solids from this area and flow them into your dampers.
You’d think that with a pressurized system ink would be forced through the print head all the time. This is where the damper comes in. Ink flows from the ink lines through a filter and through a simple spring valve. This prevents ink from being pulled out of the print head when the system depressurizes. The filter is the primary line of defense for pigment solids that pass along the ink lines and can be visually inspected if the dampers are removed from the printhead.
The ink then arrives at the second pressure sensitive valve. This time the membrane pulls the valve tightly closed when the system is pressurized (compared to the first valve which is opened by pressure). The only way ink can get out is if it is sucked from the printhead side. There is a careful balance between the system pressure and the ability of the printhead to suck ink. Too much pressure and this 3rd valve will stay closed. Too little and the first valve won’t open.
When the printer sits, pigment can accumulate in the 3rd valve of the damper. Once again, this isn’t much of an issue since ink is pulled from the middle. But under heavy cleans, it could be sucked into the printhead.
So what’s the moral of this story? Print often. Keep the fluids moving. But if problems occur, what can be done? Cleanings move varying amounts of ink through the system in an attempt to dislodge clogs from the printhead. However in the process they can make matters worse by pulling those clogs mentioned earlier forward. In this case, a MANUAL flush is most cost effective. Chances are that some lines are more clogged than others, and those will be the slowest to flush out via cleanings. See the above linked thread for instructions.
So how do cleanings work? As far as I can tell there are 3 levels of regular cleanings, plus the power clean.
Level 1: Only the printhead is used to try to dislodge clogs in the printhead. Ink is ejected by firing the printhead over the capping station (you’ll hear high-pitched sequences if you’re under ~40). The capping station is then drained (you’ll hear the “smooth” motor mrrrrrrrr with a click every second or so). This repeats a few times with wiping in between. Probably less than 1g of ink is used per channel (unverified). Epson claims 0.64g/8colors or ~0.1g per color.
Level 2: The printhead is seated on the capping station and the capping station pulls ink through the print head (you’ll hear a flapping sound for about 2 seconds). It then sits for a while to let stuff dissolve, then seems to proceed with the level 1 cleaning. 1.5g of ink or so is used (unverified). Epson claims 4.2g/8colors or ~0.5g per color.
Level 3: Same as 2, but flaps longer pulling even more ink. It sits, fires ink, wipes, then does another short flap, then level 1. 2g or so of ink is used (unverified). Epson claims 12g/8colors or 1.5g per color.
Power: The cartridges are depressurized, closing valve 1. The capping station then flaps, drawing a heavy vacuum which fully opens valve 3. The cartridges are repressurized allowing valve 1 to reopen. This rapidly moves ink through valve 1, dislodging nasty accumulations and passing them to the damper’s filter. It can also remove air from valve 3 and hopefully slams any stubborn clogs from the printhead. It then goes through cleaning level 1. About 4g of ink are moved per channel from my measurements, but this might have been skewed due to my clogged channel. Epson claims 16g/8colors or 2g per color.
2 to 3 power cleans move enough ink through clean lines to fully refresh the entire ink system. However if there are clogs anywhere, more ink will flow through the clean lines and less through the clogged lines you actually want ink moved through. This is why I highly suggest a manual full system clean, especially if you’re missing an entire channel that does not reappear regardless of cleaning cycle.
Hopefully this is useful to people. Let me know if I got anything wrong!
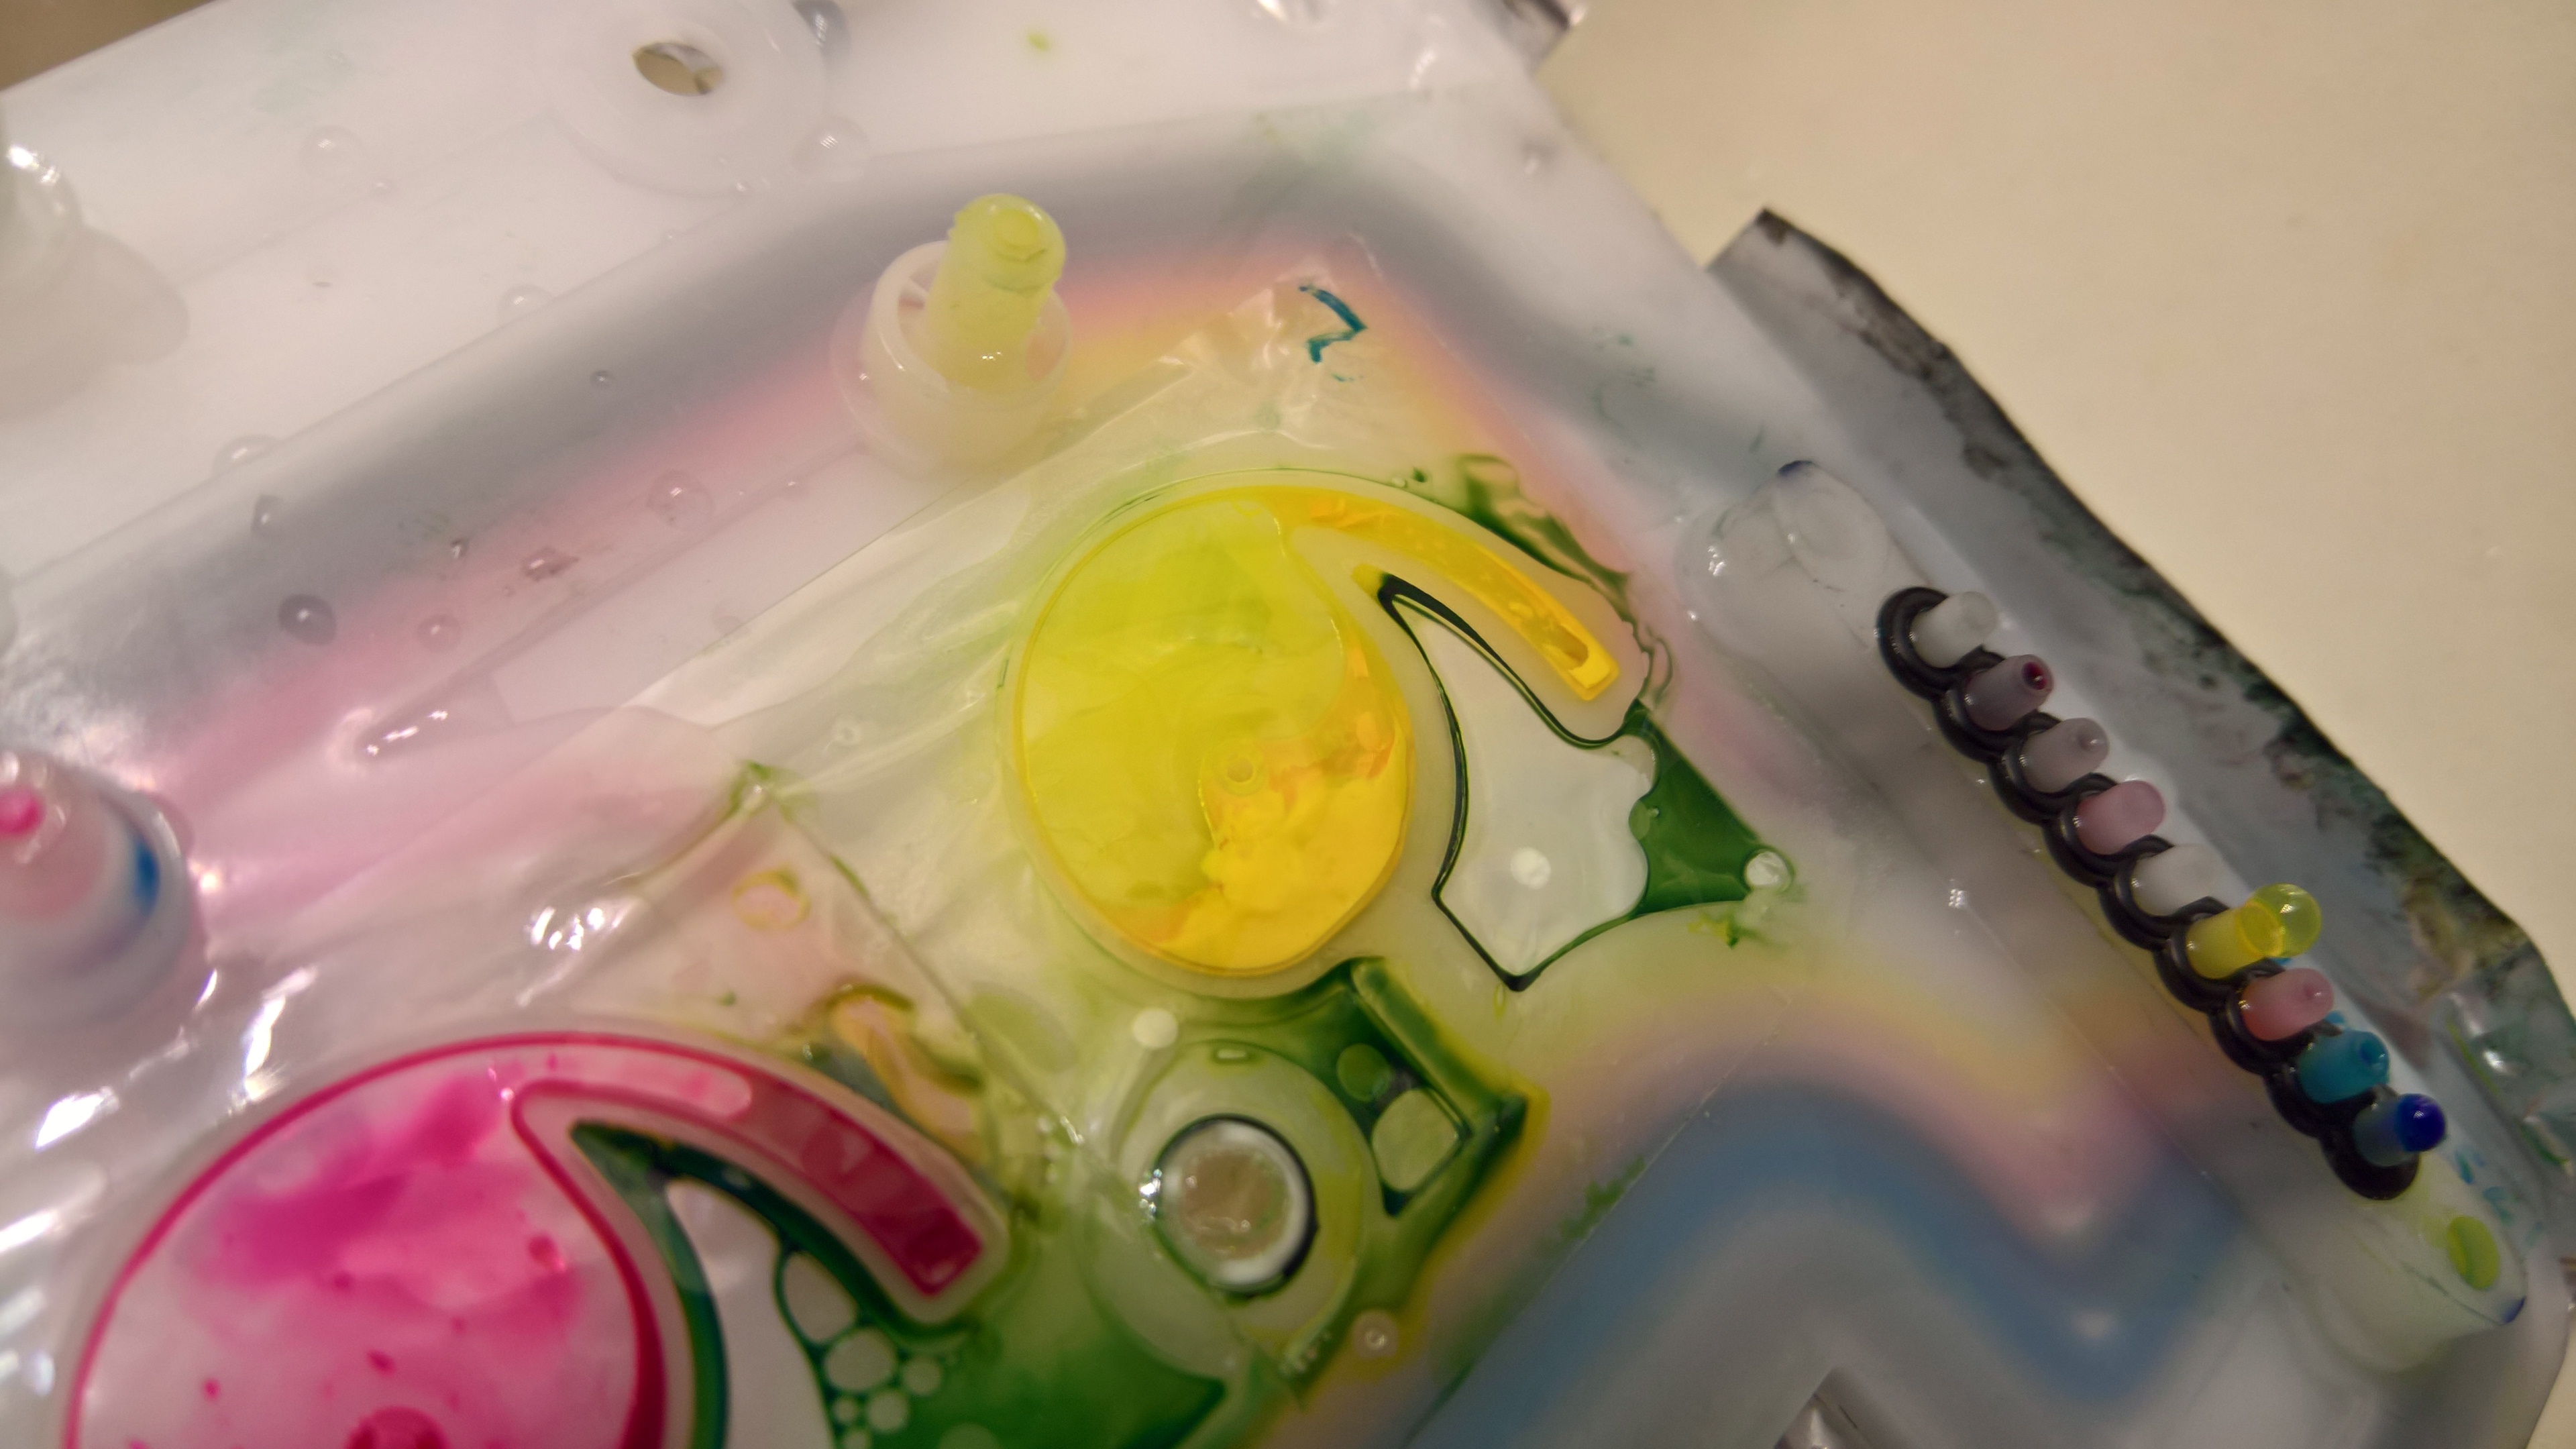
Bonus image showing nasty valve 1